Okta Policies | Okta Configuration’s
Integrating Applications with Okta
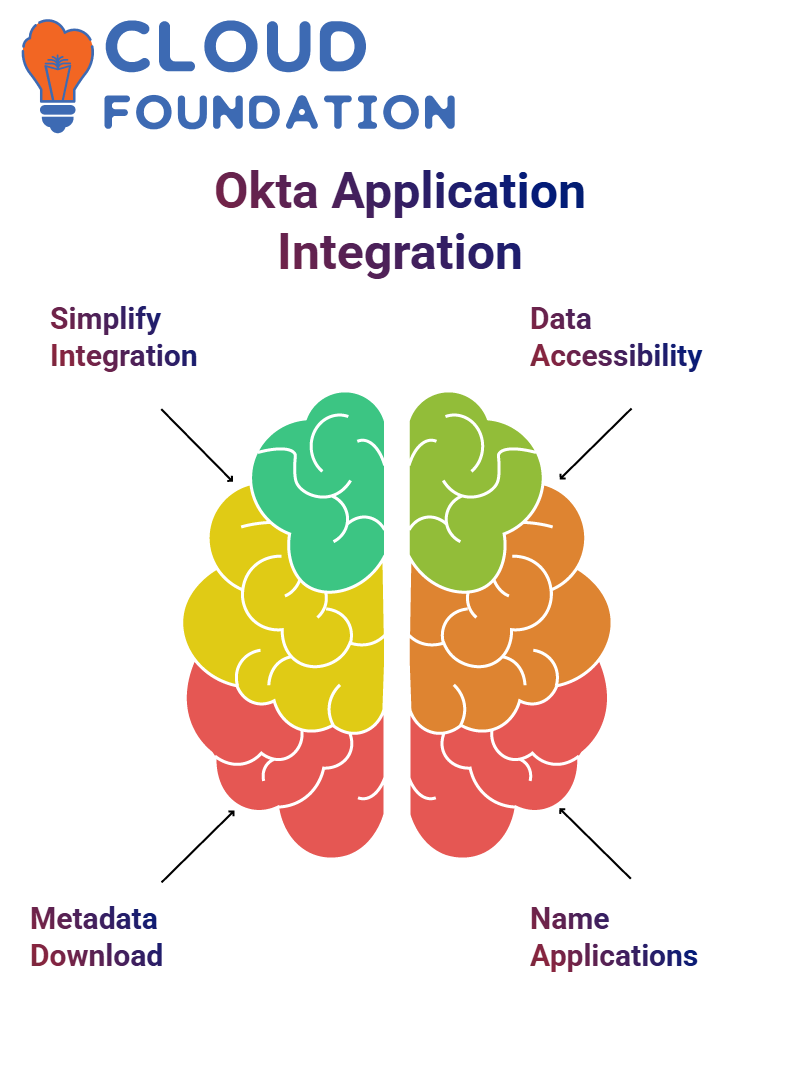
Today I will demonstrate how Okta can simplify application management through step-by-step integration of an app. This step-by-step approach will demonstrate its ease of use.
Start by discussing your service provider and application you’re integrating. After clicking “Download Metadata,” this opens a separate tab to display information necessary to complete this step.
Okta makes managing both direct and specialized data readily accessible, in easy steps.
Setting Up Single Sign-On with Okta
Setup requires giving each application an identifiable name such as ‘Sample One.’ Additionally, users have control of whether it will be visible. An essential aspect is providing users with access to an SSO URL after login; with Okta all fields have clear-cut tools which provide insight into what their purpose is.
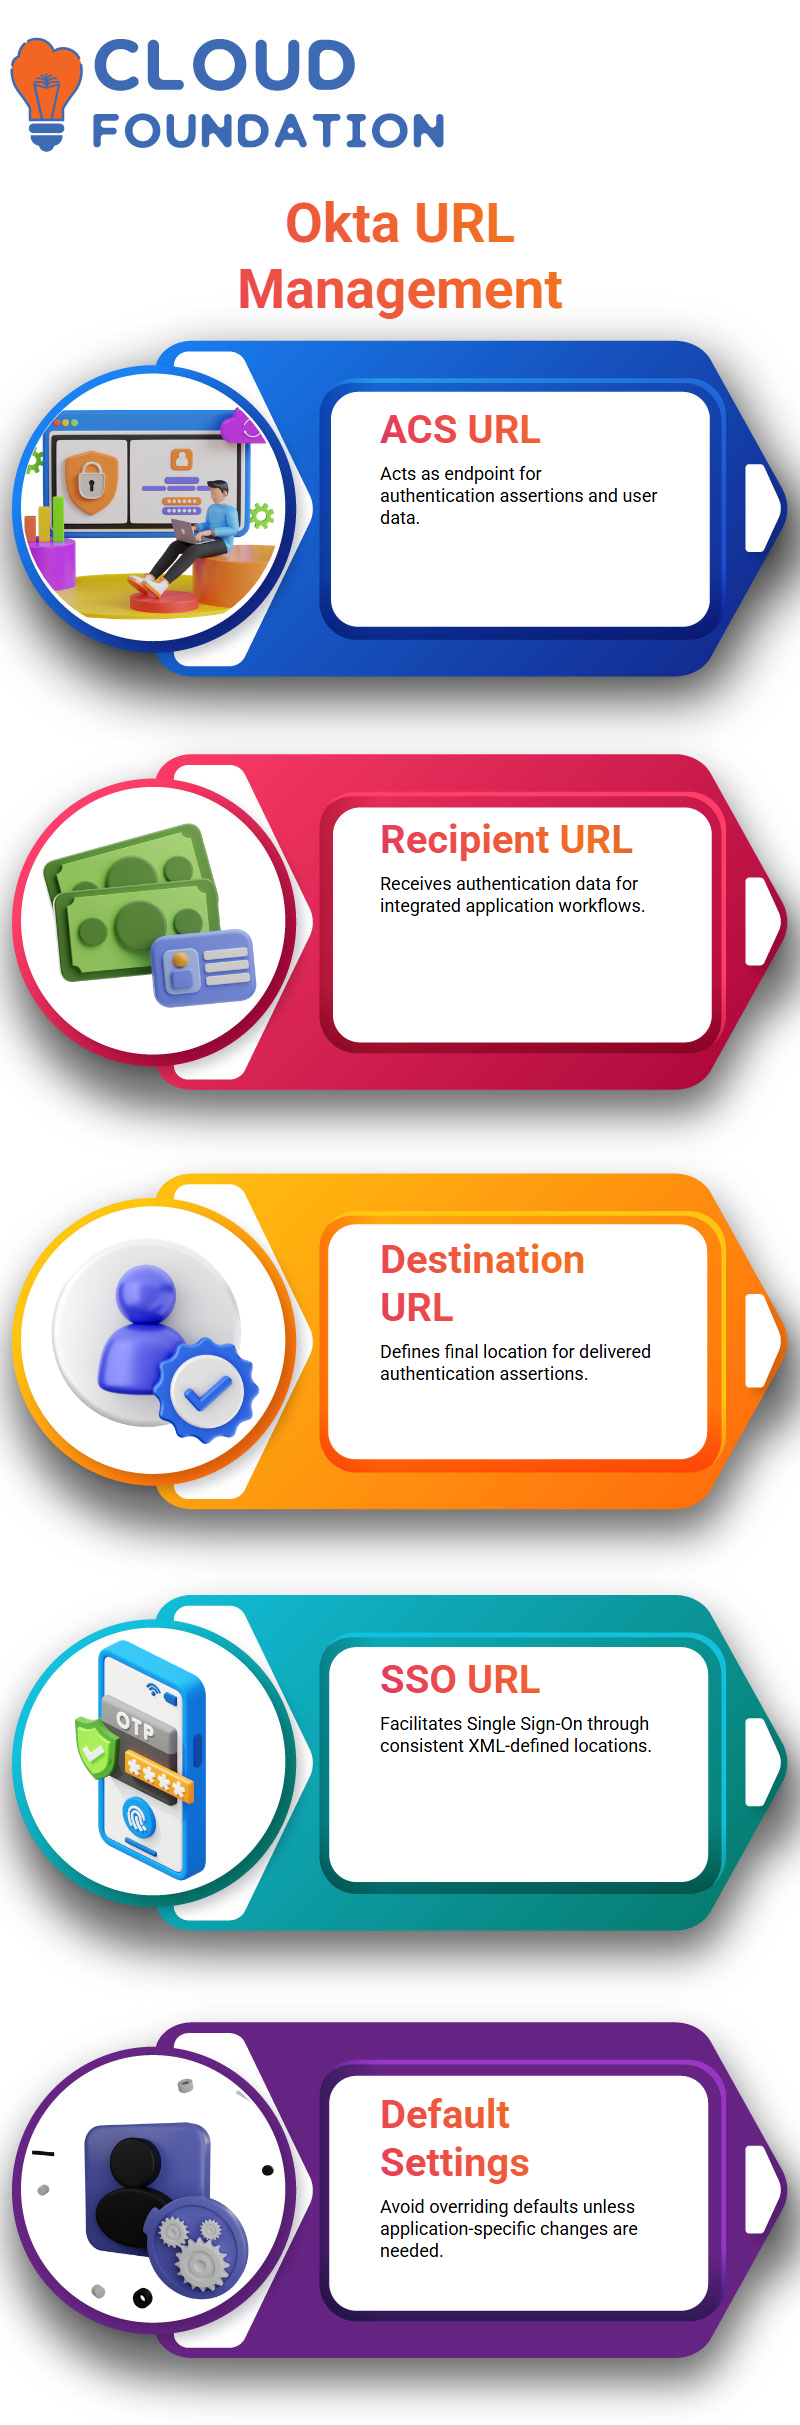
Okta uses an Assertion Consumer Service (ACS) URL as the endpoint where its authentication assertions can be sent, for instance if service providers request user data such as usernames or emails addresses from Okta it will send that data via this channel to this URL.
Understanding SAML and Okta Roles
SAML authentication protocol is employed here for integration. Okta acts as the Identity Provider (IDP), while applications become Service Providers. Finally, end-users enjoy all that Okta can provide through its integrated experience.
Okta has two primary SAML flows in its setup – IDP-initiated and SP-initiated flows. An IDP-initiated flow starts when you log into Okta and verify your credentials before accessing an application, while in an SP-initiated flow it begins when visiting an application directly and using Okta to sign-in directly to it.
How Okta Handles User Assertions
Okta streamlines user assertions by making sure all necessary information, like usernames or email addresses, reaches its destination at once. An ACS URL provided by service providers acts as the recipient endpoint.
Okta allows service providers to quickly obtain user details for integration purposes by making the acquisition of these details as seamless and efficient as possible. From username and email verifications, through to other fields that need verifications – Okta ensures these assertions reach you securely.
Understanding ACS URL, Recipient URL, and Destination URL in Okta
Let’s consider how Okta handles URLS like the ACS, Recipient and Destination URLS. Consider an instance in which I sent a package worth $1,000 directly to a store owner as the ACS URL; when receiving it at their storefront location he collected it on behalf of my recipient ACSURL will often coincide with Recipient URL or Destination URL in most instances unless specifically instructed otherwise – that is why default settings must never be overridden unless specifically told so as not to lead to confusion later!
Finding the Single Sign-On (SSO) URL or ACS URL in Okta
Okta’s Application Connectivity and Sign On URL, commonly referred to as SSO URL, plays an integral part in its system. I typically search XML files for Location tags to quickly locate this URL that should remain consistent between entries unless changed manually; any updates required due to specific application-based requirements can then be completed automatically by Okta.
Decoding SP Entity ID and Audience URL in Okta
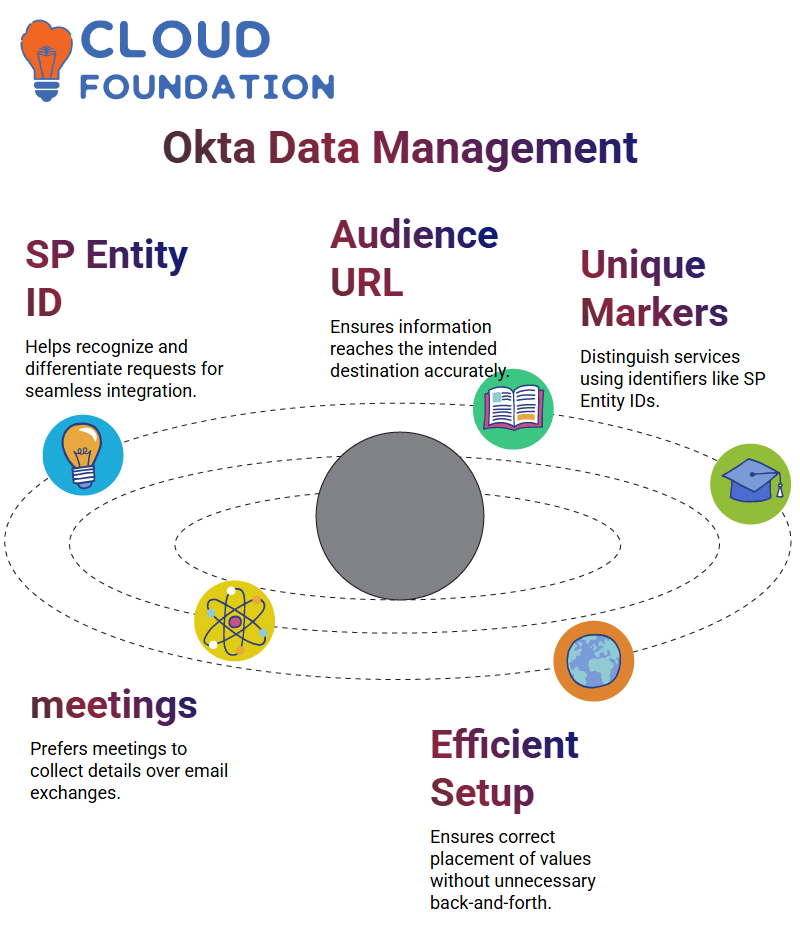
Okta employs SP Entity IDs and Audience URLs to recognize and manage requests, acting like markers distinguishing packets of data – for instance, I may ask the store manager to recognize my package by its unique yellow box with Hulk cartoon on it – this helps ensure my information reaches its destination as intended.
Likewise, an SP Entity ID unique to identity providers like Okta or Ping Identity helps differentiate their services among each other and help identify individual requests more precisely.
Configuring Applications in Okta Efficiently
I prefer direct communication over email exchanges when configuring an application in Okta. Therefore, I arranged a 45-minute meeting with the application admin so we can collect all pertinent details directly and ensure every value is correctly placed without unnecessary back and forth between emails or phone calls.
Understanding Okta’s Name ID Format and Application Usernames
Let me introduce Okta’s Name ID formats and how to manage application usernames. It is crucial that you know which Type of Name ID is necessary and verify that its specifications match those for application usernames; when left unselected, for instance, defaulting to email is a common practice so pay close attention when selecting an Okta Name ID format or when setting up integration processes with software solutions like Okta. This detail matters in creating seamless integration.
Configuring Advanced Okta Settings
Now let’s dive deeper into Okta settings that may or may not require alteration; these should generally only be modified upon explicit request from service providers or administrators.
However, in certain instances – for instance placing signature certificates provided by service providers into designated fields to facilitate secure verification processes – additional settings might need to be configured such as single logout URL settings which determine where users land upon logging out; although often overlooked but potentially critical configuration steps.

Okta Training
Diving into Okta’s Inline Hooks and Advanced Concepts
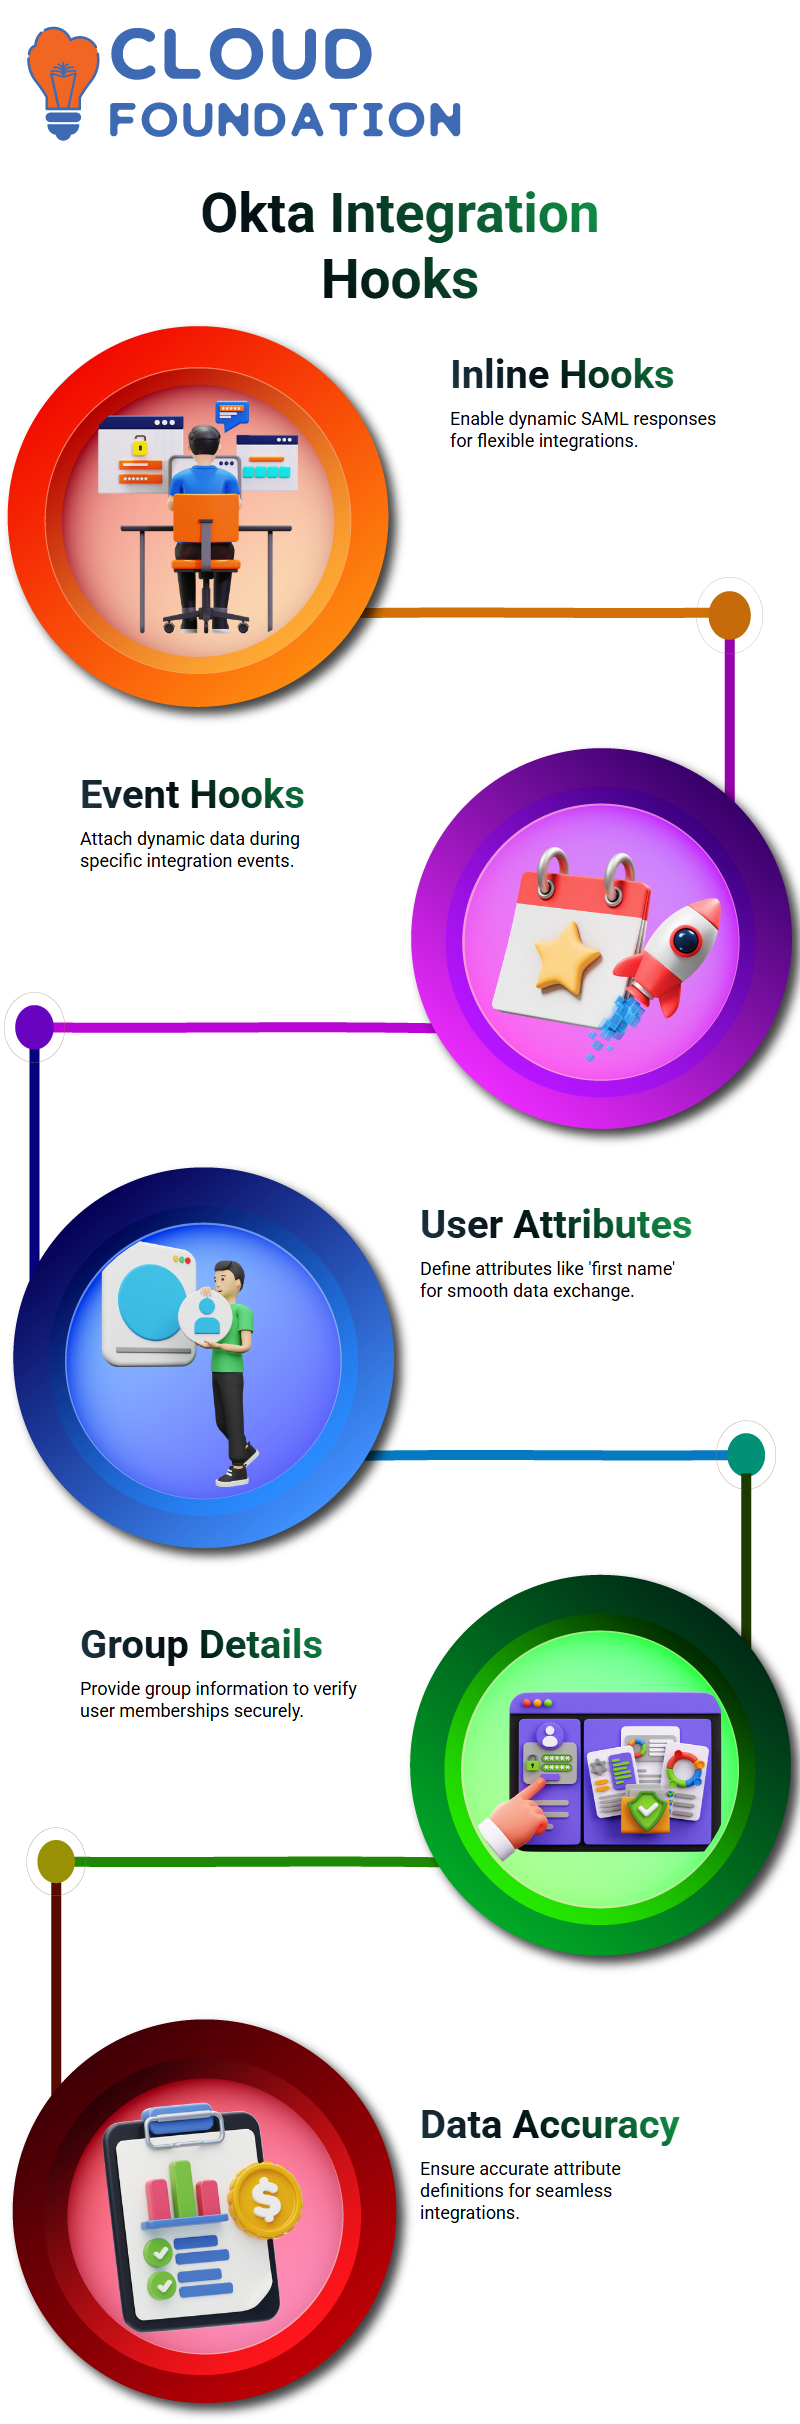
Inline hooks in Okta are intriguing but not widely used. In simple terms, they allow for dynamic SAML responses to be generated. While I haven’t encountered these extensively, hooks like Inline Hook or Event Hook provide developers the flexibility to attach dynamic data during integration.
Defining Attributes and Group Details in Okta
Attributes and group details play a pivotal role when integrating with Okta. You should define user attributes like first name to send data such as ‘first name equals user-first-name’ to service providers, while groups play equally essential roles; some providers require specific group details in order to confirm whether a particular user belongs. By accurately defining attributes you ensure the smooth exchange of data.

Submitting IDP Metadata in Okta
Submitting IDP metadata is an integral step in Okta integrations. To do so, save and upload an XML file through Okta’s interface before testing to confirm everything works as expected and making any minor policy modifications needed to ensure smooth operations.
Understanding Okta and Key Terminologies
Let me get right down to it – when dealing with Okta, terms like IDP (Indirect Direct Provider), service provider and SES URL may seem intimidating but rest assured it’s easier than you think!
Okta is an Identity Provider (IDP), providing secure authentication and user management. When we talk about “service provider,” that refers to any application or service relying on Okta for authentication; SES URL stands for Secure Endpoint Services URL used by Okta to handle requests.
Knowledge of Okta integration terms is paramount when configuring or troubleshooting integrations. Okta’s strength lies in its ability to streamline authentication processes for both users and administrators alike, increasing productivity levels across both sets.
Why Familiarity with Okta Terms Matters
Why does knowing these terms matter when working with Okta? Well, understanding IDP (Individual Domain Provider), service provider (SP), and SES URL URL will allow you to navigate its features effectively – kind of like learning authentication’s language!
Okta has quickly become the go-to solution for many organizations, and becoming familiar with its terminology can make all the difference when setting up single sign-on (SSO) or managing user access – these terms form the cornerstone of Okta’s functionality.
So when someone mentions IDPs or SES URLs while discussing Okta, you’ll understand exactly what they’re referencing – all part of accepting its powerful capabilities!
Getting Started with Okta Groups and Policies
At Okta, creating groups is where all begins. I love its ease-of-use when setting up new accounts – let’s pretend we’re setting up passwordless experience: when visiting Security Authenticators you’re presented with several different authentication and recall methods including email as both authenticator and recall method!
Defining Passwordless Policies in Okta
Next, I take steps toward designing the “Passwordless Policy.” For this policy, email is mandatory while Octavariify and Passwordless Multifactor Authenticators will become optional allowing me to be flexible when setting up security settings. I then assign this policy to the passwordless group before creating rules governing access for individual members based on this setup – making my security setup secure moving forward!
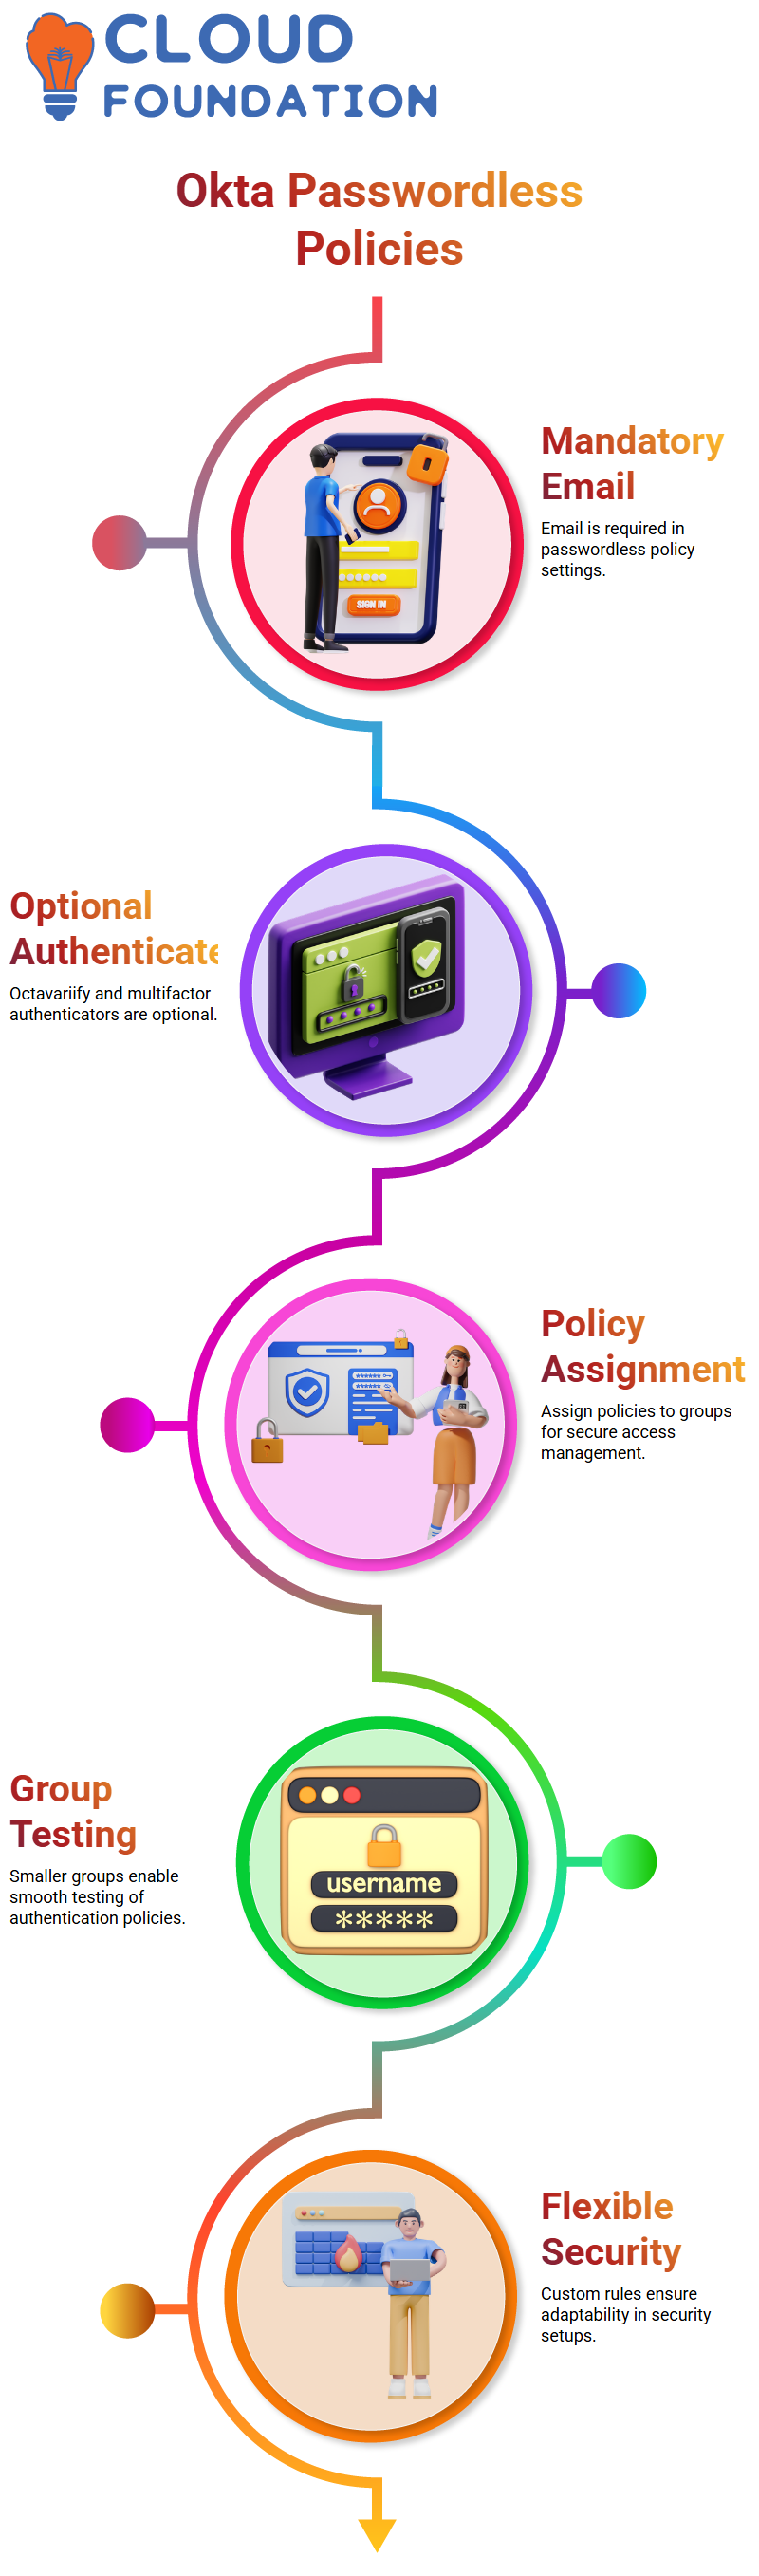
Navigating Authentication Policies in Okta
Okta’s authentication policies play a pivotal role. Here, I use my dashboard to search for my application and assign it to the “Passwordless” group for testing purposes before expanding further – smaller groups always benefit more as testing ensures smooth operations without disruptions for larger user bases.
Global Session Policies with Okta
Okta’s global session policies make customising setups to match individual system needs easy, such as setting restrictions such as restricting session length to an hour and mandating multifactor authentication for every login session on critical systems versus setting more relaxed policies for less critical ones – acting like a toolbox capable of meeting any demand!
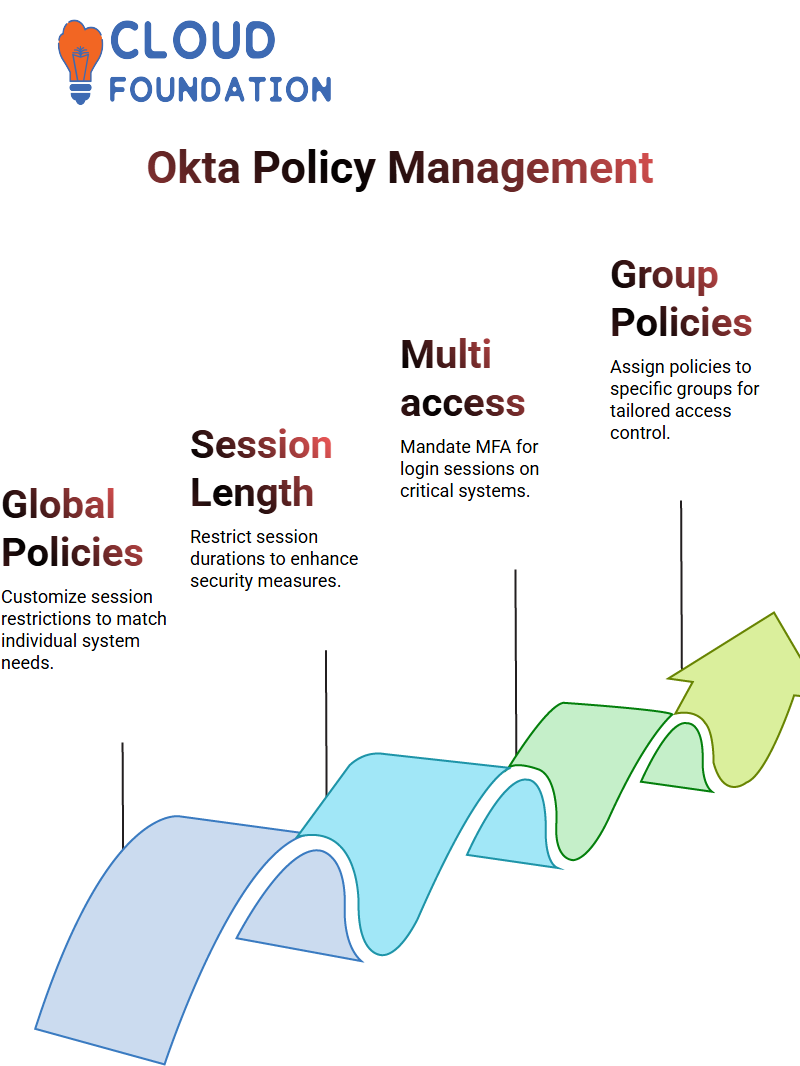
Assigning Okta Policies to Specific Groups
What sets Okta apart is its ability to assign policies directly to certain groups. For instance, when I joined passwordless group I now apply all policies assigned here to myself as well. Should any policies need be added for others simply add them back onto that group!

Okta Online Training
Fine-Tuning Okta’s Enrollment Policies
Enrollment policies are also key components. When I observe something not functioning as intended – for instance removing passwords or not showing certain features due to feature flags or incomplete setup -, my enrollment settings need to match our needs; otherwise I need to redouble my efforts until they do! To address such situations and ensure everything meets these specifications.
Integrating Devices Seamlessly with Okta
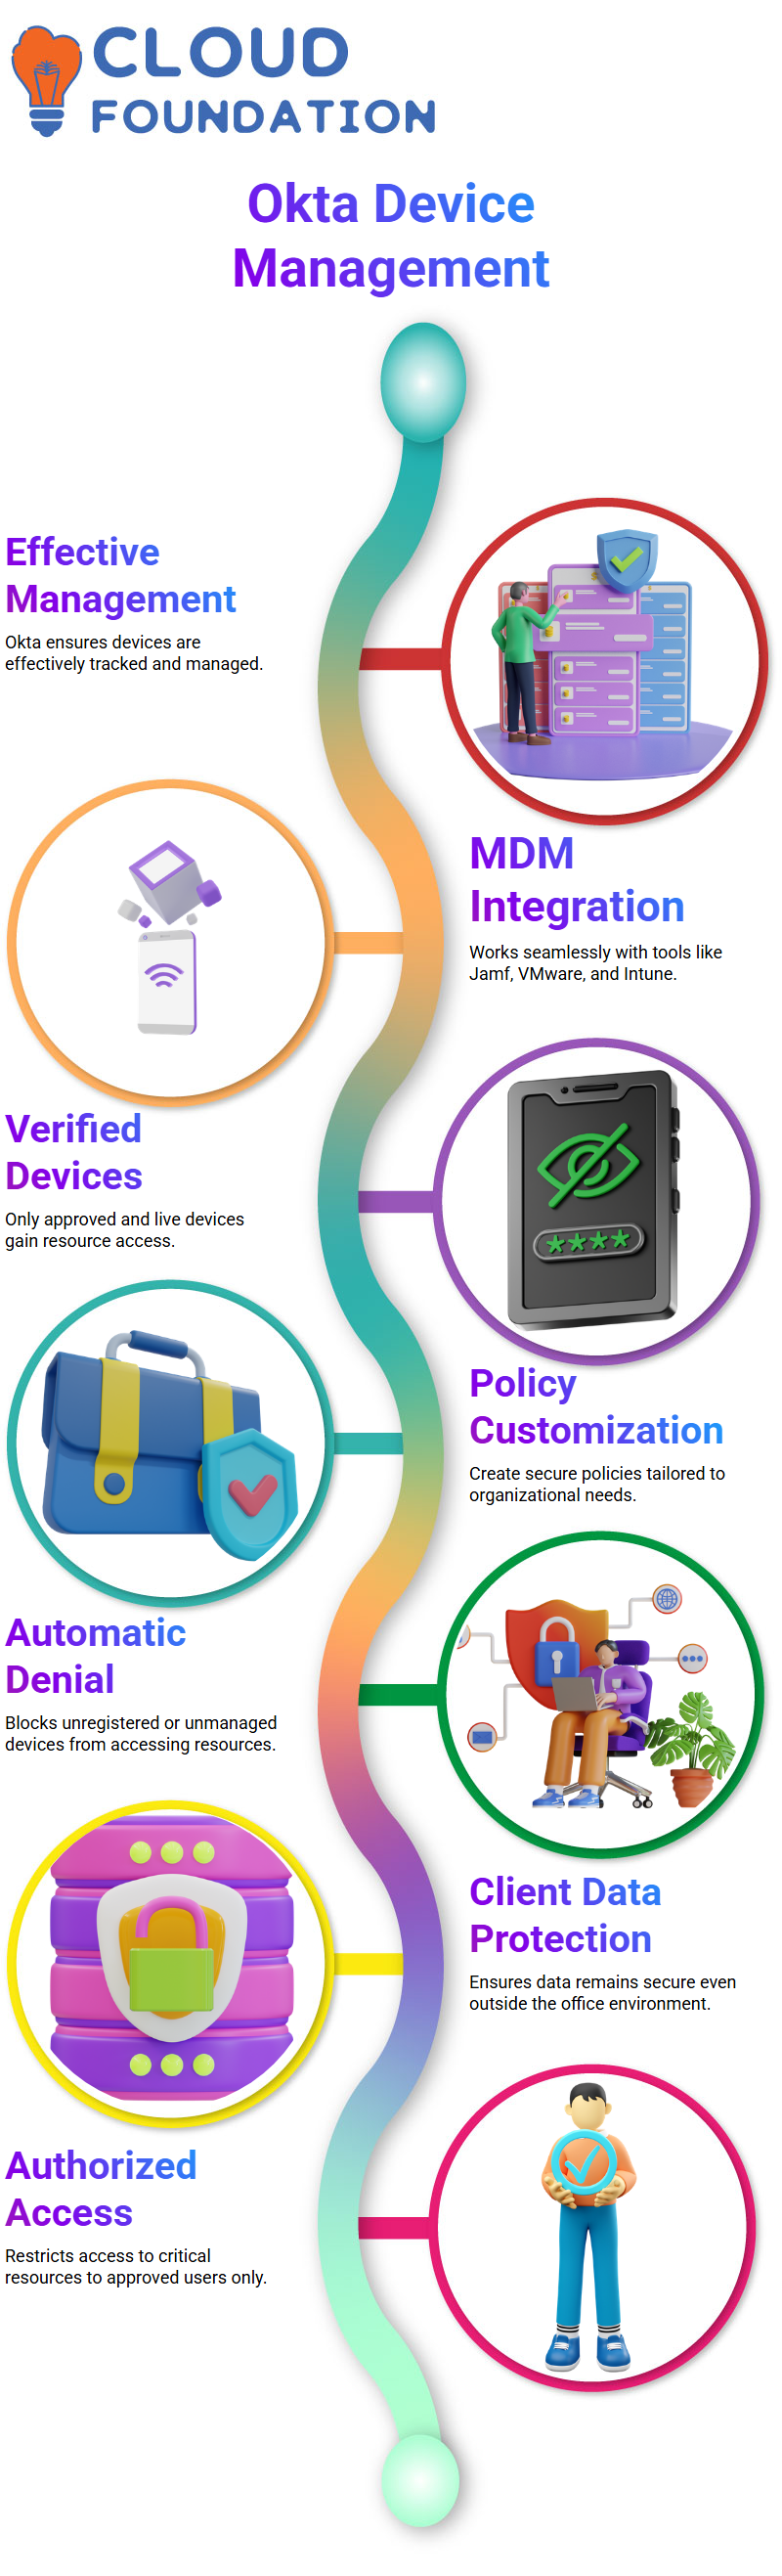
Okta makes device management straightforward. For organisations purchasing devices through Apple Business Manager, Okta’s integration can connect directly with tools like Jamf to ensure seamless information exchange – connecting device inventory and management system together into an efficient unit.
Okta requires installing an agent on every desktop to monitor compliance with passwordless policies you create and enforce across devices managed by Okta, such as serial number/unique identifier verification using integrations such as Intune/Jamf.
How Okta Validates Device Management
Okta does more than track devices; it ensures they are managed effectively. Once a device’s details have been recorded, Okta communicates with any MDM tool such as Jamf, VMware or Intune to confirm its recognition and activity status. This integration makes Okta an invaluable solution when managing devices across an enterprise network.
Okta marks any live, verified devices as “managed.” This ensures only approved devices gain access to sensitive company resources – keeping corporate data protected and safeguarding sensitive corporate data from being breached or misused by unapproved devices.
Creating Secure Authentication Policies with Okta
Okta allows your organization to establish secure authentication policies tailored to its unique requirements, for instance creating corporate policies that only grant access to registered and managed devices; any device not managed automatically denies entry via Okta’s automatic denial feature.
Okta ensures the data of its clients remains protected when devices leave the office environment and access critical resources from devices managed by Okta. Only authorized users on company devices are authorized to gain entry.
Device Assurance Policies with Okta
Okta provides robust device assurance policies. Let’s say your organization requires upgrading macos Ventura (version 13.0.1) by a certain date; Okta allows you to enforce this mandate with policies to enforce this upgrade requirement and any devices not meeting standards are flagged, creating an integrated and secure ecosystem.
Okta can integrate with security tools like CrowdStrike, Zscaler or Netskope to monitor web traffic and enforce data upload policies – providing yet another layer of protection that ensures company data stays within an approved environment.
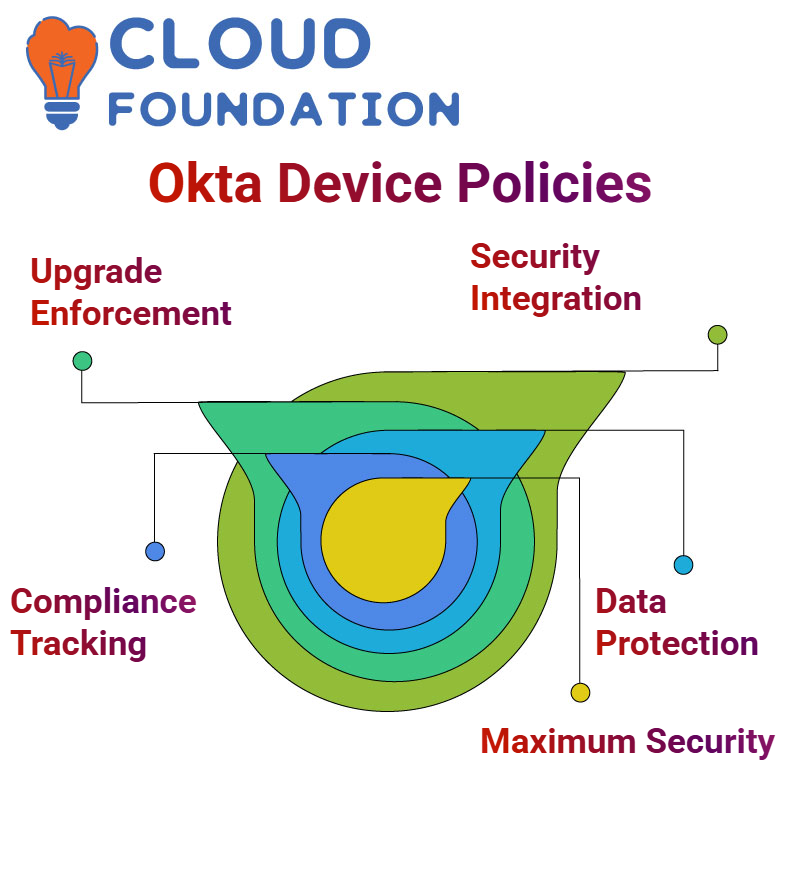
Enhancing Compliance and Monitoring with Okta
Okta goes beyond device management by providing comprehensive compliance and monitoring capabilities. Through integrations with tools such as Microsoft Intune and Jamf, Okta ensures all devices comply with organizational policies while leaving an audit trail of activity on company laptops, making tracking compliance simpler than ever.
IT teams using Okta can protect company assets and sensitive information with superior security by restricting unauthorise data uploads and setting restrictions policies on emails and communications. This approach ensures they maintain maximum protection.
Enhancing Security with Okta Policies
Let me provide an easy approach for protecting your systems with Okta. One critical element in doing so is making sure all devices attempting to access Okta are registered; this ensures each one meets your organization’s security standards, making your overall system more secure.
Imagine this: An outdated device running an OS version below 13.0.1 attempts to log-in. Okta makes this impossible by providing policies for blocking such attempts by only permitting devices running the most secure OS versions – effectively restricting access from outdated and potentially vulnerable devices and improving your security posture in this manner.
Addressing Security Vulnerabilities with Okta
Your company could encounter sudden vulnerabilities in specific OS versions at any moment; macos 11 could pose serious security vulnerabilities and rapidly update policies to restrict access only for devices running macos 12 and higher – this swift action reduces risks in an instant and protects your organization against further exposure to risks. With Okta’s security-centric capabilities, limiting device access for those running OS 11 is now simpler and quicker.
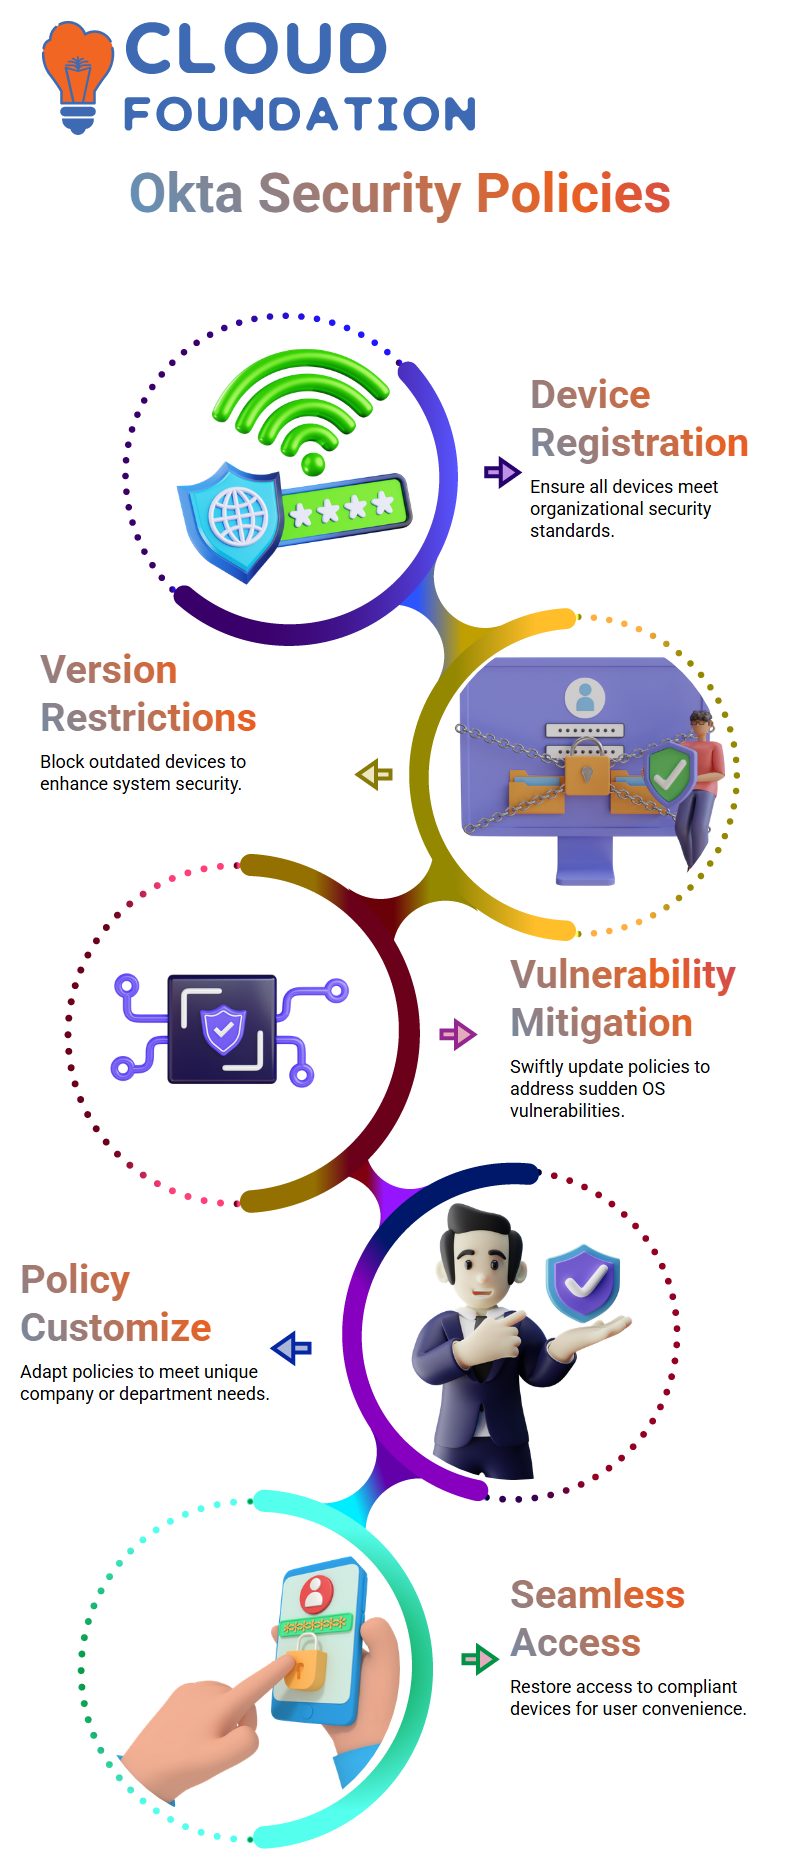
Users with outdated devices will naturally+ contact the service desk and, once upgraded to one of Okta’s supported OS versions, access is restored – seamlessly aligning security with user accessibility.
Customising Okta Policies with Expertise
Okta’s key strength lies in its adaptability; you can tailor its policies to meet any special requirements that arise for your company or department. Collaborating with security professionals such as CIO or CTO helps create policies which blend security and usability seamlessly.
Okta makes it simple and secure for you to set access thresholds based on device specifications or address emergent vulnerabilities with digital infrastructure protection tools that you need for optimal operation.

Okta Course Price

Navya Chandrika
Author