What is Spring Boot?
Introduction to the Spring Framework
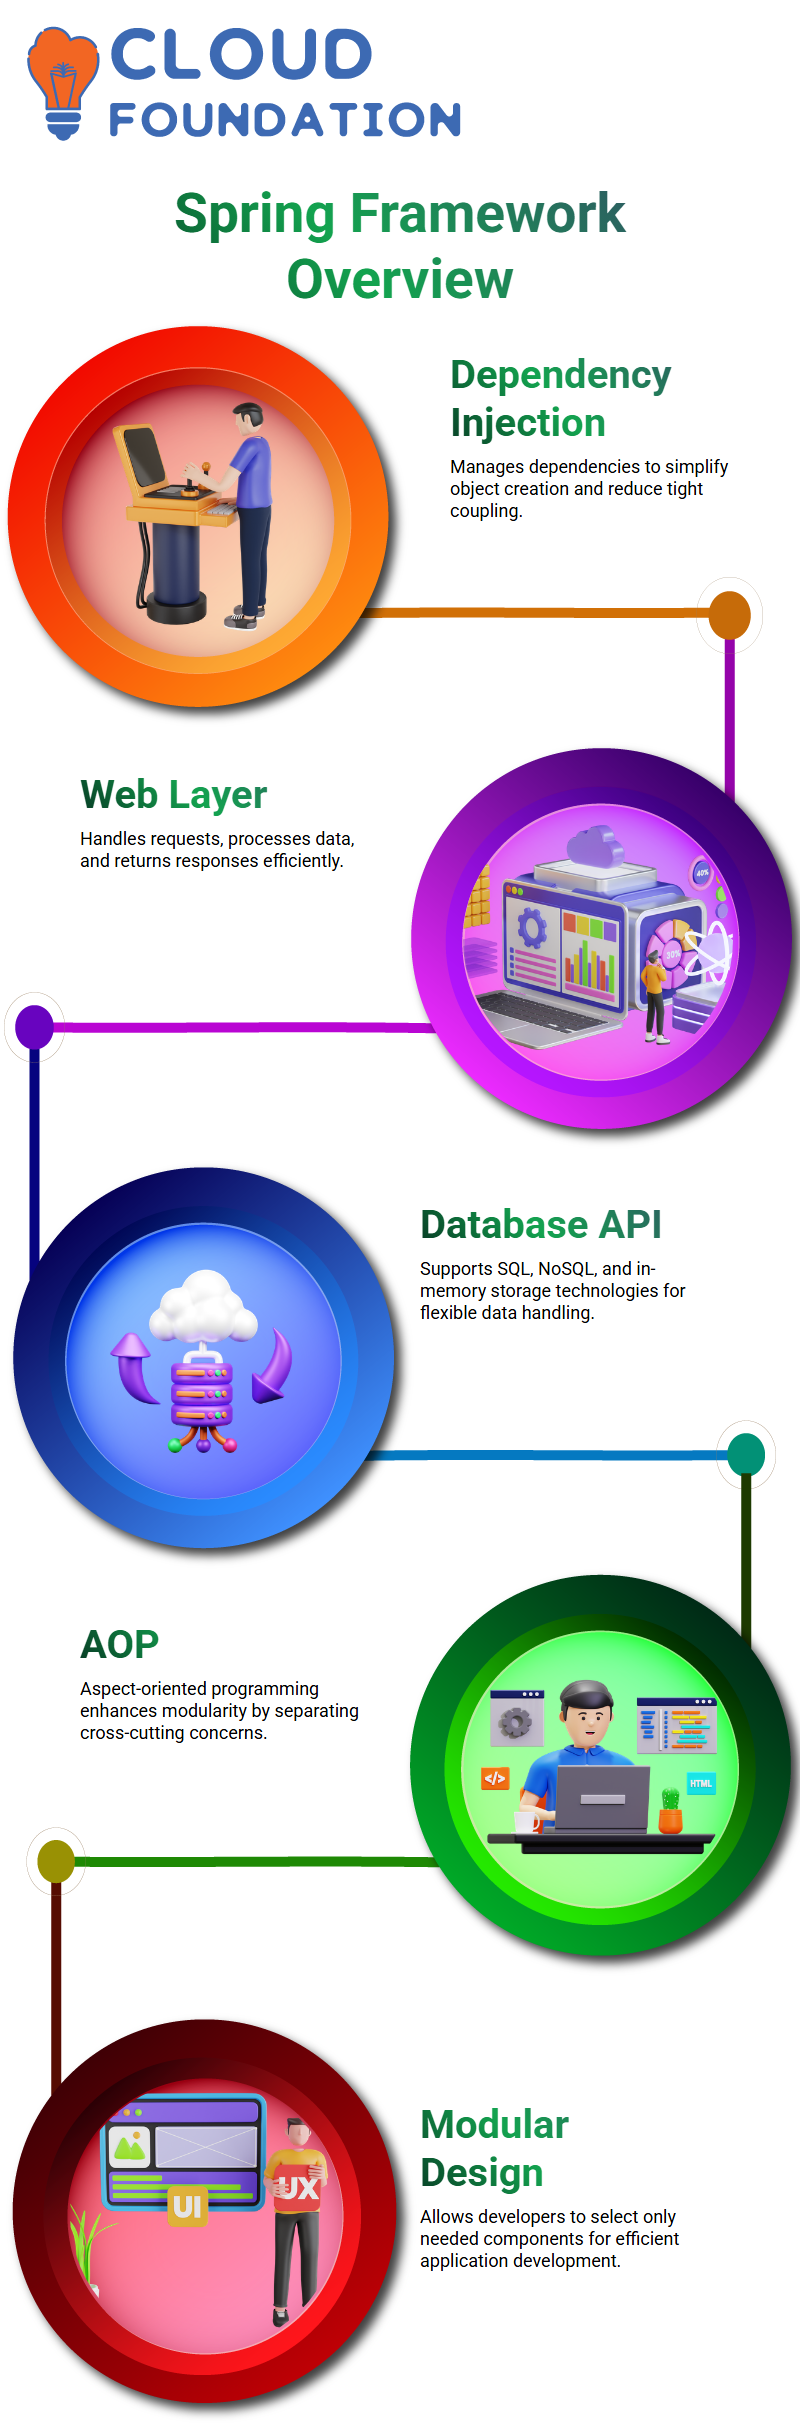
Spring Framework is a handy framework for building Java applications. It contains modules explicitly designed to tackle specific tasks within its multiple layers at its core.
These modules include modules for managing dependencies and injecting objects, modules that manage object dependencies, such as dependency injection, and web-layer modules used to build applications on top of web servers while processing and returning responses from databases, such as B. Additionally, there are modules dedicated to managing B database APIS and modules that add features such as logging or security without overloading code bases.
Modules in the web layer provide functionality to manage requests, process data and return responses while adding cross-cutting features like logging or security without cluttering. They may also serve as APIs in the data layer to work with databases using SQL, NoSQL or even in-memory storage technology.
There are modules to work with B databases and add cross-cutting features like logging or security without overwhelming them with unnecessary features.
AOP (aspect-oriented programming) has modules for testing Spring and selecting appropriate modules for your application.
Spring Framework excels due to its modular nature. It enables users to select only those modules necessary for their particular application development needs, enabling them to build more efficient and effective application development environments than ever before.
Understanding the Role of JDK in Spring Boot Development
To develop applications successfully, users need a solid grasp of Spring Boot‘s applications and features. This understanding ensures they possess all the resources to build and deploy applications efficiently.
Maintaining an up-to-date version of JDK is crucial to future development and comes equipped with several built-in tools designed specifically for productive development.
Intelligent Idea stands out among similar solutions due to its excellent editor. It autocompletes method names and suggests chunks of code with just one press of P, making writing high-quality code faster without getting bogged down with syntax or boilerplate errors.
Spring Boot was created explicitly for efficient development, making it suitable for use alongside alternative editors like Visual Studio Code or Eclipse. demarr IntelliJ makes starting much simpler as it provides all the tools required to develop Spring Wood applications.
IntelliJ makes getting started easier, as it comes equipped with all the tools required to get up and running quickly.
Creating a Spring Boot Project with IntelliJ
Reverse domain name and package type to set the project’s name; then change it to “store.”
Package names combine group and artifact names, while package type options range from Jar to War.
One can use IntelliJ to quickly generate dependencies, third-party libraries, or frameworks before clicking “Generate.” This generates a zip file that can be opened with any editor, without creating new website projects!
IntelliJ is also capable of creating Spring Boot projects. Open your project, navigate to “Generators,” select Spring Boot on the left side, and click “New Project.” You can see that the right panel displays information similar to what is shown on “Start. Spring.io.”
IntelliJ Ultimate alone supports this feature, and no other platforms offer it.

Spring Boot Training
Understanding the Project Structure in IntelliJ
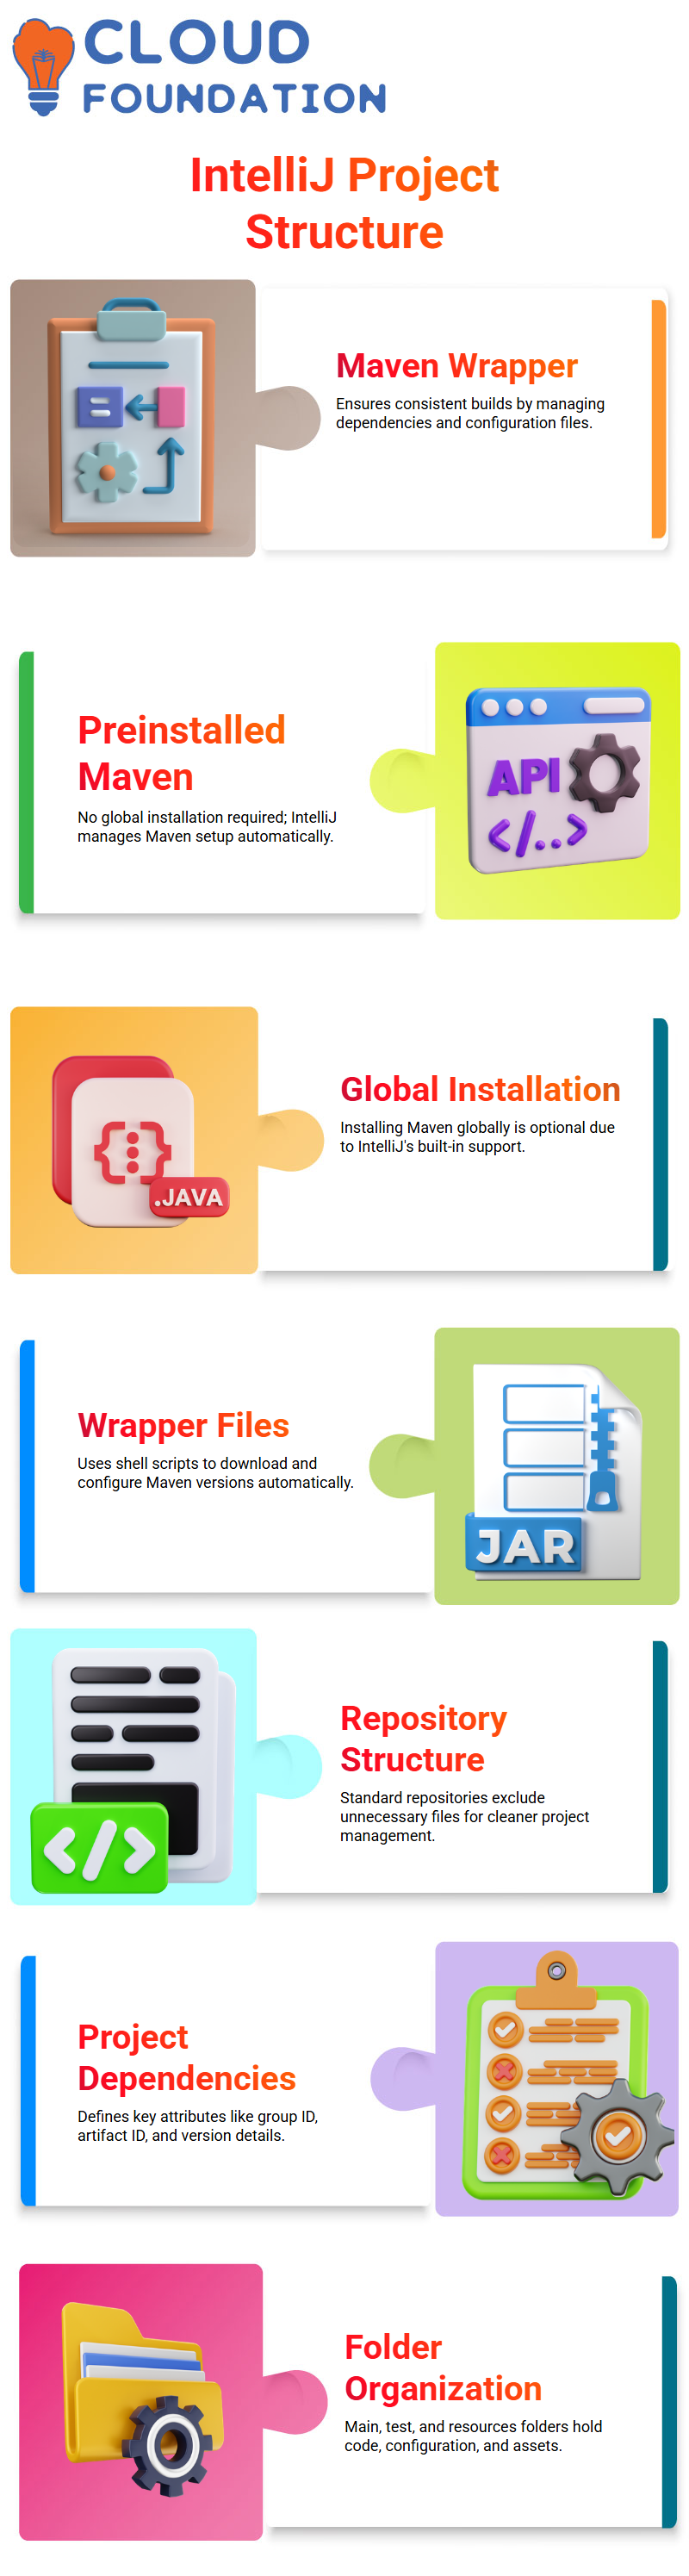
IntelliJ has designed its project structure so that certain folders and configuration files used by it cannot be altered; these make up part of the Maven wrapper, which ensures consistent Maven builds across environments.
IntelliJ comes preinstalled with Maven, a built-in project management tool; therefore, you do not need to install Maven globally across machines for it to function effectively.
Likewise, using IntelliJ doesn’t require you to configure Maven globally in every project’s build process—IntelliJ takes care of everything itself!
Instead, as IntelliJ already comes equipped with Maven support, install Maven globally on your machine.
This project contains two Maven wrapper files for Unix-based systems, such as Mac and Linux; it uses CMD instead for Windows-based computers.
Both these shell scripts include code that automatically downloads the desired version of Maven from its configuration file.
These repositories are relatively standard and should not be included within a project structure. However, the structure facilitates easy access to configuration files and tools necessary for building and testing projects.
Maven makes project construction effortless across different environments by offering multiple versions for every development environment, similar to HTML.
Young developers find Maven useful; MD serves as its heart, providing configuration information about its project and dependencies.
This file provides attributes like group ID, artifact ID, and version number, as well as dependencies specified when creating the project. The actual code necessary to build each project can be found within its main and test folders.
The main and test folders contain automated tests written for both sides, while code development occurs within the main folder. Two subfolders contain JVM-specific files, such as resources, as well as non-Java-related ones, like configuration files.
The Java and resources folders contain non-Java files such as configuration files and static assets such as HTML, CSS and JavaScript. Within each resources folder is also an application Properties configuration resource folder containing an application Properties configuration file.
This file may include multiple key-value pairs for use as key spring applications.
Using Spring Boot Starter Dependencies
Java classes serve as entryways into applications; each features an easy-to-use primary method that calls up Spring applications directly.
Project structures typically encompass dependency management, third-party libraries used in an application’s frameworks, libraries for handling web requests, building APIs, processing JSON data, and libraries used for logging.
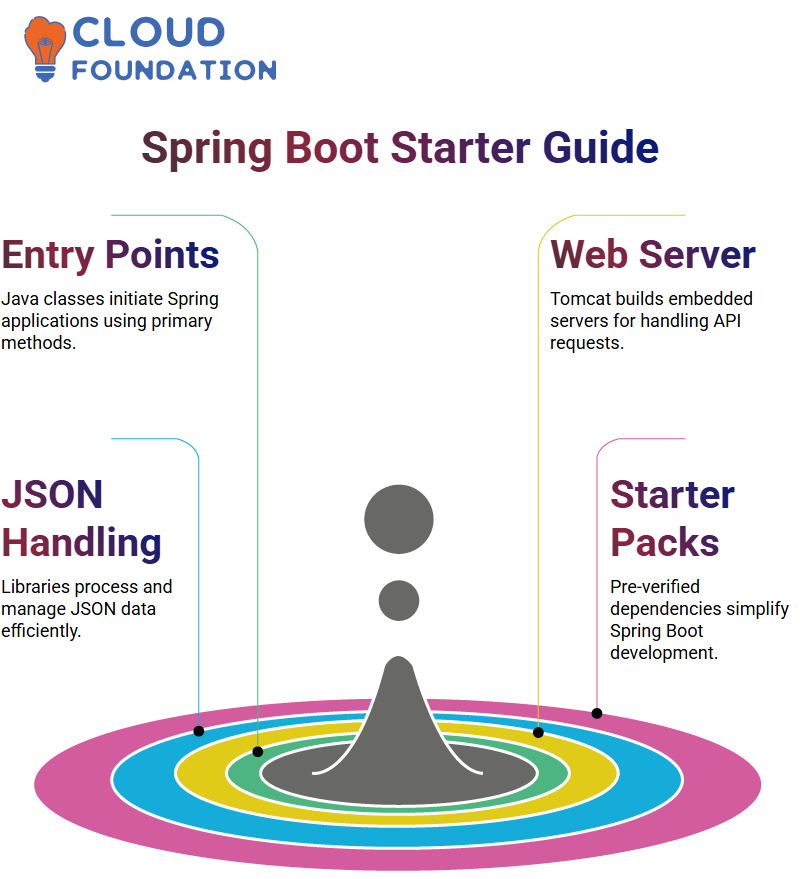
Tomcat, for instance, must construct an embedded web server application and libraries to handle requests and API calls. It must also be capable of processing JSON data requests and building APIs for handling them. These libraries must then also process JSON requests.
Spring Boot applications can use starter dependencies – collections of libraries that have already been tested and verified together – instead of adding libraries individually. Common frameworks will also be tested and verified together for optimal performance.
Understanding Spring MVC
Spring MVC (Model View Controller), part of the Spring Framework that helps us develop web applications, serves as the framework’s data store by representing where its business logic resides on a scale model.
Data for models typically exists within databases or data sources connected to them through connections such as APIs.
A Java class with or without views (the latter typically consisting of HTML/CSS/JavaScript rendering in a browser) could serve as their representation in an implementation environment.
Spring Boot’s scale model represents where our application’s data resides, representing our business logic.
Often, this data is connected to databases or other data sources through Spring Boot. A model could be an ordinary Java class, one with views enabled, or one combining simple classes with views to form one complete application.
Throughout MVC programming, the controller plays an essential part.

Spring Boot Online Training
Role of the Controller in Spring MVC
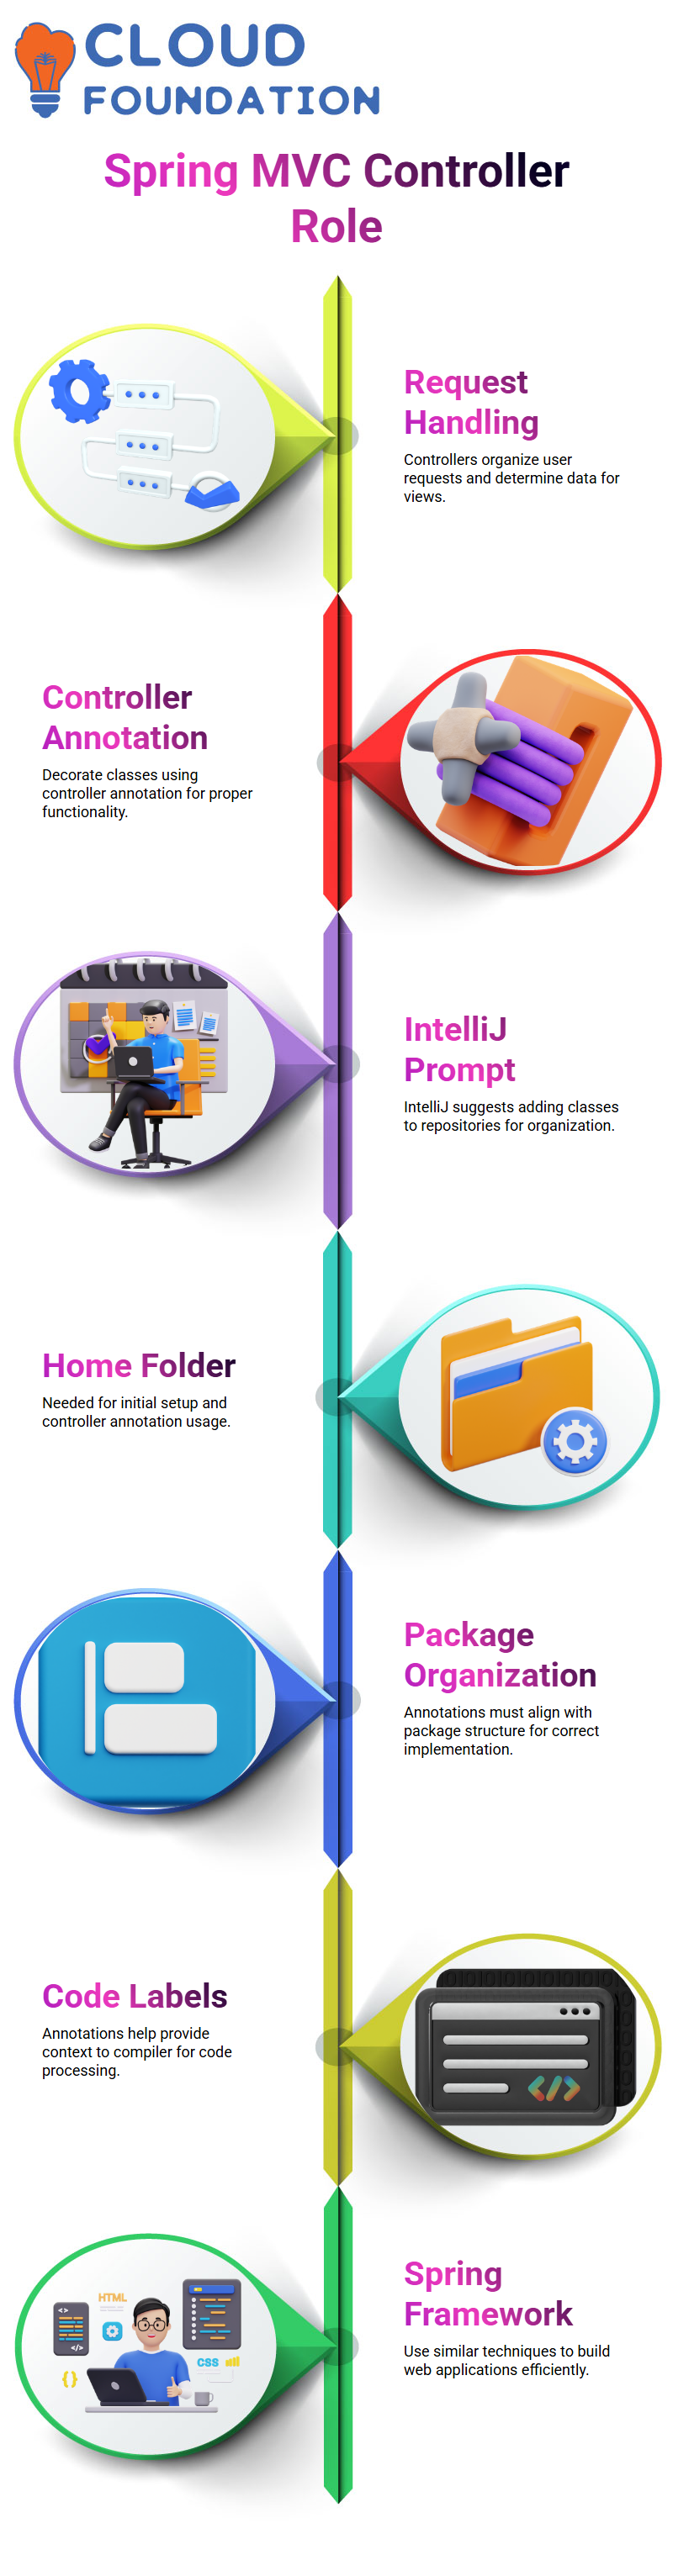
Utilising tools like Thymeleaf, controllers are like traffic cops who organise user requests. Their job is then to tell views which data to retrieve and display.
IntelliJ will ask whether or not to add this class to the repository.
To decorate a class as a controller, decorate it with the controller annotation defined within the package org as specified above and decorate it accordingly with the controller annotation defined.
To create one quickly, place the “Home” folder inside any package; IntelliJ will prompt for this action and ask whether you would like to add it to the git repository.
When creating controller classes from scratch, decorate them accordingly with the controller annotation before creating a new class using the controller annotation defined inside the package org.
To do this step before beginning development, a controller annotation must be added, which must then be decorated according to package organisation.
Otherwise, the “Home” folder is needed when starting from the git repo, or adding controller annotations is also an imperative step when creating controller classes.
Otherwise, they cannot create it and decorate as normal when creating a controller class and decorate it appropriately with a controller annotation from the package Org. They must decorate with this annotation when decorating with such annotations in the org package and add it in this way too.
To do this, one must decorate as described. Creating one requires creating something that already exists, or when creating one, one must add this specific annotation when decorating them.
To create one, you should decorate with this annotation like before.
To decorate it, create it before. For each class created with this annotation, a similar annotation is used when decorating with either.
For creating a controller. To make one, you complete this way within another source.
Press Enter after typing an AD Sign followed by the controller’s name to activate an annotation from the package org. The compiler can provide context by applying labels or tags to code instructions or additional code.
In addition, classes, methods, fields, and parameters may also receive context when instruction or additional code insertions are needed. You can create web applications using the Spring Framework using similar techniques.
Creating a web application using Spring Framework
First, create an index of a website before sending a request directly to its root. For this task, we must utilise Spring’s request method as part of its web framework package and add another annotation called “request”, providing it with an argument corresponding to an URL pattern.
We can input a URL pattern followed by a forward slash to represent our website’s root. When someone requests that address, they use this method to retrieve its root URLs.
These methods can receive traffic at different endpoints, such as about or about.
After we return the website and its name to browsers, we will create an “index.html” file and link back to our project.
Once in the resources folder, we can add non-Java files. Within the static folder, we will add an HTML file called “Static”, where we will type our H1 tag and body element within each element containing an H1.
Within each H1 Tag, we type our Hello World message within its H1 tag.

Step-by-Step Guide to Running a Spring Boot App with Maven
To run the application, launch a terminal window and navigate directly to the project folder. From here, search your desktop PC’s Spring Boot SL demo store for the project you would like to execute and locate it before following these step-by-step guides on running Maven on various platforms for multiple platform deployment.
If you don’t use IntelliJ, Maven provides another means of running applications. You open a terminal window and move directly into your project folder, which gives you access to project files as well as any major branches within a Git repository.
If you are using LS on Mac or Linux, use the Maven wrapper instead. Even if Maven is globally installed on your machine, use its wrapper.
To launch the application on Mac or Linux computers, type: “mvnw V”. This will display project files. On Windows machines, instead type “mvnw CMD space-V”.
Troubleshooting Code with Debug Tools in Spring Boot
Debug mode involves starting your JavaScript app in debug mode, with execution stopping periodically at various points; for continued access, click “debug” rather than “play.” To continue working on an app in debug mode, you need a debugger such as Spring Boot’s. To create this setting, click the debugger instead of the play button (instead of “play”).
Users can control the application shortcuts by pressing Ctrl + D to execute the code.
A web server listening on Port 880 must first be refreshed for home controller activation before an application can be executed successfully.
Suppose the user has yet to execute their line, using “F8”. In that case, they can do it step-by-step using this shortcut and verify whether variables have the appropriate values within their current context.
Variables detected include the current object, home controller, and view name set to index. As needed, a user can add or modify expressions for variables that are not detected properly or remove those that do not make an appearance.
Once completed, press “F8” repeatedly to execute your application and step through its source code. Stepping over lines may also allow direct editing of the F8 program’s source code files.
Once in debug mode, users can inspect whether all variables have their proper values; otherwise, they can add an expression to detect whether certain variables remain undetected.
Users can observe the results and modifications made by rerunning in debug mode. After which, using “F8”, applications may execute code directly.
Spring Framework is an external decompiled class that cannot be part of our application, making debugging its code challenging. To effectively test it out, we must continue running until something appears in the browser and use an alternate debugging tool, such as a program shortcut on a Mac.
To execute our code, we press Command-R. To test and ensure we haven’t discovered a bug, we restart debugging sessions by pressing Ctrl+R before returning to browser view.
Once we refresh and hit our home controller again, this time stepping directly into a line instead of over it, this method only has one line of code, but could contain multiple steps; we can step over or step into these lines until we locate where our issue originates.
Assuming our problem lies within a string literal, we can change it to “we are returning” and then change this value to index.html before stopping debugging and setting breakpoints again. Once this task has been accomplished, remove breakpoints.
Conclusion
Spring Framework and Boot play indispensable roles in modern Java application development. Both can offer powerful modules to assist developers with building scalable, maintainable software for dependency injection, security, and web development; yet, their configuration and management may prove complex and cumbersome for newcomers to the environment.
Spring Boot offers an opinionated approach with sensible defaults, embedded servers, and autoconfiguration to simplify this complexity so that developers can concentrate more on writing business logic than infrastructure setup.
Spring Boot’s modular project structure and easy integration with tools such as Maven and Gradle facilitate seamless integration. It’s built-in dependency management through starter packages makes adding frequently used libraries such as Tomcat, JSON processors, and Spring MVC components much simpler.
IntelliJ IDEA enhances productivity with built-in support for Maven, intelligent code completion capabilities, and debugging features that increase development efficiency.
These tools enable developers to create, configure, and manage Spring Boot projects more quickly, thus shortening setup times and speeding application development.
Spring MVC provides developers a practical toolkit for developing web apps using the Model-View-Controller design pattern. Controllers manage user requests, models provide application data and logic management, and views present information to end-users.
Running and debugging applications is easier with tools like the Maven wrapper and IntelliJ’s debug mode. These tools simplify early issue identification and resolution, thus improving application reliability.
Spring Boot offers developers another helpful feature—automatic restart, which enables real-time changes without manually restarting applications. Overall, mastery of Spring Boot gives developers the skills to construct reliable, scalable, and efficient backend systems.
Spring Boot provides an efficient environment that caters to real-world development requirements from initial setup through debugging and deployment.
Understanding Spring’s fundamental concepts, project structure, and available tools can enable developers to unlock its full potential and deliver high-quality Java apps quickly and confidently.

Spring Boot Course Price

Sai Susmitha
Author