Salesforce Pardot Online Training Course
Salesforce Pardot Email Preference Centres
One issue about email preference centres constantly comes up when I teach Salesforce Pardot in our free technology classes.
Typically, I begin by opening a sample email address and demonstrating to them how Salesforce Pardot allows us to update each piece from inside the editor.
I double-click any place to bring up the pop-up and demonstrate how easy it is to customise Salesforce Pardot. The preference centre is a key component of the user experience in Salesforce Pardot.
Unsubscribe and Preference Links in Salesforce Pardot
Unsubscribe management is a crucial component of Salesforce Pardot training.
Choosing the appropriate email preference option in Salesforce Pardot allows us to turn plain text or a button into an unsubscribe link.
This guarantees adherence and maintains clear communication.
I often advise against using random URLs in Salesforce Pardot and instead suggest utilising the built-in unsubscribe or preference links.
Salesforce Pardot saves time and prevents broken redirection by automatically connecting these URLs to the appropriate preference centre.
Working with Email Templates in Salesforce Pardot
I immediately refer learners to Salesforce Pardot email templates when they inquire about drag-and-drop templates.
I clarify that although some accounts route templates via Salesforce, others display traditional email templates.

Because of the close integration between Salesforce and Pardot, dropdown menus often include Salesforce information.
I make a new email template in Salesforce Pardot and describe folder access.
I demonstrate how private templates limit access, but public templates enable sales teams to reuse them.
When creating a template, Salesforce Pardot makes this decision extremely evident.
Anchor Text and HTML Basics in Salesforce Pardot
Anchor text within HTML templates may sometimes be problematic for Salesforce Pardot users. I open the HTML view and highlight the anchor element to demonstrate this step-by-step.
We may put preference URLs or match fields straight into the anchor tag using Salesforce Pardot.
Salesforce Pardot makes it simple to change, reroute, and test anchor text once it is present in the HTML.
This clarity makes it easier for learners to comprehend how Salesforce Pardot manages email content inside.

Salesforce Pardot Training
Working with Templates in Salesforce Pardot
When I started utilising templates in Salesforce Pardot, I must admit that I had some difficulties for a few days.
I attempted to make all the adjustments using the builder; however, Salesforce Pardot has limitations of its own.
It is impossible to paste a long HTML block of 2000 characters and expect it to work correctly.
That’s when I saw the full power of Salesforce Pardot’s drag-and-drop builder.
In Salesforce Pardot, I often begin with a simple layout. I either use a single column or a two-column layout, depending on the topic.
I believe that starting small and working my way up is preferable.
Salesforce Pardot makes this easy sense; I can just drag elements like buttons and rich text blocks to the appropriate spot.
What appeals to me the most about Salesforce Pardot is the versatility of the rich text component.
To move it up or down, duplicate it, or completely alter its appearance, I don’t have to touch complex code.
This approach preserves Salesforce Pardot’s purity while saving time.
Styling Content Easily Inside Salesforce Pardot
I concentrate on style inside Salesforce Pardot once the content block is set up.
Before using the built-in choices for headers, bold text, italics, bullet points, and numbering, I often compose my content directly.
Without requiring other tools, Salesforce Pardot provides sufficient control to make the material seem professional.
Salesforce Pardot still accepts HTML code that I already have ready.
All I have to do is go to the source view, paste the code, and let Salesforce Pardot get and display it automatically.
Everything seems correctly formatted when I return to the visual view.
Margin management is another Salesforce Pardot function that I often use.
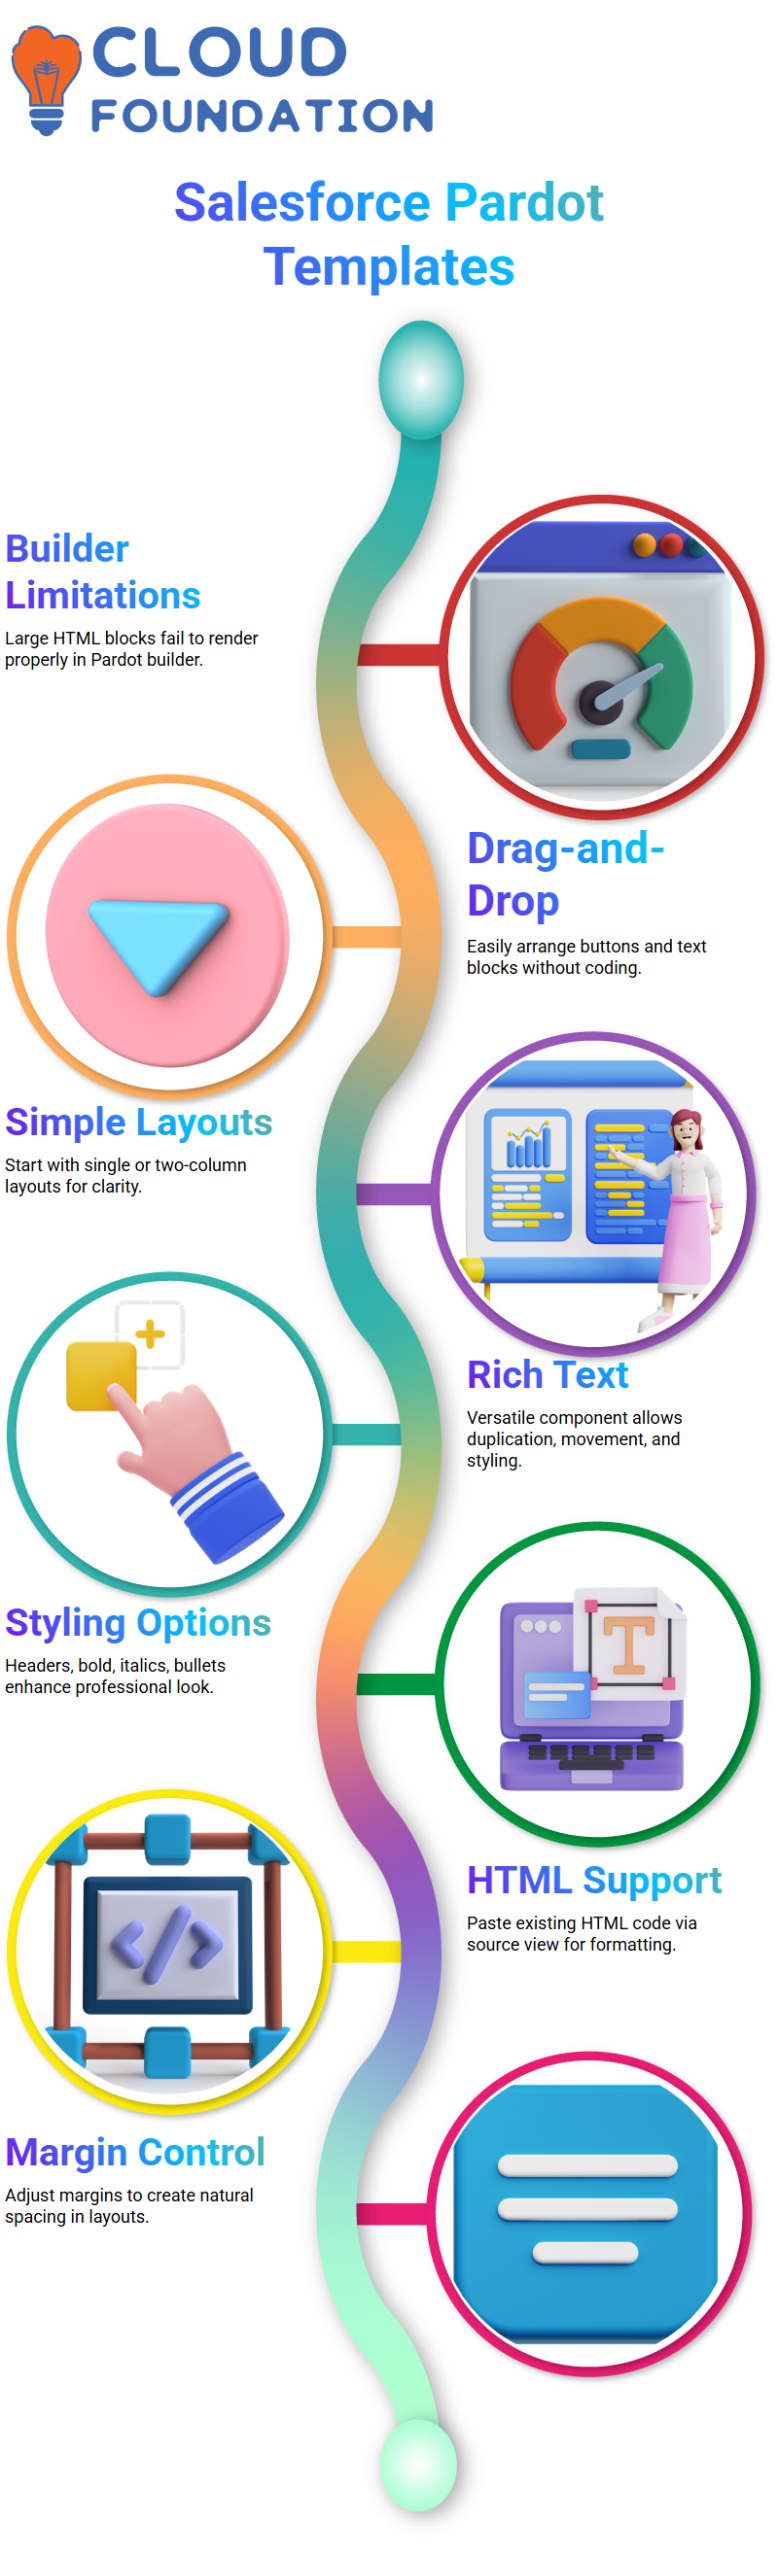
To produce space that seems natural, I make adjustments to the top, bottom, left, and right margins.
When creating emails or landing pages, even little space adjustments have a significant impact on Salesforce Pardot layouts.
Managing Images and CMS in Salesforce Pardot
Salesforce Pardot treats images differently, even though they are a crucial component of interaction.
Since Salesforce Pardot cannot correctly access photos from Salesforce Files, I never upload images straight from Salesforce.
Instead, while working inside Salesforce Pardot, I always depend on Salesforce CMS.
I make sure the admin-side CMS rights are enabled before integrating Salesforce CMS with Salesforce Pardot.
Once enabled, Salesforce Pardot has no trouble retrieving assets from the CMS, including photos and logos.
I also like keeping everything in Salesforce Pardot organised. I start by creating folders, which I then use to hold papers, forms, landing pages, and photos.
This practice keeps Salesforce Pardot information organised and manageable, particularly when there are many assets involved.
Creating and Publishing Forms Using Salesforce Pardot
Another area where Salesforce Pardot offers versatility is in the building of forms. Usually, I use the CMS interface linked to Salesforce Pardot to generate forms directly.
After choosing the form type and giving it a suitable title, I let Salesforce Pardot automatically create the API name using underscores.
One crucial point I always keep in mind while using Salesforce Pardot is that a form has to be linked to a flow to be published.
When I first set up Salesforce Pardot, I didn’t worry too much about it since it generally generates a basic test flow automatically.
I use drag and drop in Salesforce Pardot to reorganise the fields after adding them, such as name or business.
I test the mobile version as well as save and publish it. It’s quite useful that Salesforce Pardot ensures the form works on all devices.

Salesforce Pardot Online Training
Keeping Content Visible Across CRM with Salesforce Pardot
I often get inquiries about visibility between CRM and Salesforce Pardot.
Anything I produce in Salesforce Pardot is also available in the CRM after I allow the copy content to CMS option.
I personally make sure that every Salesforce Pardot asset is stored in the appropriate place and published correctly.
In this manner, teams using Salesforce Pardot may continue to see and use forms, emails, and templates.
I prevent misunderstandings and duplication by regularly adhering to this procedure.
When material is properly organised, published, and synchronised with CRM, Salesforce Pardot functions at its best.
This strategy has saved me several hours when using Salesforce Pardot.
Salesforce Pardot CMS and Email Templates
The CMS workspace is often the first thing I describe when working with Salesforce Pardot. I
essentially manage material using Salesforce Pardot CMS without having to deal with complex coding.
Even without coding experience, I can build a workspace, manage channels, and investigate features that make Salesforce Pardot user-friendly.
I didn’t go more into Salesforce Pardot CMS until I saw how beneficial it is for content management and email marketing.
I want to keep things simple with Salesforce Pardot. I often start with email templates rather than CMS sites that are difficult to monitor afterwards.
I can create engagement emails in Salesforce Pardot using both Lightning and Classic options, but I like to go with Classic as it seems more reliable.
Building and Editing Emails in Salesforce Pardot
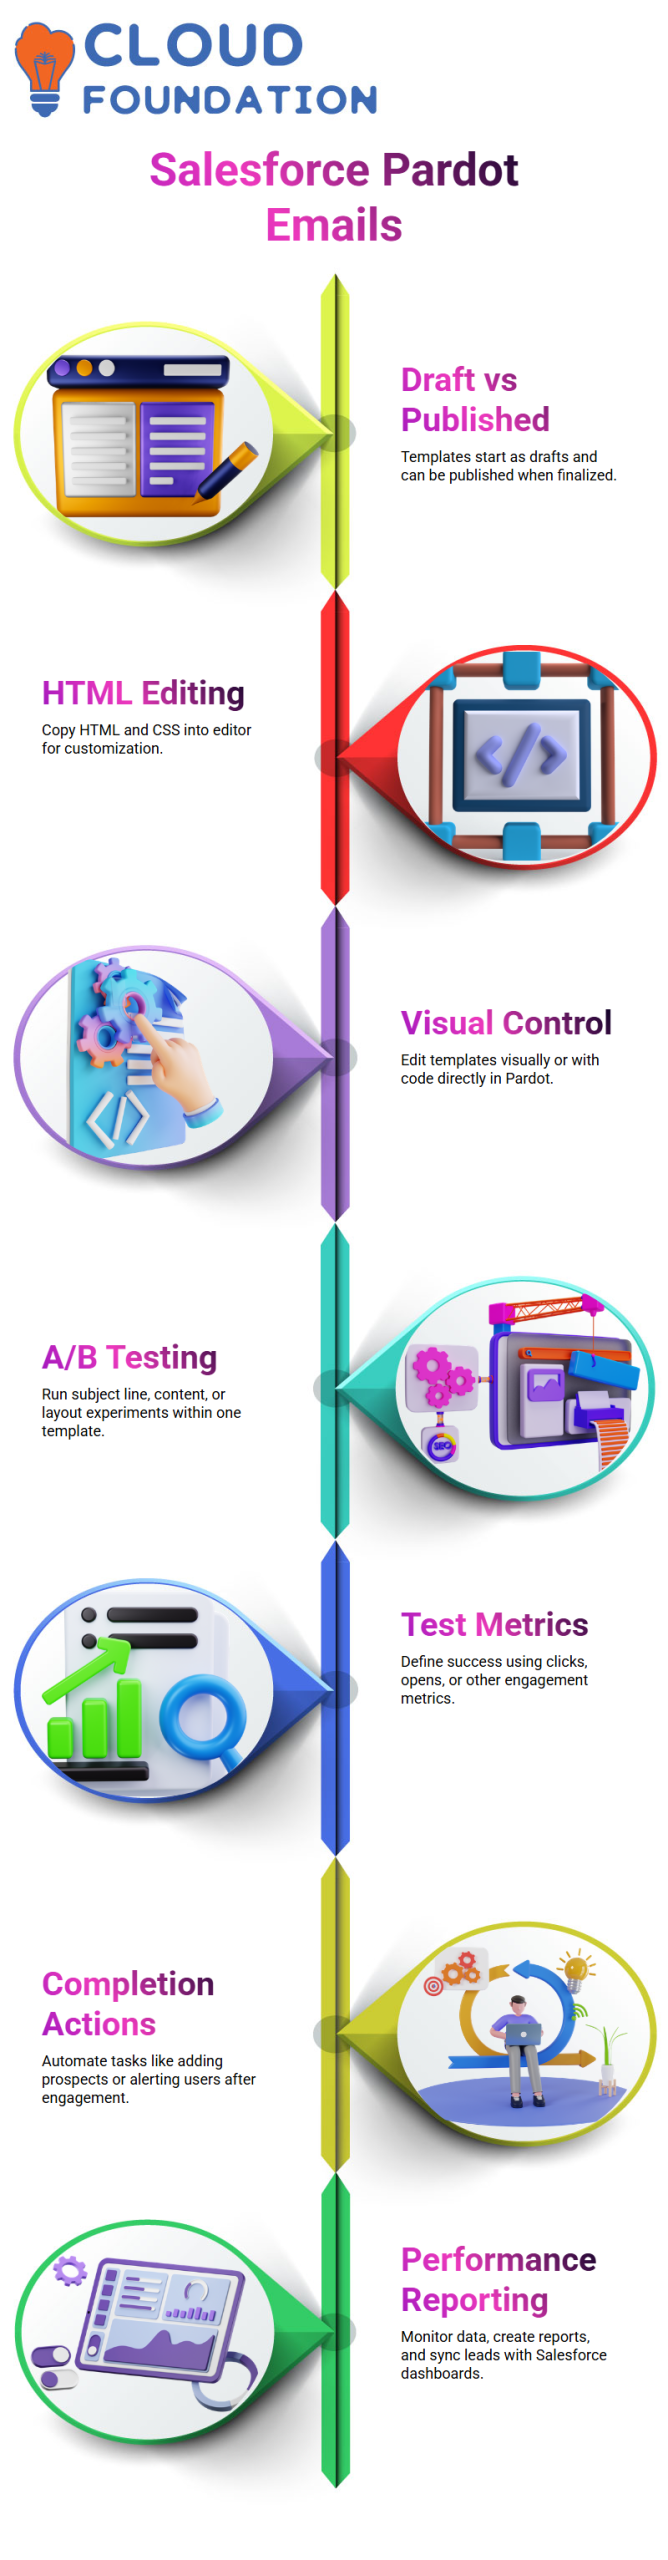
Email templates in Salesforce Pardot are available in two different states: draft and published.
To allow me to freely explore, I always begin with a draft in Salesforce Pardot.
Knowing that I may make changes later, if necessary, I post it as soon as everything seems to be in order.
One of the reasons I love using Salesforce Pardot every day is its versatility.
I often use a simple HTML option when I build a new template in Salesforce Pardot.
I copy the current HTML and CSS, insert it into the editor, and make any necessary adjustments.
I maintain control since Salesforce Pardot allows me to change both visually and in code.
Without ever leaving Salesforce Pardot, I can follow changes, see snapshots, and edit content.
A/B Testing Emails Using Salesforce Pardot
A/B testing is one Salesforce Pardot tools that I really like. I don’t make two different templates. Rather, Salesforce Pardot allows two versions to be stored in a single template.
I can experiment with subject lines, content, and layout in Salesforce Pardot to see what works best.
I choose how many hours or days the test should run in Salesforce Pardot.
Additionally, I decide which Salesforce Pardot metrics, like openings or clicks, define success.
If I choose 20% of my list, for instance, Salesforce Pardot divides that group equally between versions A and B.
I can use Salesforce Pardot to make data-driven choices thanks to this method.
Automation, Completion Actions, and Reporting in Salesforce Pardot
Salesforce Pardot uses completion actions to make automation feasible. Salesforce Pardot may initiate activities such as adding a prospect to a list, alerting a user, or modifying data when they click or open an email.
To cut down on human labour, I depend on these Salesforce Pardot completion activities.
In Salesforce Pardot, reporting is also very important.
Since that data goes into reports and dashboards, I constantly make sure prospects in Salesforce Pardot sync properly as leads or contacts.
I can clearly monitor performance using Salesforce Pardot data, create custom reports, and respond to customer inquiries when Salesforce Pardot is linked to Salesforce.

Salesforce Pardot Course Price

Vanitha
Author