Training on AEM Dialog Node
AEM Dialog Nodes
Dialog nodes are indispensable in the AEM world, enabling the implementation of highly functional features. Today, we will cover how to do that most cost-effectively by changing an existing AEM Dialog node.
Facilitate getting started by removing the currently existing CQ call and Dialog node. Without repeating what has already been done, we will select an existing Dialog node and work on it.
Find the particular Dialog node in AEM, and then you can copy it and insert it into your project. This not only spares our precious time but also avoids the possibility of errors arising.
After we have copied the Dialog node, we can start customising it to fit our case. Opening the node unveils the components that can still be adjusted.
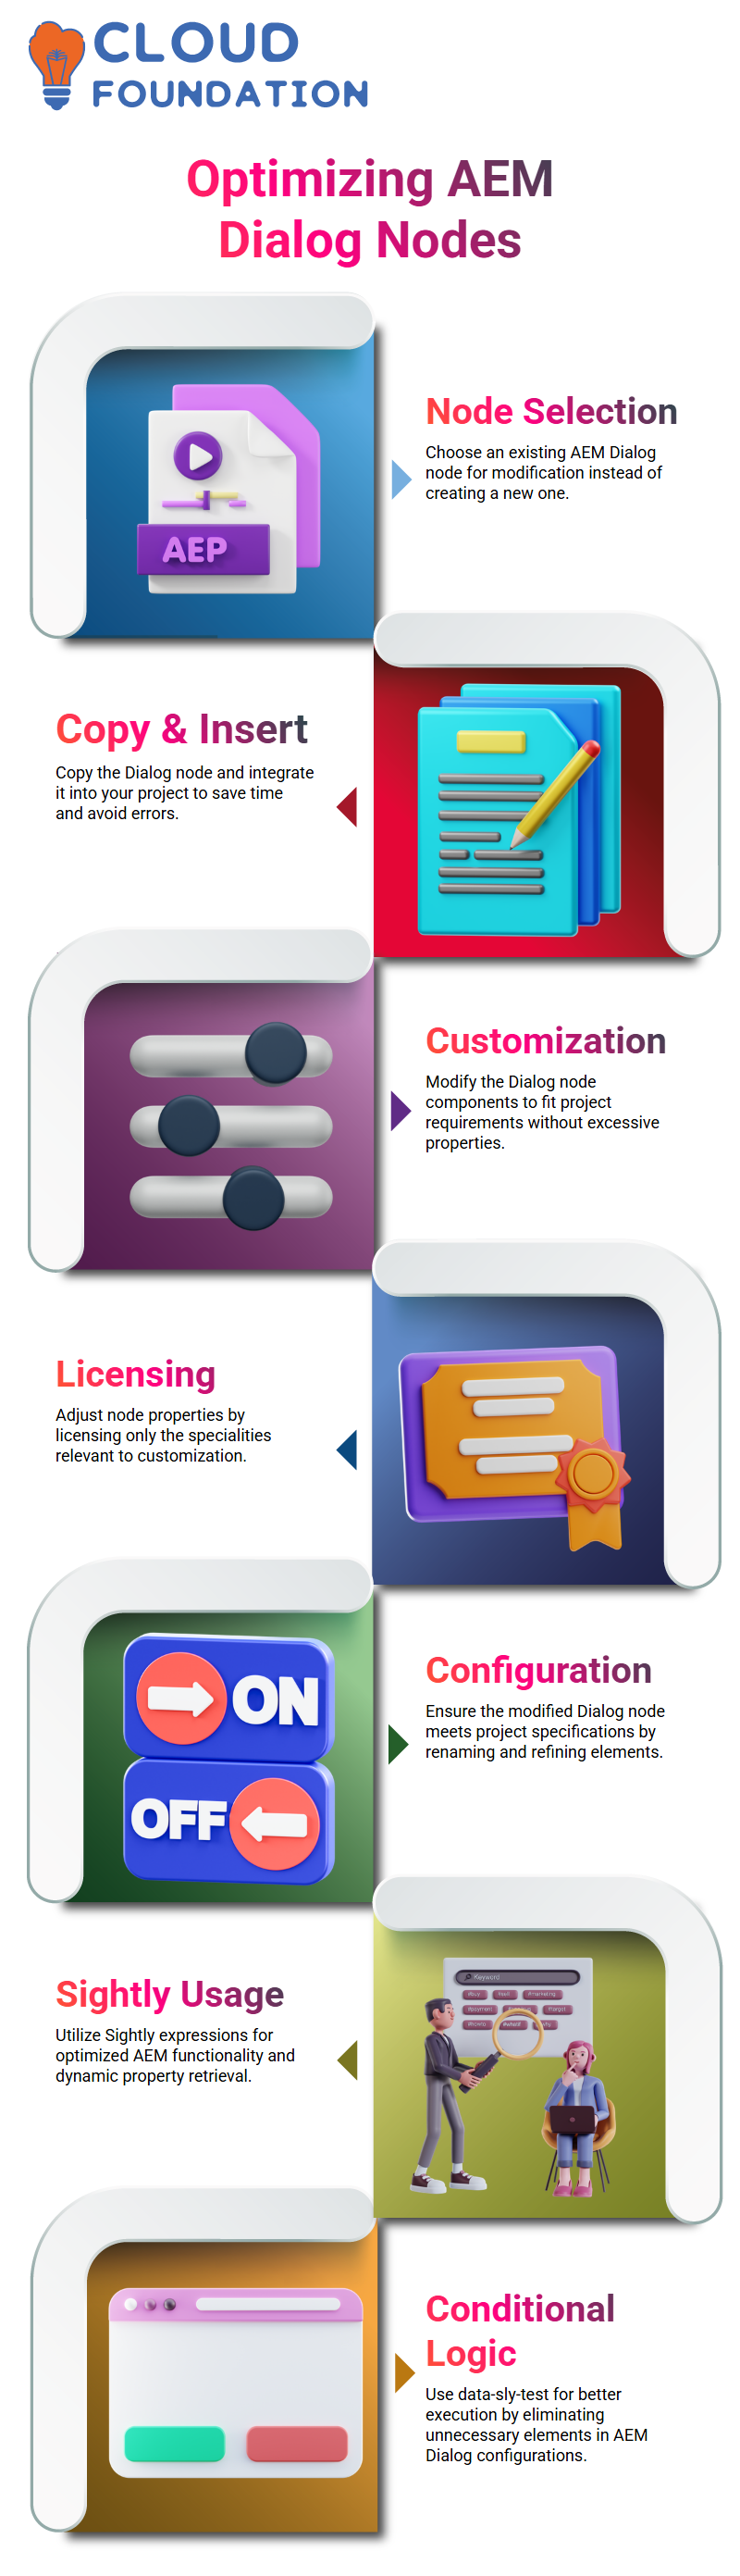
We shouldn’t have excessive properties in AEM, so we will alter the Dialog node by licensing only the specialities that relate to our customisation.
By configuring the AEM Dialog node, we confirm it meets our concrete project specifications. By examining the properties, one can easily rename the branches and remove unwanted elements.
AEM Performance
Sightly expressions in AEM development contribute to improved capability. The properties object retrieves its values dynamically, ensuring the program’s smooth operation.
Interpreting conditionally through data-sly-test eliminates the unnecessary elements. Thus, this results in faster execution and more user-friendly AEM Dialog configurations
Variation in the AEM development process that is based on a well-structured way licenses for easier revisions and adjustments, which is both more manageable and fits the user’s situation
Code Component in AEM
And now facilitates touching upon the code component in AEM
If you add a code component to the page by applying drag-and-drop, a new node is created where the component is stored. If a property exists, the component will get the data and show it
If a new illustration is created without a pre-authored property, the result will be that the default text is not displayed.
Nanobody’s brand new branch in Altrimenti makes it possible to change at ease in the middle of the process without going to the backend
Property Configuration in AEM
The interesting thing about AEM is that it is straightforward to assemble the properties of the components.
By traversing the CRX at ease structure, we can determine which node is responsible for a particular component’s attitude.
To illustrate, by setting the corresponding values for the required nodes, we can add a default value.
Consequently, if the satisfied value is replaced or modified dynamically, it does not matter because deployment is not required.
Variable content in PHP
People can easily and effectively update the content in AEM by leveraging AEM’s capabilities. Even non-technical users can change component properties without code deployment, thanks to this method.
As users make amendments, the resource types and node structures of AEM that they have applied directly influence how content is rendered.
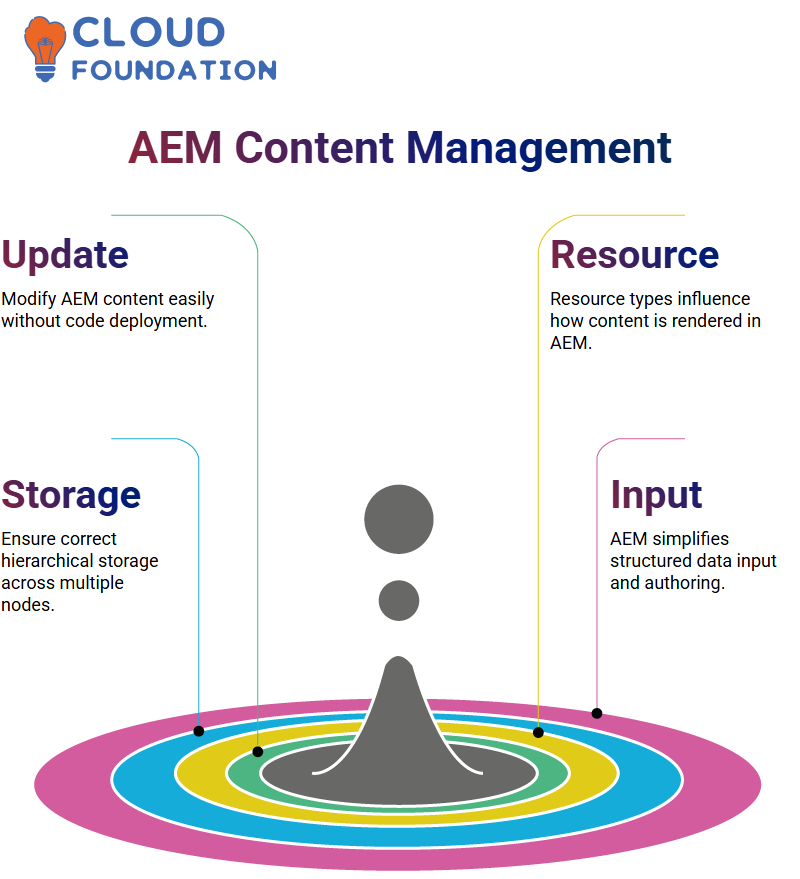
Resource types are those tied to scripts; thus, it is more within reach to retain and gauge the application.
Hierarchical Storage in AEM
AEM is quite effective at managing complacency across different hierarchical levels while working with multiple nodes; therefore, correct storage is highly required.
Taking advantage of ‘slash’ is a guarantee that I can store the component data at the parent level.
Components that are part of AEM can be dynamically configured according to the user’s demands.
For example, when creating a new component with sectors for name and age, I have two distinct zones to specify: one for text input and one for numeric input. AEM makes it very easy for users to input structured data and thus, very easy to author with
AEM Component Placeholders
Part of the structure is built by the placeholders in AEM Just in case you received a new component, but it was not visible to you, I guess the settings of the placeholder need some adjustments.
In the case of AEM, for example, if a component such as Duck Text is not shown, it is because it is not enabled in the gratified page template container, even if you add the corresponding element.
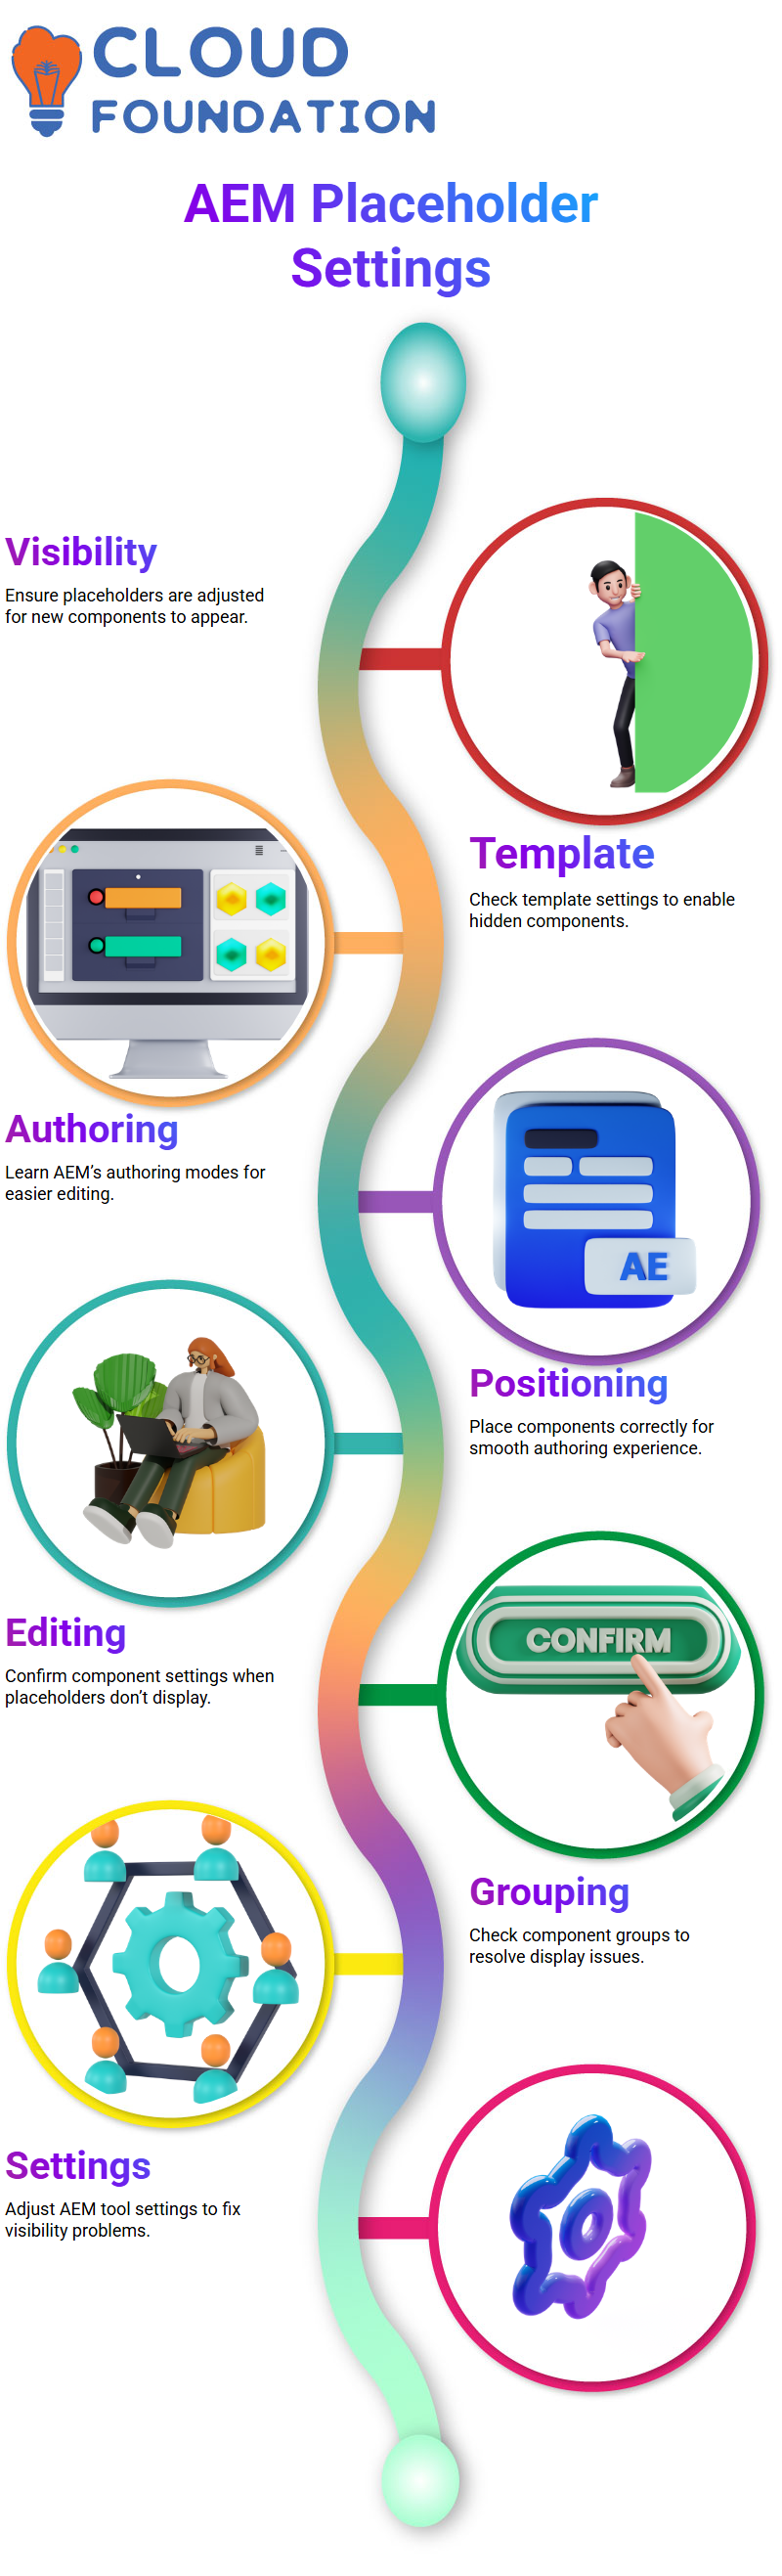
It does not appear in the template; you will have to go to the template settings to equip it.
AEM for Integrated Authoring
Although AEM has been designed to make authoring seem effortless, it is still essential to become familiar with the various modes of comfortable authoring.
Placing components in a particular position in the author environment is a sure means to identify where they should be, thereby making editing more spontaneous.
The fact that the editing mode does not display placeholders could signal a problem. Still, it might result from tool settings in AEM A simple check of the component group and the settings, therefore, will correct everything that is not yet visible.
This is a common occurrence, particularly when ritualistic components are used.

AEM Training
Updating AEM Properties
At AEM, go to the section of the Dialog mode property and change the DCR title to ‘Stop Next’
Moreover, specific features, such as the help road, should be removed—right-click and select ‘remove’.’
When carrying out these alterations, remember to save all changes first and then proceed. This way, AEM will reflect the updates you made
Developing Norm Components in AEM
Most often, projects require setting up the norm components in AEM
That’s right, this is where we do all the reshaping, scrubbing, and renaming of nodes in AEM to have a more fluid procedure.
To put it another way, changing the default type and modifying the properties in AEM will help verify a structural implementation throughout all the projects.
AEM Component Inputs
Authentication is the action that ensures you are free from making too many mistakes. If a user enters more than four characters, you are supposed to issue a notice.
This substantiation logic resides in our ‘validation.js’ file.
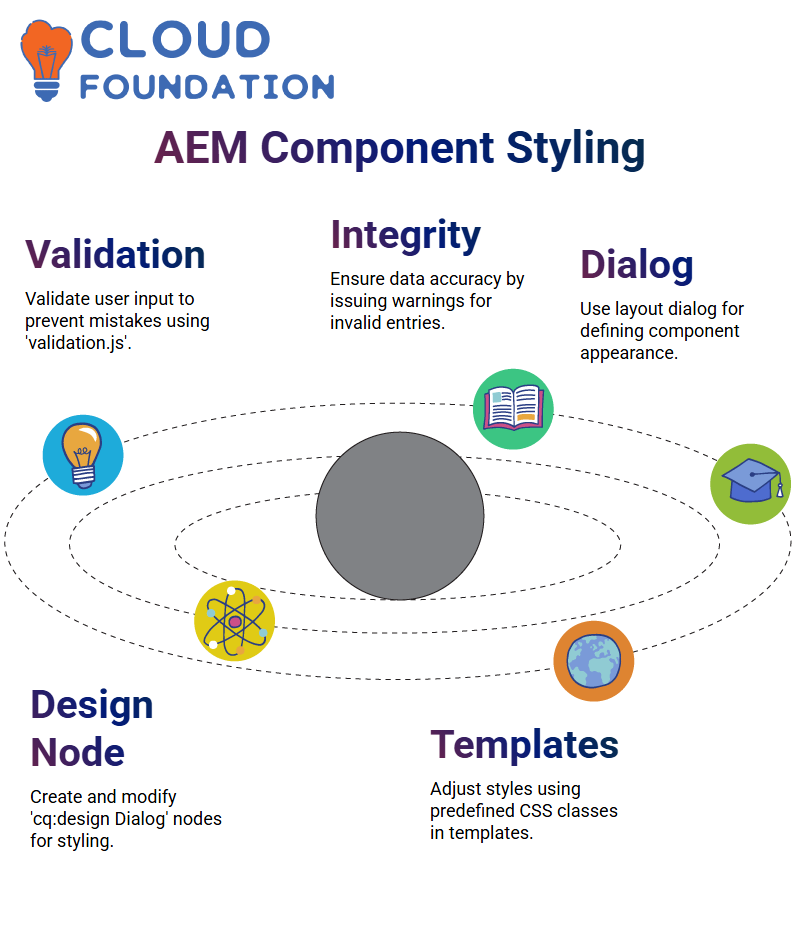 For example, the following is the method for the test: for the sample, type the symbol name ‘ADBE’ and add some additional characters, and then submit the form. You will receive a warning about the new characters that are implemented to ensure data integrity.
AEM Layout Dialog for Styling
Dialog, which is a part of the authoring environment, the authors will be able to describe what the component should look like
We take the down “cq:design Dialog” node from the centre component and make a new one in our project structure.
When a template is displayed, the style choice option appears, allowing for adjustments using predefined CSS classes.
AEM Comfortable Fragments
Serene fragments are vital in AEM because they can effectively organise reusable text segments. The containers help you reuse the same design across multiple pages.
The only thing you have to do is to take the satisfied fragment container and drop it onto your page.

Herein, you can easily employ drag-and-drop individual AEM-validated fragments to classify your text more effectively.
Does AEM deal with CSS and JavaScript?
AEM performs an automatic combination of files for rationalisation. Even if there are several separate CSS files, only the required ones are sent to the final output.
This operation is a performance booster and a resource-saving process.
If you delve into the HTML created on the fly by AEM, you will be amazed to know that script and link tags are produced automatically. This achievement doesn’t require physical work beyond organising assets.

AEM Online Training
AEM Client Libraries
The client library folder is the triggering point in AEM for the project structure. Thus, initially, the client library folder does not exist unless the imperative package is installed.
After that, open CRXDE Lite and check if the client library is created under your component folder.
Customer Libraries in AEM
AEM components work harmoniously when a corresponding client library is available. In this step, the client library that has been preselected must be uploaded through AEM’s package manager.
By utilising client libraries, we enhance the functionality of the component and can add verification scripts to improve user interaction within the AEM system.
JavaScript in AEM Client Libraries
When you release a site in AEM, you can see your JavaScript loaded from an embedded client library in the page source.
AEM JavaScript management is the same as CSS management—you will find a confluence of everything securing packaged together in one place.
 The reason the components are not loading correctly on your page is due to the AEM client libraries.
AEM Configuration
The proper functioning of components in AEM is most important. Often, it happens that the Dialog box does not appear as the user expected.
To identify the issue, refreshing the page and checking the resource type is the first step a user can take.
In AEM, a message popped up about the hero component. It did not display the correct details, so I examined the configuration in the properties of the right-hand side.
By deleting and then dragging the hero component again, I resolved the issue, which explains how AEM can sometimes reference the wrong templates.
Testing and Verifying AEM Components
Verifying the components in AEM confirms they are working as expected. The edit config node integrates Dialogs to provide an enhanced user experience, allowing users to drag and drop files with greater ease.

For example, in AEM, if you add configurations and then test them by refreshing the pages and checking the expected values, it can work as a debugging tool.
Component Gestures with AEM
The edit config node of AEM invitations provides greater flexibility for delighted authors. The process not only saves time but also allows developers to utilise the system for other manual purposes.
Recognition of the role of edit config properties in AEM greatly aids developers in reusing power in their components proficiently.
AEM CSS Environmental Setup
Invent a ‘css txt’ file in the client library folder by pressing your pointer’s right key on the folder and selecting the option from the context menu. Remember to add ‘page-hero’ styles to the webpage and save the required adjustments.
To accomplish this, through AEM, first open the libraries to add the client. Click on the embed property in the AEM client library implementation and feed it with the new library you have created.
Now, by going to the left-hand side and selecting the floppy disc symbol, and then simply updating the page, you will instantly see all the recent variations reflected right after the update process finishes.
You need to verify that your modifications have taken effect by saving the page and refreshing the browser.
Deploying Blueprint Dialogs AEM
The adaptation of blueprint Dialogs to AEM bestows a superior disposition to the AEM components. Besides the configuration of hero elements, the use of a new footer element through the pattern Dialog is to be discussed.
In the AEM template structure, generate the footer component, assign the mandatory properties, and then include those in your project. These variations offer new adjustment features for your AEM project.

AEM Course Price

Vinitha Indhukuri
Author