Step-By-Step Salesforce Approval Process Training
Why Salesforce Admin is a Game-Changer
Working with Salesforce Admin has revolutionised my approach to automation and process management.
From setting up approval processes to designing flows, each tool in this program was created with admins and users in mind to simplify everyday life.
Automating approvals, tracking history and creating trigger actions based on record changes has saved hours of laborious manual processes.

Salesforce Admin enables organisations to build flexible systems tailored to their specific real-world business requirements.
Salesforce Admin: Mastering the Approval Process
As a Salesforce Admin, one of your key responsibilities should be setting up and overseeing an approval process.
This vitally important workflow serves to validate business activities, such as managing patient data, employee expenses, or time sheet approvals. Just how Salesforce handles this is key, and every admin should feel comfortable creating one from scratch.
Initially, we reviewed and displayed all the components we had covered so far, which included reports and the data loader, as well as several modules left out, most notably the approval process configuration, a crucial configuration required by any Salesforce Administrator when making data-driven decisions.
The Approval Process in Salesforce Admin
Salesforce Admin tools, one of the most exciting and beneficial features, was undoubtedly its approval process. Simply put, when marking patients as inactive, they should first undergo an approval process before being confirmed or declined for processing.
Rules can also ensure the decision is reviewed by higher management; once approved, an “Inactivity Approved” box automatically ticks, helping maintain data integrity by accepting only validated changes.
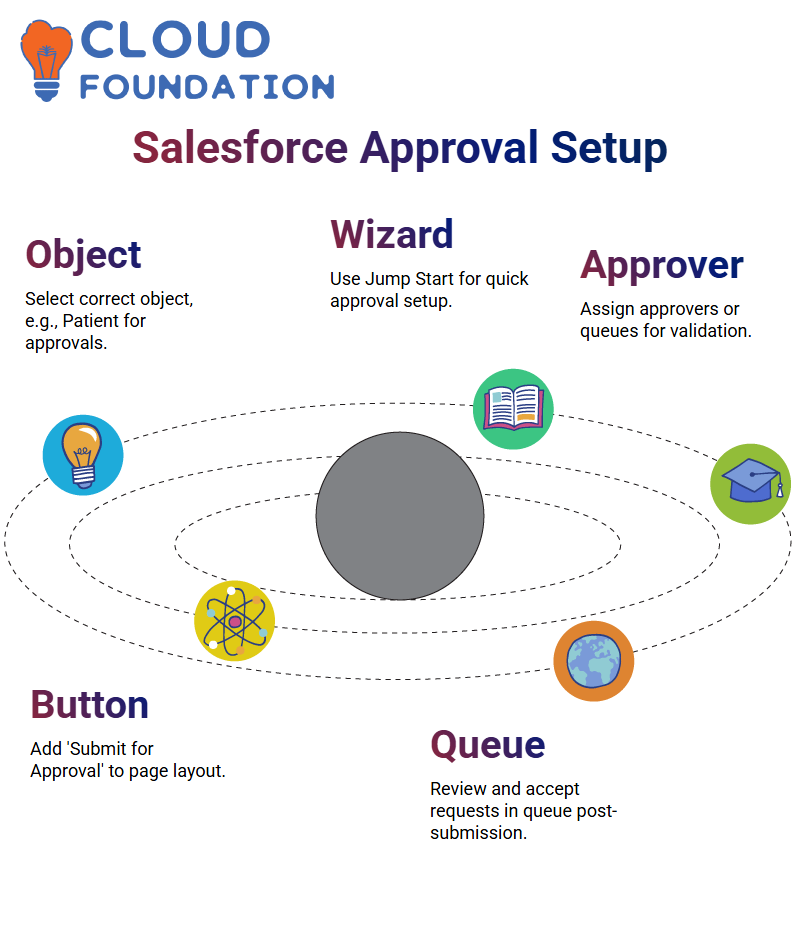
To set this up in Salesforce Admin, navigate to the Approval Process section and select the Patient Detail object as your object of interest.
Next, use the Jump Start Wizard for a quick setup process. Name this process “Approve Inactivity” with criteria that trigger when the status is set to Inactive.
Since it was working solo, I assigned myself as the approver (in an ideal world, this would be done by managers or supervisors).
Defined an approval action to update ‘Inactivity Approved’ checkbox; once everything had been set up, activated the approval process – simple.
Real-World Use Case for Approval Flows in Salesforce Admin
As an engaging way to make these concepts relatable, imagine organisations seeking approvals on expenses or timesheets before sending out invoices or timesheets for approval from managerial levels.
Salesforce replicates this through an approval process; our healthcare project included adding an ‘Inactivity Approved’ field to patient records, which determines whether an individual with an inactive status remains eligible for hospital services.
As soon as a patient becomes inactive, their record must be reviewed, and higher management must approve this inactivity before the patient’s checkbox is unchecked.
As a Salesforce Administrator, I designed a flow that triggers an approval request when their status changes; once approved by higher management, the checkbox gets checked automatically—an elegant solution driven by an approvals process.

Salesforce Training
Creating the Approval Process from Scratch in Salesforce Admin
When working as a Salesforce admin, always select the correct object — in this instance, “Patient.”
There are two configuration styles offered by Salesforce-Jump Start or Standard Setup configuration styles–if quickness and efficiency are essential, use Jump Start; otherwise, use Standard Setup; in either instance, prefer Jump Start when creating quick processes such as an approval process named Approve Inactivity, where its trigger criteria would simply be when patient status becomes inactive.
As part of my demonstration, I designated myself as an approver just for demonstration purposes. Salesforce Admins can easily assign approvers to users or queues; process creation is intuitive if you’ve ever built workflows. Once created, approval actions could be added.
 In my case, as a Salesforce Admin, I needed an action that updated fields after approval (an action that marked the Inactivity Approved box was added as required).
Submit a record for approval in Salesforce
The process of manually submitting records for approval. A Salesforce Admin should add the “Submit for Approval” button to the page layout, allowing users to click it and leave comments that guide the approver.
This process was demonstrated using patient records that had been inactive for a year, and a note was included when they were submitted for review.
Once activated, however, the approval process went smoothly: checking the queue, finding and accepting the request, and then updating the patient record checkbox automatically Salesforce Adminship, which seamlessly links user actions with backend automation processes.
Flow Automation in Salesforce Admin
After mastering the approval process, I moved on to using flows in Salesforce Admin. My initial scenario involved assigning a default source value when new records with active statuses are created, using record-triggered flows for this purpose.
Salesforce Admin offers four types of flows: record-triggered, auto-launched, screen, and scheduled.
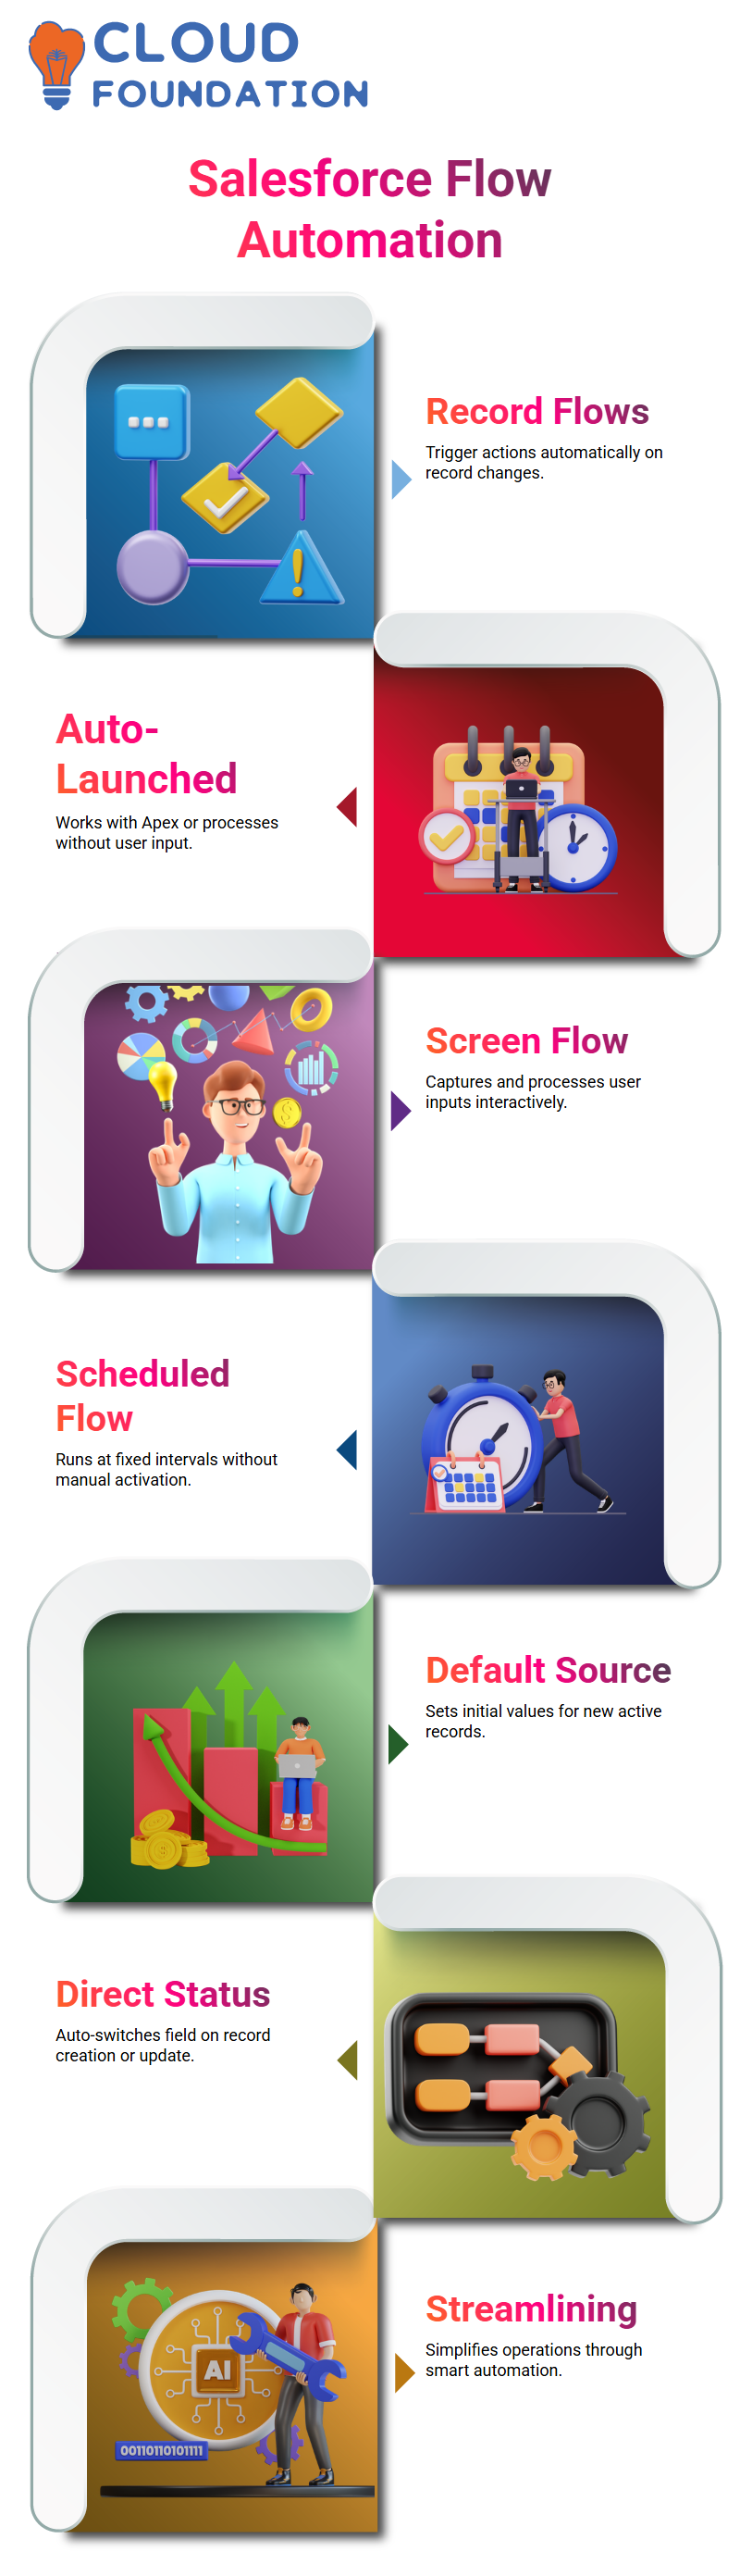
We chose record-triggered because we wanted our flow to react immediately when changes occur in records, similar to how workflows and process builders work, but with greater flexibility and power.
The Right Flow Type in Salesforce Admin
Selecting the appropriate flow type in Salesforce Admin is key for successful implementation.
Record-triggered flows are ideal for responding to changes in records, while auto-launched flows excel when called from Apex code or process builders. Screen flows facilitate user input scenarios, and scheduled flows can run at set intervals without requiring user intervention.
As part of my use case, I needed a record-triggered workflow: when records with active statuses are created or updated, my source field should automatically switch to direct status.
The powerful automation features available in Salesforce Admin, streamlining operations becomes effortless.
Record-triggered flows in Salesforce
As a Salesforce Admin, you may use flows to streamline processes. Begin by choosing a record-triggered flow; Patient Detail records would make an ideal target, with this one needing its status set as “active”.
Once the record fulfils an entry condition, use either Fast Field Updates or Action and Related Records as appropriate to update fields directly within it.
Since I’m making updates directly on one record here, Fast Field Updates would work better as this assignment logic sets the source value to “Direct.” Finally, name this assignment “Set Source” before linking accordingly.
Step-by-Step: A Salesforce Admin’s Flow Execution
Once your flow is ready, activate it and switch over to Process Builder as a Salesforce Administrator. Create the process so that it triggers upon the creation of a Patient Detail record with an active status.
Link this process by changing the record ID variable accordingly and linking the flow by setting the record ID variable to equal the actual record’s ID value.
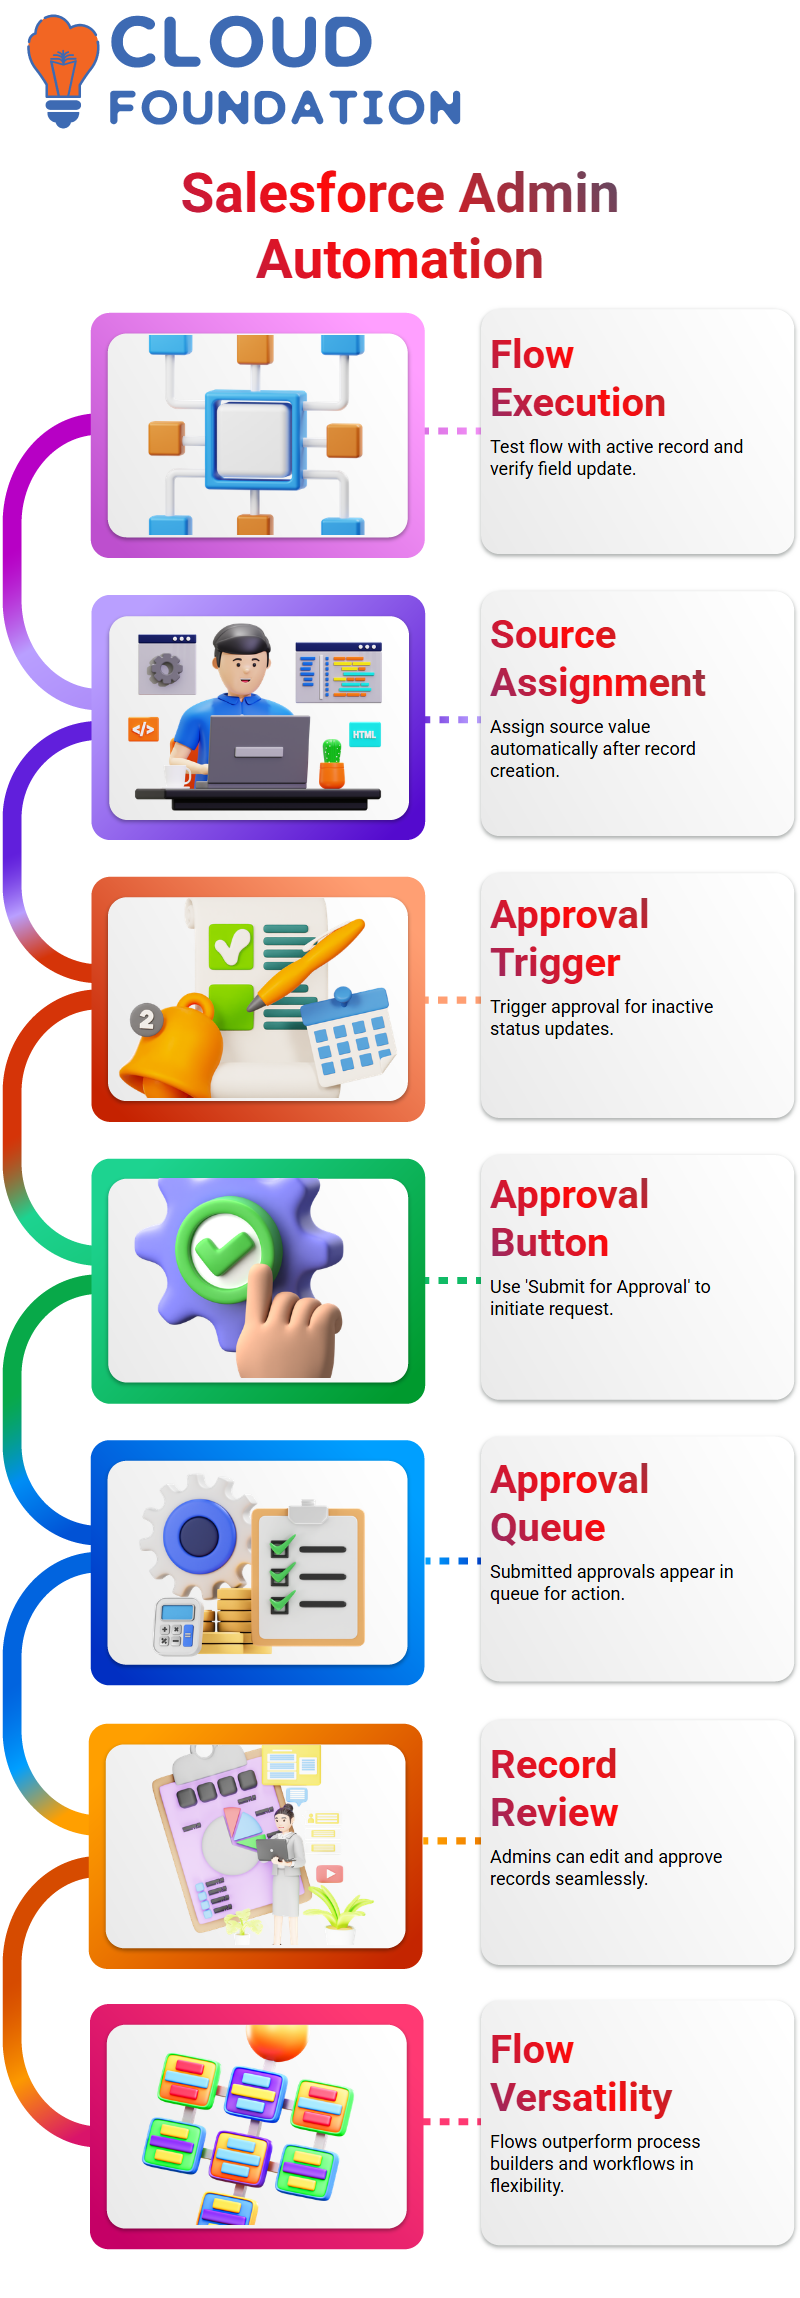
After activation and testing have confirmed that the source updates are as expected, you now have greater control over process automation as a Salesforce Administrator.

Salesforce Online Training
Using Auto-Launch Flows with Process Builder in Salesforce Admin
As another way to explore this idea, link the process builder with auto-launch flows. As a Salesforce admin, design a flow to update records based on their status.
The Process Builder then passes along this record ID for further action by the flow. Assuming my flow is called by the Process Builder, the first step should be to create the flow itself.
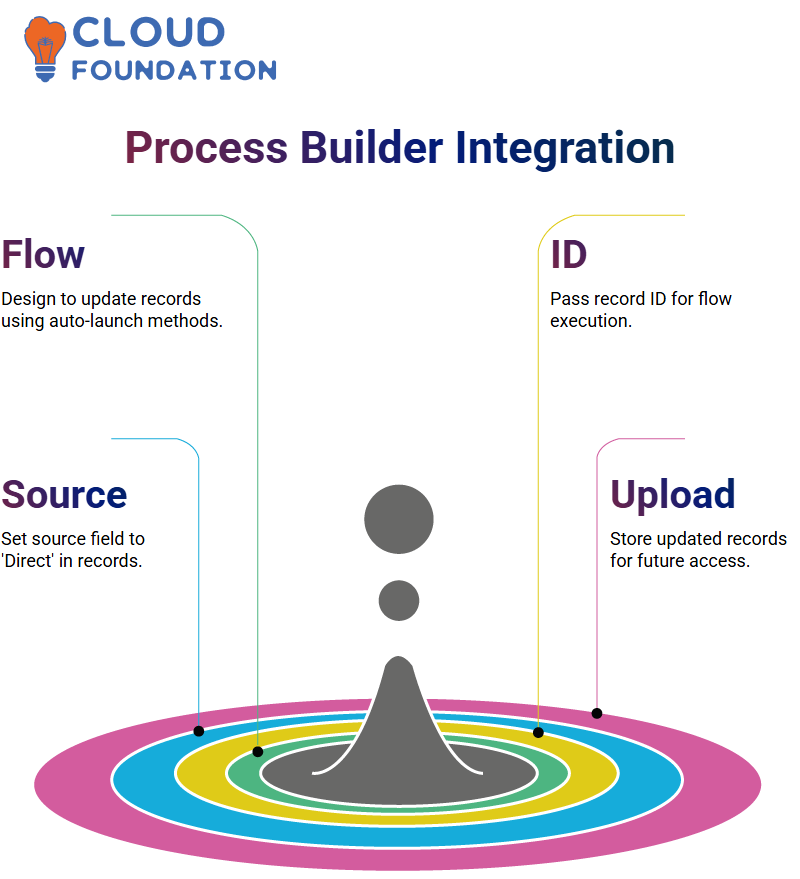
Then, define an array named Record ID that holds the values as they come in, before using an Update Records element to set its source to “Direct”. Once found using its ID, use an “Upload Records” element to save its information to storage for later.
Automating Approval with Process Builder in Salesforce Admin
As a Salesforce Administrator, It recognised the benefit of automating operations as another layer of efficiency.
Therefore, it implemented Process Builder to automatically submit records for approval with certain conditions, which, when met, will trigger approval without user intervention.
Manual or automated approvals depend on business requirements. If comments need to be dynamic and user-specific, a manual approach is best; otherwise, for standardised messages with repeatable use cases or processes, Process Builder could be more suitable. As a Salesforce Administrator, you should balance both options depending on client expectations.
Implementing Direct Field Updates in Salesforce Admin
After saving your flow, test it by creating a record with an active status, assigning a membership ID and email, and then verifying that when you save, it changes to direct.
This illustrates the versatility and power of using flows over process builders or workflows in Salesforce Admin.
Even when selecting different source values, thanks to the record-triggered flow setup. As a Salesforce Administrator, this procedure should prove quick and effortless.
Testing the Salesforce Admin Approval Workflow
It established an approval process in Salesforce Admin and tested it by marking one patient as inactive.
It added a “Submit for Approval” button that agents could use after changing statuses to submit requests directly for approval.
Review, edit, and approve – this seamless flow demonstrates Salesforce Admin’s power in automating business logic and approvals.

Salesforce Course Price

Vinitha Indhukuri
Author