Netsuite Suiteflow – The only suitflow you need
📣 2786 Participants |🎓 1908 Reviews | 4.9 ⭐⭐⭐⭐⭐
NetSuite Flow
Suite flow/ Workflow???
Suite is a tool designed to facilitate and automate business processes that require tasks to perform by people.
It ensures the right work is brought in the right sequence at the right time to the right people.
Why do we need Workflow?
Workflow can be used to automate the following process.
- Custom approval routing
- Apply validation
- Send emails
- Create related records
- Direct the tip user to acceptable forms within the interface and lots of a lot of.
Creating a Workflow in NetSuite:
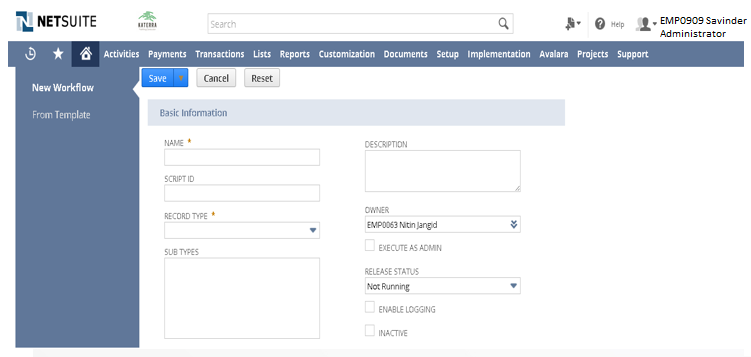
- In NetSuite, go to Customization >Scripting>workflows>New.
- The workflow definition page will appear like below
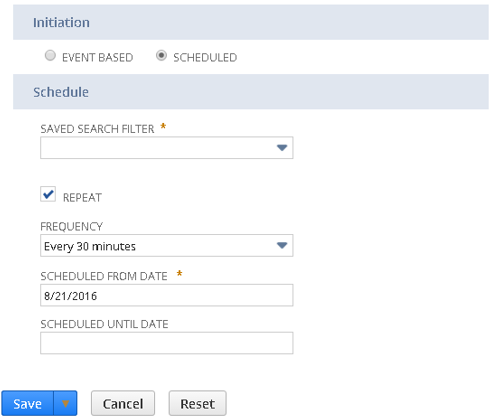
On the same page we can see Initiation, hear we can see two types:
1. Event-Based.
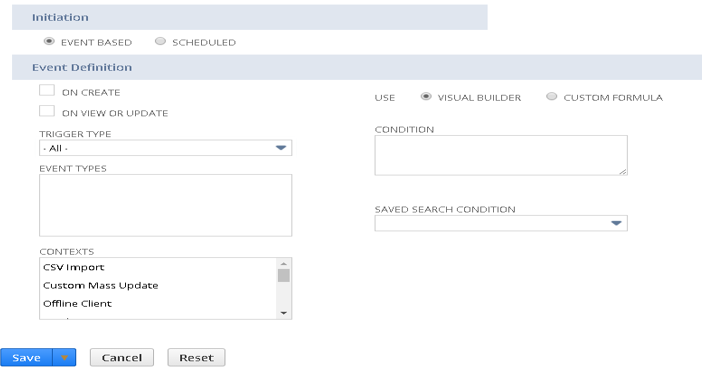
2. Scheduled.
- On the workflow Event definition page, make sure the Visual Builder is checked and click the button to open the Condition Builder.
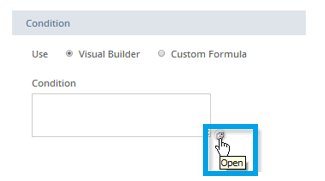
- The Workflow Condition window appears.

- The Workflow diagram and context panel appears.
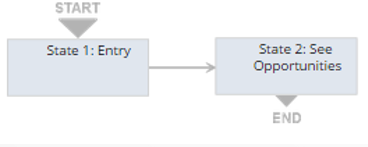
Create Workflow states:
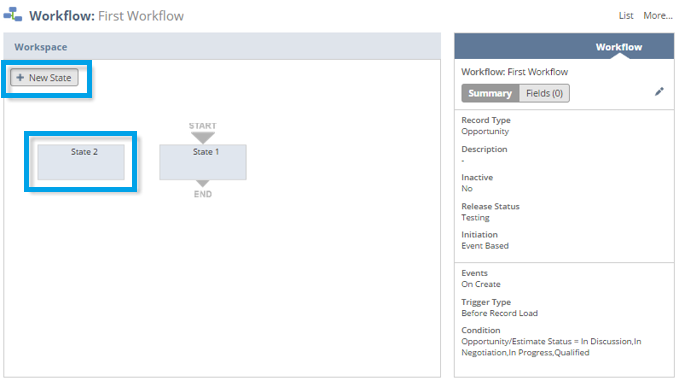
- The Workflow enters these two states when it keeps running on a chance.
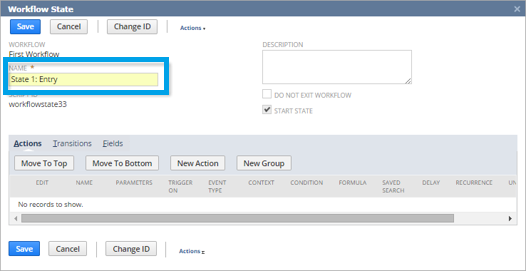
- To change the name of the State 1, double tap the state in the diagrammed.
- In the Name box of the Workflow State window that shows up.
- Change the name to State 1: Entry and snap Save.
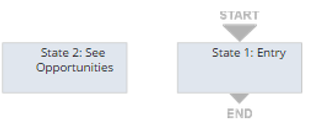
Repeat the same step for State 2: “See Opportunity” and verify in workflow.
Create Actions:
This progression demonstrates to you proper methodologies to utilize the Workflow State window to add activities to a state.
The impacts added to the states execute as indicated by their triggers when the record enters the state in the work process.
In this progression, you include a Set Field Mandatory activity in
- State 1: Entry and a Go To Page activity in
- Step 2: See Opportunities.
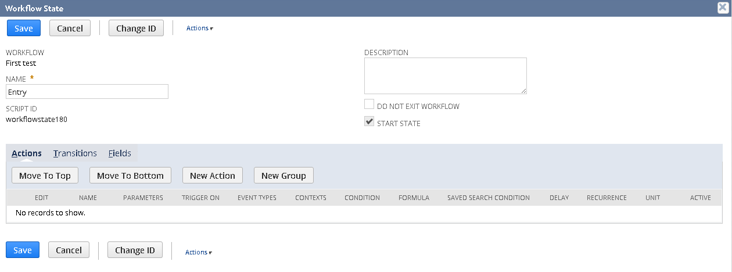
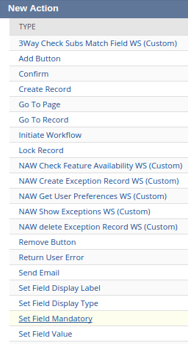
- Click on the New Action button, a new action window appears. There select “Set field mandatory” link.
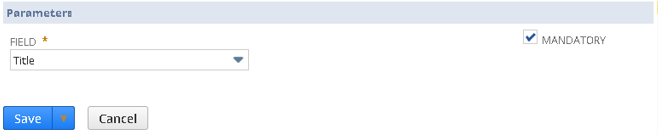
- After selecting Set field mandatory, a new window will appear their select parameter as “Title” and check the Mandatory field and click on save.
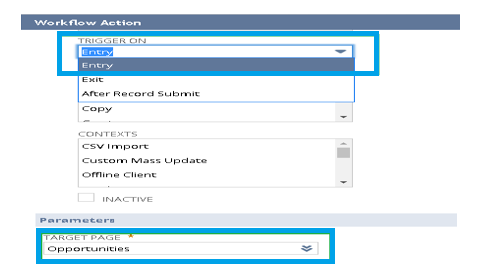
- And repeat the same step for State 2 with new action as “Go To Page” link and select trigger type as “Entry” and parameter as Opportunities.
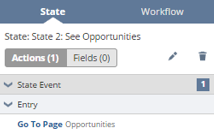
- Verify that the action in the context panel.
Create Transition: Here we can get to know how to create and edit a transition.
- You can utilize the diagrammer to move a change among states and after that alter the progress properties. Any progressions made in the diagrammer are instantly spared.
- In this progression, you make a change between State 1: Entry and State 2: See Opportunities that executes after an open door record is put something aside out of the blue.
- In the diagrammer, drift over the End symbol on State 1: Entry. The cursor turns into a filled half-circle. Drag and drift over State 2: See Opportunities.
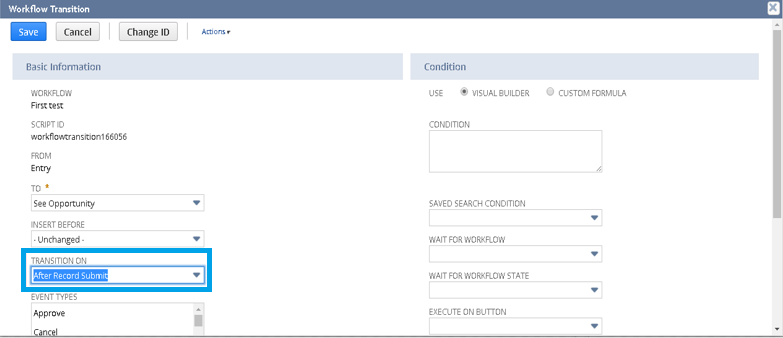
• Double tap the change in the diagrammer or select the progress in the diagrammer and tap the Edit symbol in the setting board.
• Workflow Transition window appears, in this window select After Record Submit for the Transition On property and click on save.
• Hence we created a workflow on an opportunity.
• After a user creates and saves an opportunity with a status of In Discussion, In Negotiation, In Progress, Qualified, NetSuite initiates an instance of the workflow on the record.
• On the Opportunities list page, open the recently created opportunity, click the System Information subtab, and then click the Workflow History subtab.
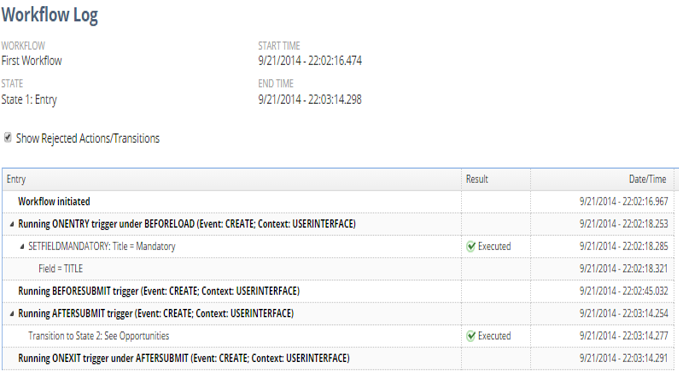
• The Workflow History subtab shows the two states for the workflow, the date and time each state was entered and exited by the workflow, and the workflow execution log for each state:

- Click the Log link for State 1: Entry. The workflow execution log shows the triggers, actions, and transitions executed:
Advantages:
- Workflow enhances the functionality
- It reduces our scripting effort and time.
- It helps to minimize the overloading of the system.
Disadvantages:
- In workflow line level items can’t be accessed.

Mahesh J
Author