JUnit Tutorial
What Is JUnit?
JUnit is an inbuilt unit testing framework created specifically for Java. As its default offering for unit testing purposes it makes JUnit part of any new Java installation and should not be overlooked!
JUnit can offer advantages when used for unit testing because its syntax echoes other testing frameworks.
Benefits of JUnit
JUnit is a versatile testing framework that enables developers to efficiently develop and test applications written using Java code.
With its comprehensive interface for testing purposes, developers can efficiently integrate their code into projects.
JUnit provides developers with annotations that enable them to understand the behavior of their code more readily, which makes JUnit one of its major benefits in unit testing in one step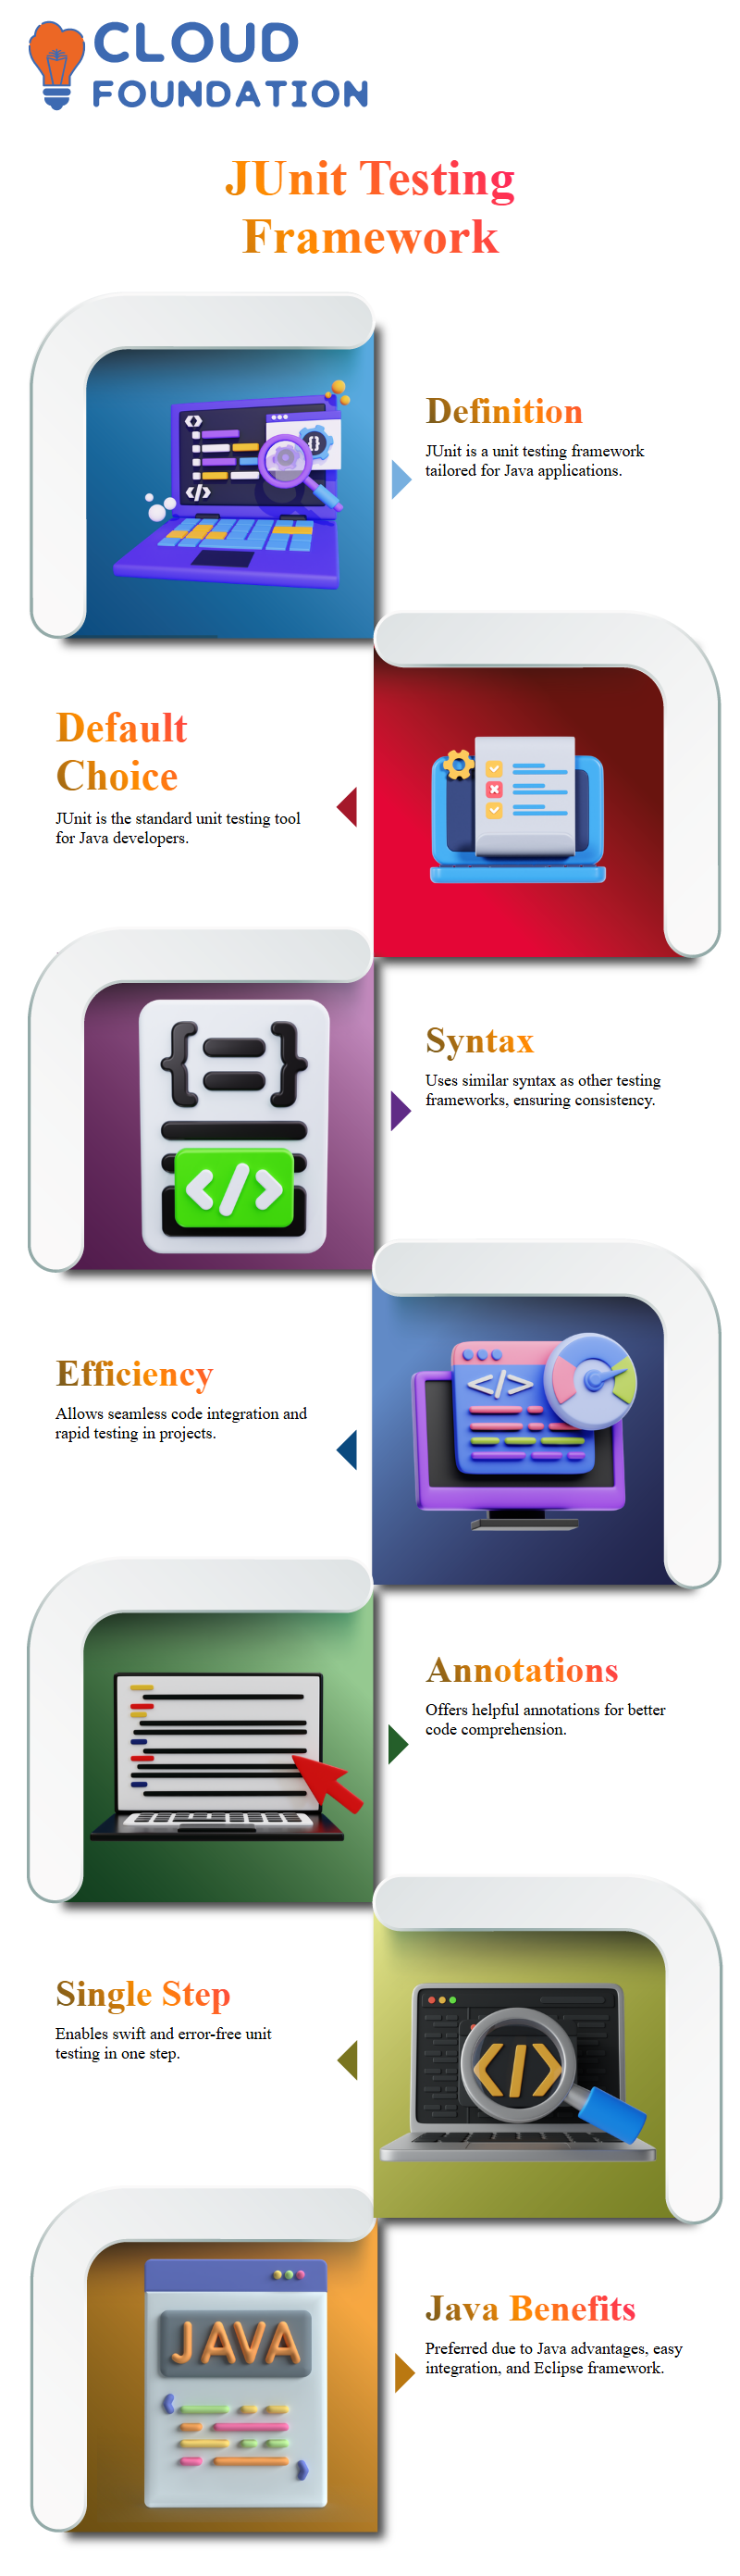
Developers benefit greatly from using Java programming languages due to its language advantages, integration benefits and Eclipse framework support.
They allow code testers to quickly and efficiently test code without worrying about syntax errors or other issues that arise in testing their code quickly and efficiently.
Its Many programmers often choose Java because of these advantages as well as Eclipse’s framework support.
JUnit has quickly become the de facto standard unit testing framework among software engineers.
Importance of JUnit Testing
Test cases must be run repeatedly until their response has been provided to ensure accurate testing results.
Unit testing can help quickly pinpoint defects early in development processes. Unit testing entails performing tests on small modules or pieces of code divided into smaller chunks for testing purposes.
Unit testing allows developers to detect defects early, without solely relying on bug detectors alone for feedback purposes.
This approach promotes more efficient and effective resolution of bugs and issues, including performance testing by our QA team and receiving feedback from developers themselves.
Furthermore, using an unit testing framework gives developers immediate feedback by running test cases as soon as they’ve been written up.
By providing easy and rapid feedback to developers, this enables them to identify various test cases and make informed decisions on whether their source code is functioning as intended or there are issues.
With timely bug identification and removal processes in place, developers can ensure their source code performs as intended.

JUnit Training
Troubleshooting and Effective Execution of Java Unit Tests
Effective execution of unit tests using JUnit can often become problematic due to failures caused by system incapacitation in identifying specific executables related to JUnit. For this purpose, effective troubleshooting strategies need to take place so as to successfully execute all applicable unit tests for maximum results.
Executable files include functions, methods and libraries. To address these issues, the system has successfully corrected error in previous cases automatically. When conducting tests using this approach, right-clicking the Run button and choosing “Change Unit Test.”
Running tests has allowed the system to find unique perspectives; such as running perfectly while sometimes failing due to typographical mistakes.
The system has successfully identified these errors by employing its “assert equals” feature, by comparing two attributes of objects; when this comparison proves accurate, this indicates that their relationship is proper and two objects should remain linked as desired.
However, due to inadequacies of its system and failing to identify which Junit executables caused failures. To address this, multiple test runs have been run until one identifies JUnit-related executables as culprits of test failures.
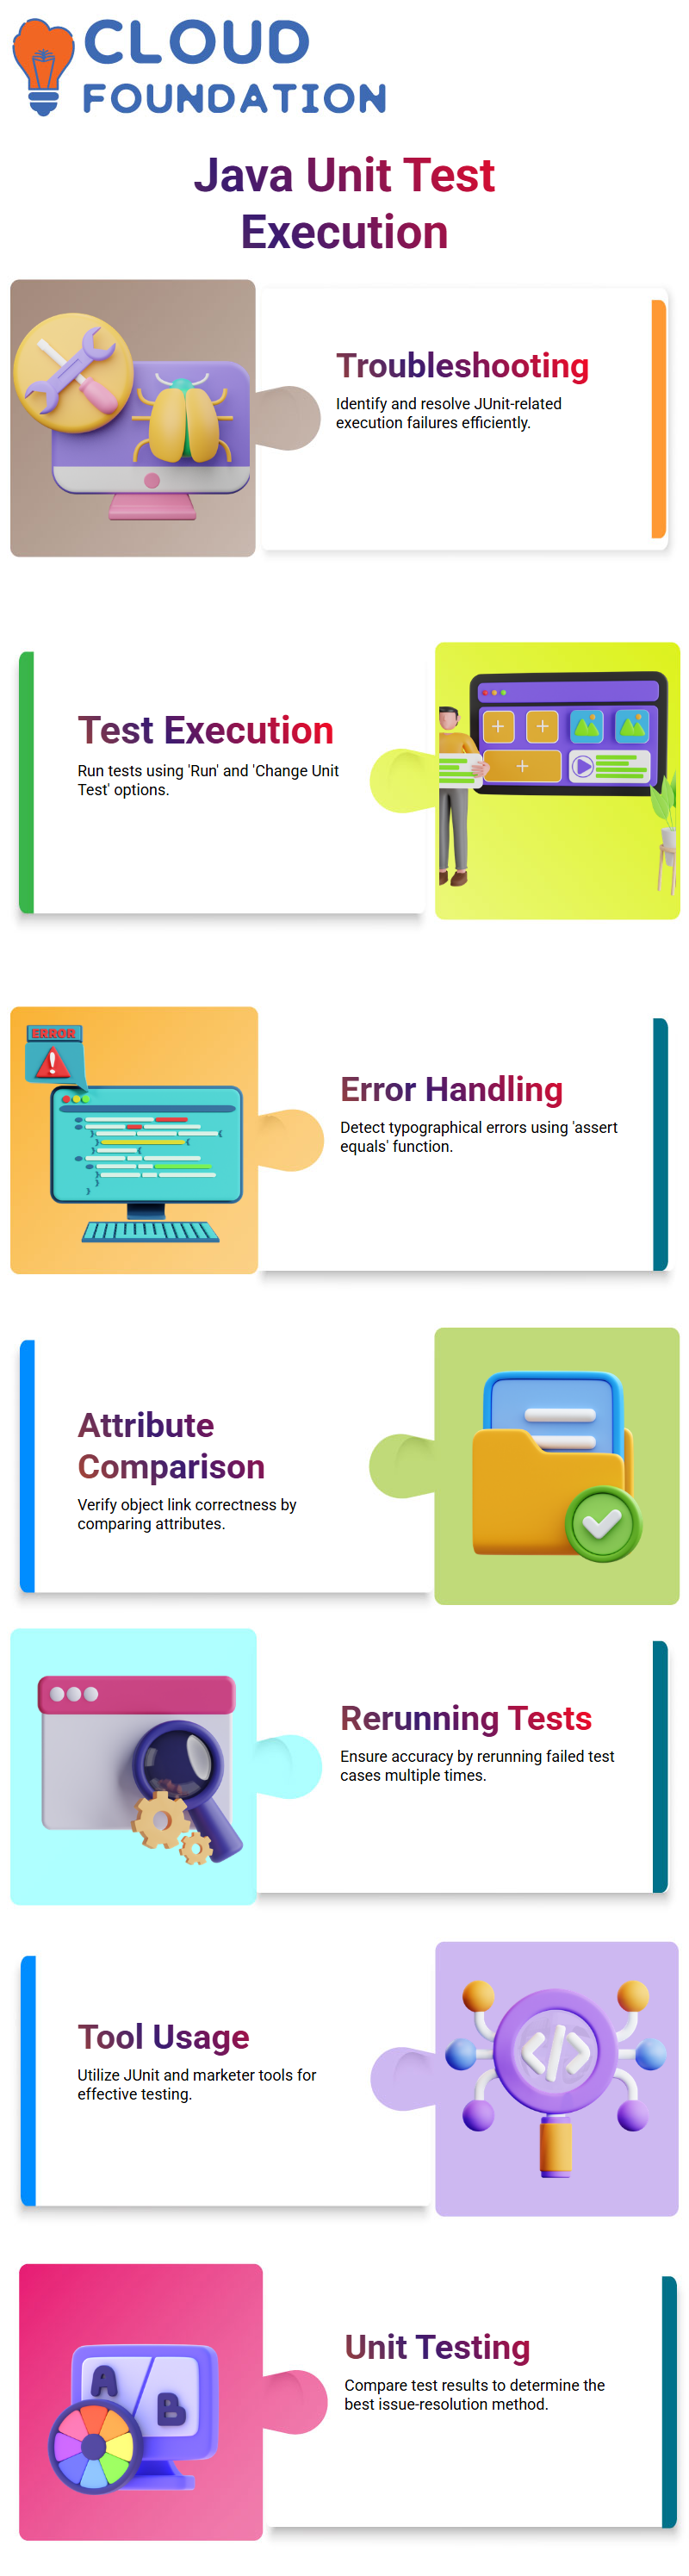
This approach has enabled the system to complete testing without encountering any errors or failures, with two attributes accurately reflecting both inputs and outputs produced, as well as any errors experienced during each run of test.
Errors that occur in test cases typically stem from some kind of error causing it. It could also be related to test execution itself or even just its general functionality in general.
To address these problems, it’s vital that changes be rolled back and rerun test cases to verify everything is running as it should.
This ensures a seamless execution within the overall mechanism allowing systems to be put into action.
When running test cases, it is essential to know how to utilize both Marketer and JUnit tools properly. Marketers use Marketer while JUnit testing relies on JUnit; both can be utilized for unit testing; however, understanding its definition first will make unit testing much more productive.
Unit testing is an increasingly prevalent testing practice across various industries and forms an integral component of software testing.
By comparing results across tests to determine which one most effectively addresses an issue at hand.
Automated Testing
Automated tools can be programmed or scheduled for automatic execution at regular intervals to perform tests in non-interactive fashion and complete tasks using their capabilities. Automated testing provides more efficiency and reliability compared to manual methods because its operation does not depend on human input or requirements.
Automated tools allow testers to write automated test cases which can then be executed using these automated tools without needing manual intervention or intervention from another person. With proper planning and management of automated tools, automated test cases may provide complete automation without requiring much human involvement at all.
Manual testing can be less reliable due to its dependence on one specific tester and time-consuming effort required for its execution.
Manual testing typically lasts eight or nine hours per day before becoming time consuming again.
Manual testing relies on one tester performing all testing themselves and can take more time, while automated test cases tend to be more reliable, since they don’t rely on human input for reliability.
These test cases can be run any time and from any location at your convenience – making them faster than manual approaches, as no human involvement is needed for completion.
Manual Testing
Junit’s manual testing approach provides developers and quality assurance professionals with an invaluable asset, helping them test source code much quicker than using automated methods.
However, manual testing processes require an installation of Junit that does not depend on any executable files or specific programs; rather, multiple jar files for every type and classpath need to be supplied with it.
Referencing JAR files when writing JUnit test cases is vitally important as this allows your team to run changes through test cases effectively and run changes faster. Without these reference jars, they won’t form part of your project and cannot run changes through tests cases effectively.
Maven builds automatically add these dependencies into a POM XML file; for Eclipse or other development environments, these must be added individually via these XML files.
Next, the jar files should be added into the class part of a project’s class library. This enables both JUnit jar files as well as their respective jar files from this release to be loaded at once. Installation process may seem straightforward; however, multiple steps need to be followed for success.
Before installing, the first two steps are to become acquainted with the demo and understand its requirements for Jar files. After installation is completed, create a JDK for the project by creating its JARs and Binaries.
It will then load JUnit jar files directly onto the classpath of the project and ensure their efficient load into JUnit itself.

JUnit Online Training
Steps for Integrating Java Files into Your Project
To integrate java files successfully in their project, the user needs to download and install two JAR files – JUnit JAR file for testing purposes, as well as Hamcrest Hyphen Code JAR file.
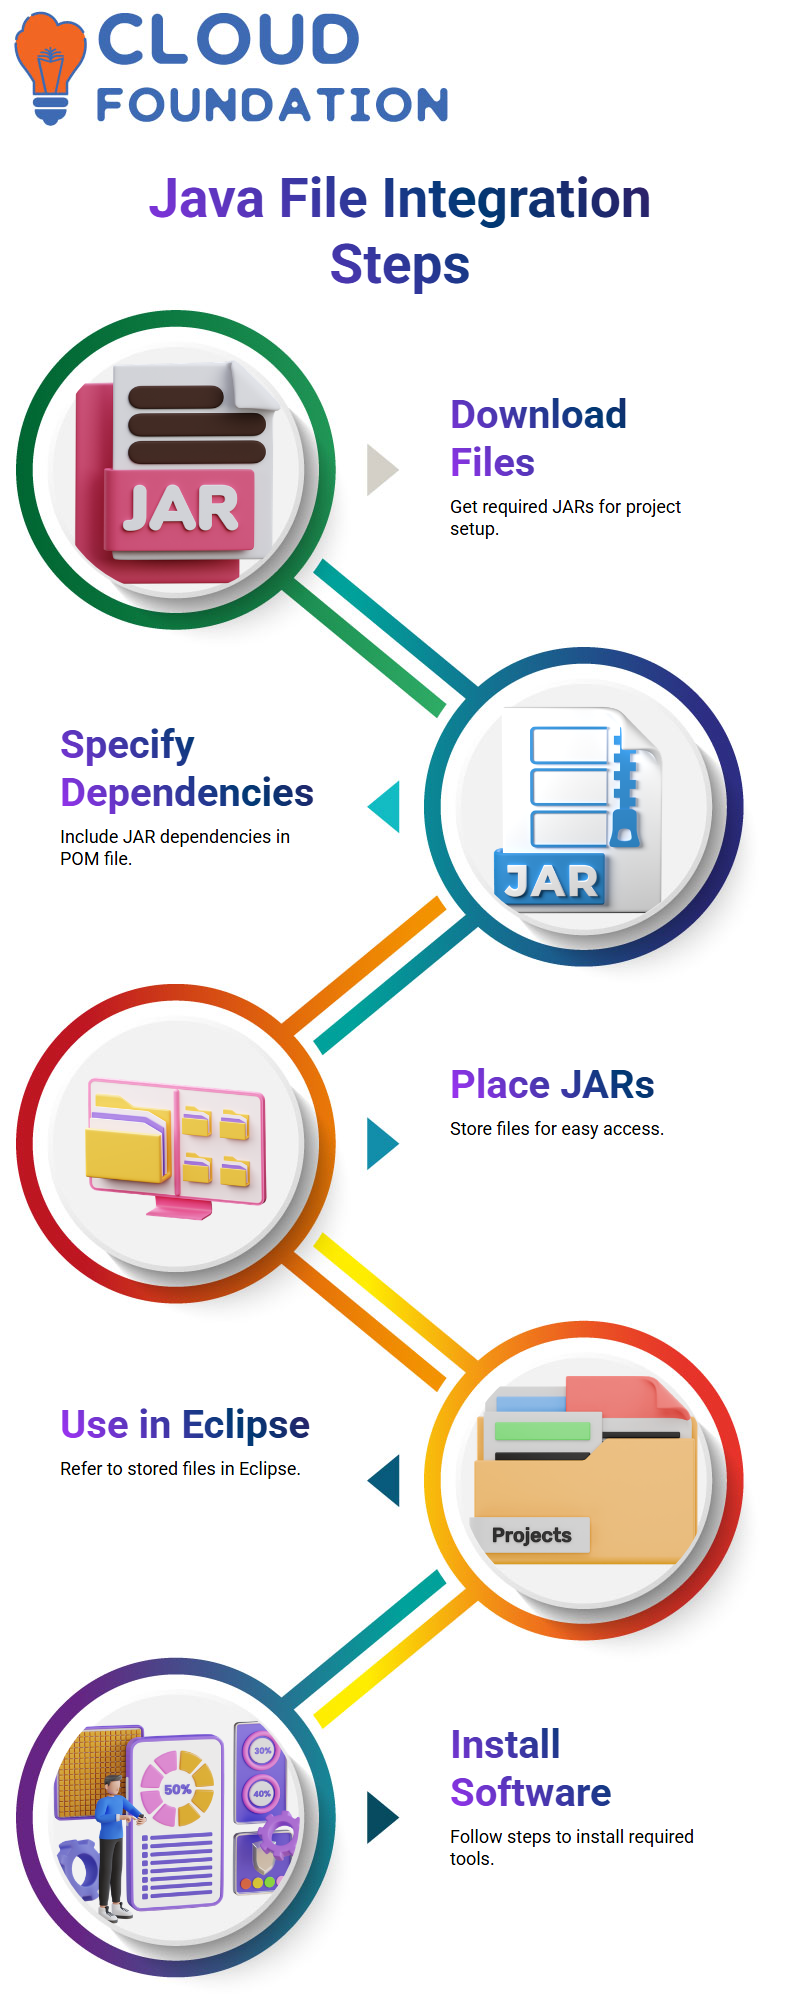
These files are necessary for downloading software into a test class, or specifying its dependency via Maven in POM files and reference it later via Palm files.
Once installed, users must place the necessary software and jar files in an accessible location so they can refer back to specific details stored in their store via Eclipse. They may then access them.
Users download Eclipse from Maven Central website in multiple steps.
Among those are searching for files needed, downloading necessary Java libraries, and installing necessary software packages.
Setting Up the Java 4 Library
The Java 4 library is an invaluable resource for building and testing Java applications quickly and effectively, with users being able to seamlessly integrate and test applications using JavaScript without hassle or delay.
Built upon Java 4 framework – which has become increasingly popular among developers – the library makes development and testing applications in this space much simpler than before.
As soon as you install Java 4 library, it will detect jar files without downloading them directly – they’re already there and installed into its directory!
Eclipse provides significant advantages when using Java 4 libraries; all jar files will automatically become part of each plugin’s path for accessing.
When selecting one or more Java libraries to import into your system, these jar files will also automatically get imported as part of that library’s functionality.
This allows you to add methods into the project that can then be executed as test cases to ensure seamless compatibility of your app with Java 4.
Initial setup requires configuring imports, annotations and specific JAR files.
Imports are configured with relevant annotations while certain JARs will automatically be added to your classpath allowing any downloaded Java files from other projects to be integrated with this project.
By adding additional files to the custom class path, you can also modify your build path for greater comprehensive and efficient applications.
Creating and Customizing Projects with Eclipse’s Pre-installed JUnit Plugin
Eclipse makes creating and customizing projects easier by including JUnit as part of its base software installation, providing access to its powerful JUnit plugin that enables creation and customization of projects quickly and efficiently.
To utilize it fully, right-click any part of the build path and choose “Configure”.
This will automatically include and configure the JF unit on the build path.
Eclipse provides users with the capability to easily import, remove and add JF units into their systems.
Utilising Eclipse offers additional benefits as it already includes Junit plugin support allowing customisation for individual versions that they may wish to include.
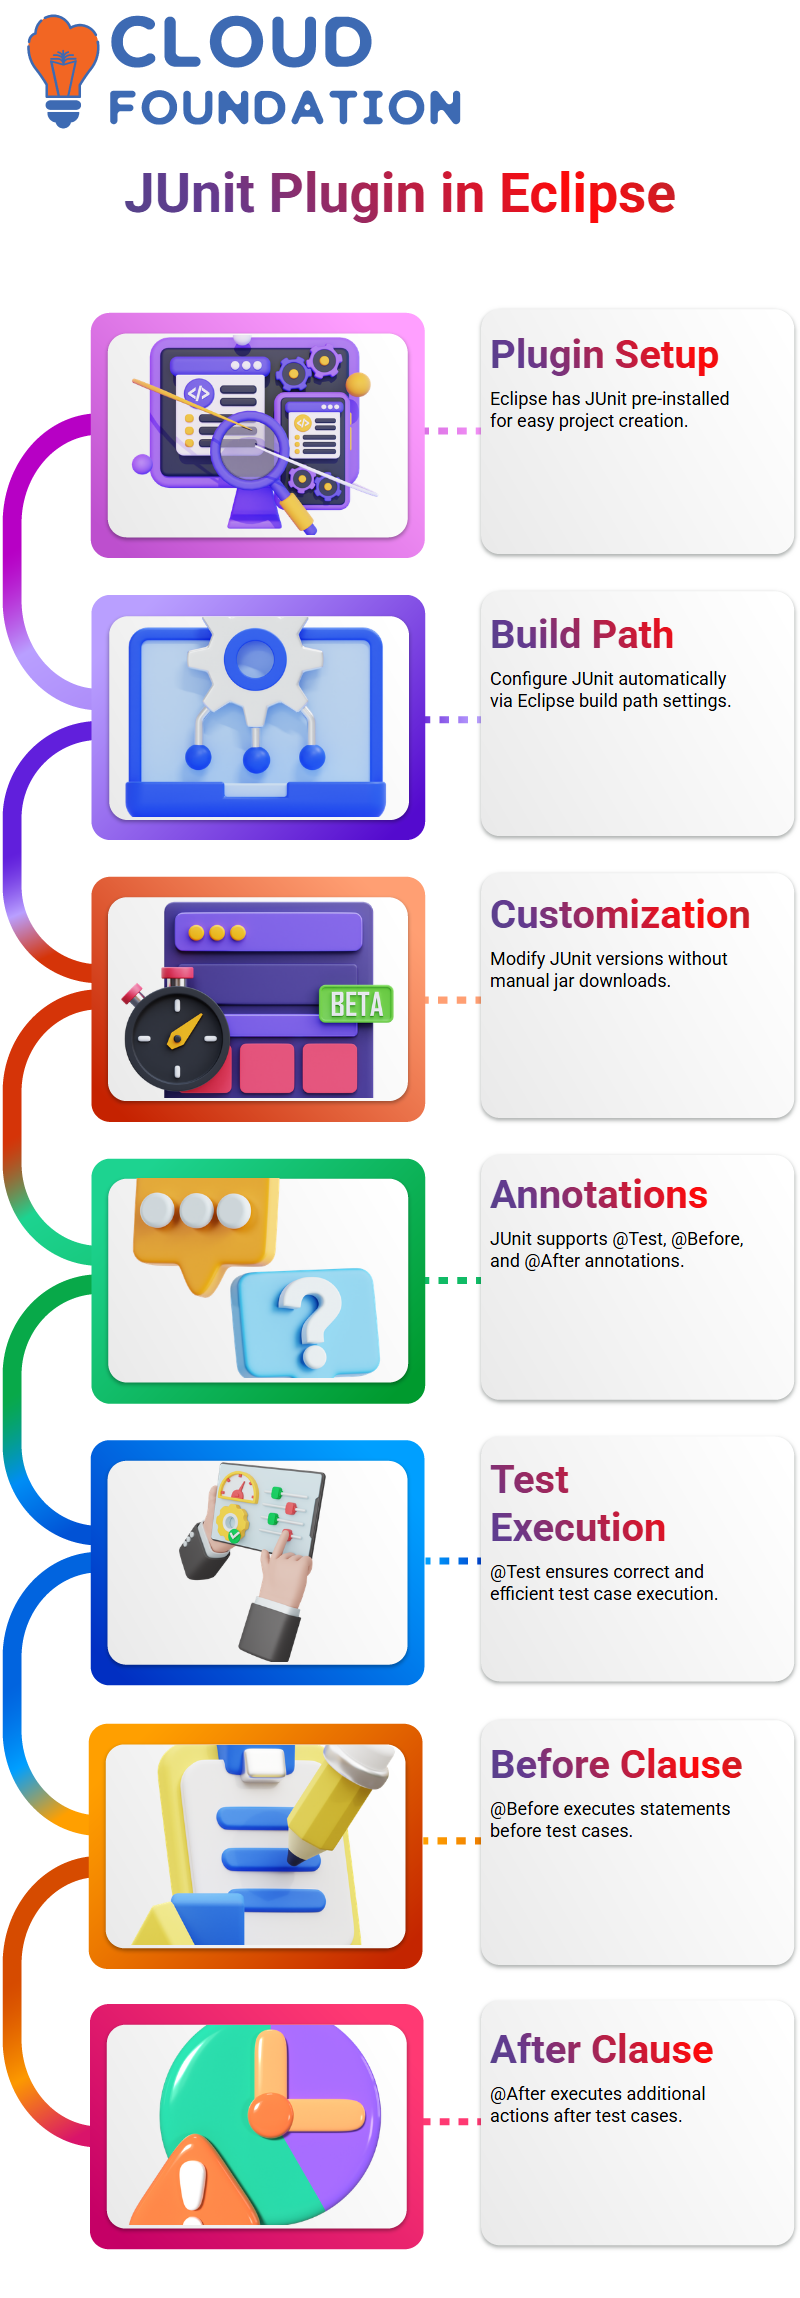
Users no longer need to manually download jar files as they will automatically be added into the build path or class path, providing for an effortless initial set up of Junit and creation of basic projects like Chair Unit.
JUnit Annotations
Junit features annotations such as @Test, @Before and @After that are most frequently employed during its tests cases. @Test plays an essential part in making sure each case runs correctly and efficiently – its presence ensures this.
@Test is more of a test method. Utilising @Test to run specific statements before each test case or run can ensure initial connectivity is also achieved through its use.
After running a test case, @Test can execute additional statements such as those you want performed post-execution of test cases. This allows for you to accomplish additional tasks or actions using @Test.
@Test’s After clause allows for you to execute additional statements after every test case, providing additional functions or actions with @Test. This feature helps facilitate additional tasks or actions with its help.
The @After clause of @Test annotation allows additional statements to be executed after test cases have run, providing more control for extra statements that need to be executed after running test cases.
As part of its function, @Before clause allows additional statements to be run before running each case while @After clause provides that extra boost of post-test statement execution.
Conclusion
JUnit plays an integral part of software development by offering an effective framework for unit testing in Java.
It simplifies testing, improves code validation efficiency and helps developers detect bugs early during development lifecycle.
JUnit annotations such as @Test, @Before, and @After allow for efficient test execution and management.
Furthermore, its seamless compatibility with tools like Eclipse simplifies test automation as well as manual testing processes.
Quickly running tests and receiving feedback enables developers to more quickly identify and resolve issues more quickly, ultimately producing higher-quality, more secure code.
JUnit offers both manual and automated approaches for testing Java applications to guarantee their correctness, making this an indispensable testing framework.
JUnit can easily fit into a range of development environments thanks to its ability to integrate with frameworks like Maven and execute test cases via command line or Eclipse, making it highly flexible.
JUnit provides developers with all of the tools needed to effectively develop, execute and troubleshoot tests; making their code robust for deployment in any production environment.

JUnit Course Price

Sai Susmitha
Author