Amazon EC2 Tutorial
📣 1340 Participants |🎓 822 Reviews | 4.7 ⭐⭐⭐⭐⭐
How to Create an Amazon EC2 Instance????
Step:1 To create Amazon EC2 Instance,
- Login to your AWS Management Console.
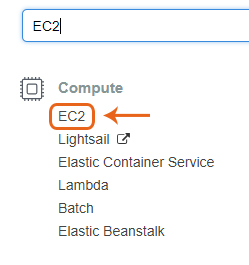
Step:2 Go to AWS Services tab at the top Search bar and type in EC2.
- Click on EC2
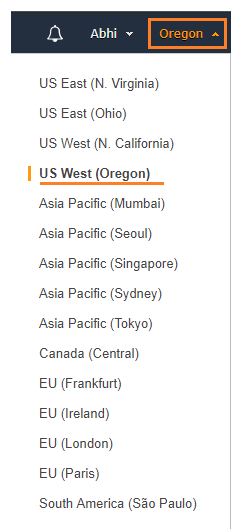
- On the top right corner choose the AWS Region in which you want to provision the EC2 server.
![]()
- Here, I’m selecting Oregon. AWS provisions 15 regions all over the globe.
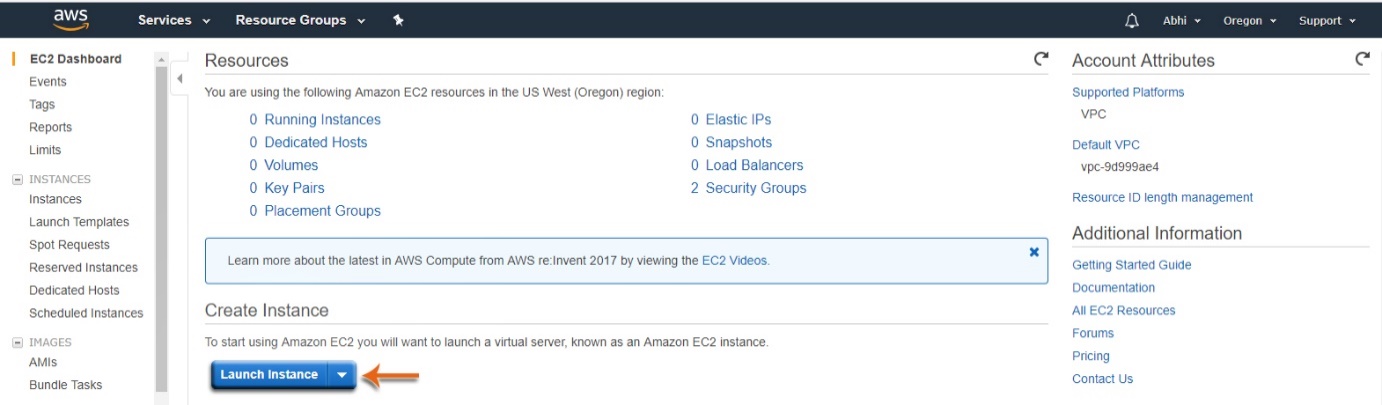
- Given below is the EC2 dashboard.
You are using the following Amazon EC2 resources in the US West (Oregon) region:

Step:3
Click on ‘Launch Instance’ button in the section of Create Instance.
Here we have 7 steps to create an EC2 Instance.
![]()
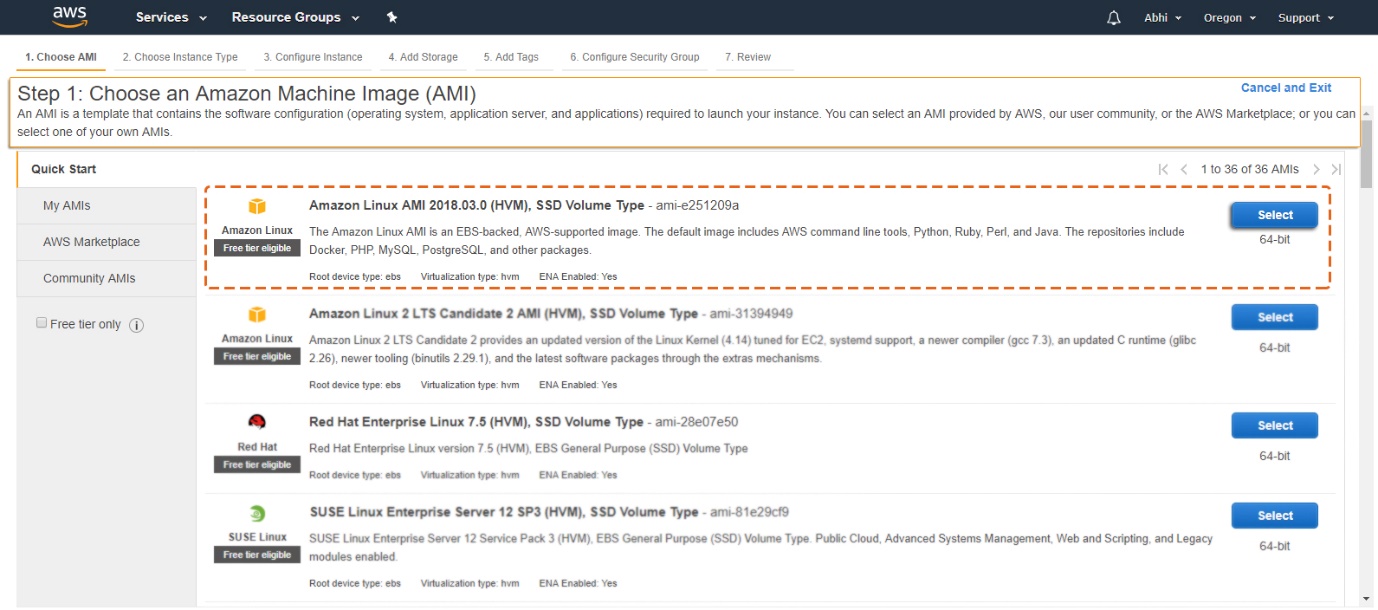
Step:1 Choose AMI
An AMI is a template that includes the configuration of the application server, operating system, and applications which are required to launch the instance.
Step:2 Choose Instance Types:
- Here you have to choose the type of instance you require based on your business needs.
- Currently we have chosen: t2,micro variable ECUs, 1 VCPU, 2.5 GHz, 1 GB memory, Intel Xeon Family, EBS only
- Click on Next: Configure Instance Details.

Step:3
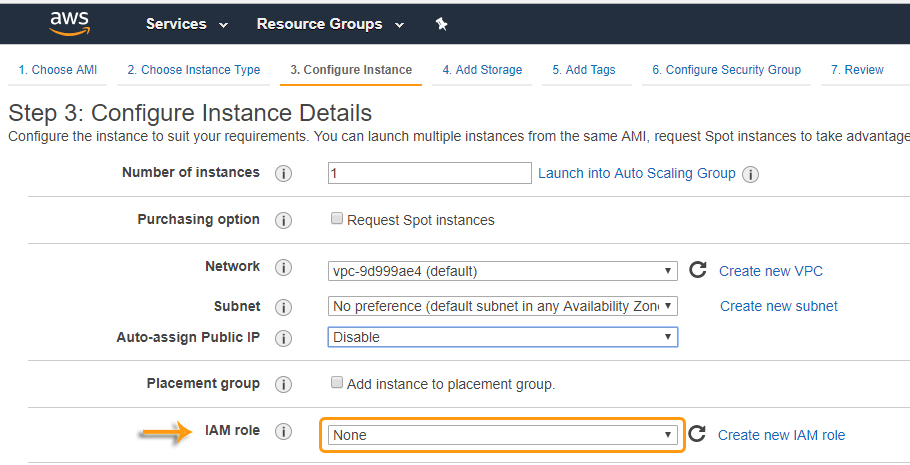
- In this Step you can configure the instance to suit your requirements.
- We have to start various cases from the AMI, request better instances to get an advantage of the lower price, and then provide an access role to the situation.
- Now we are launching one instance.
- Under purchasing option please unchecked the box Request spot instances.

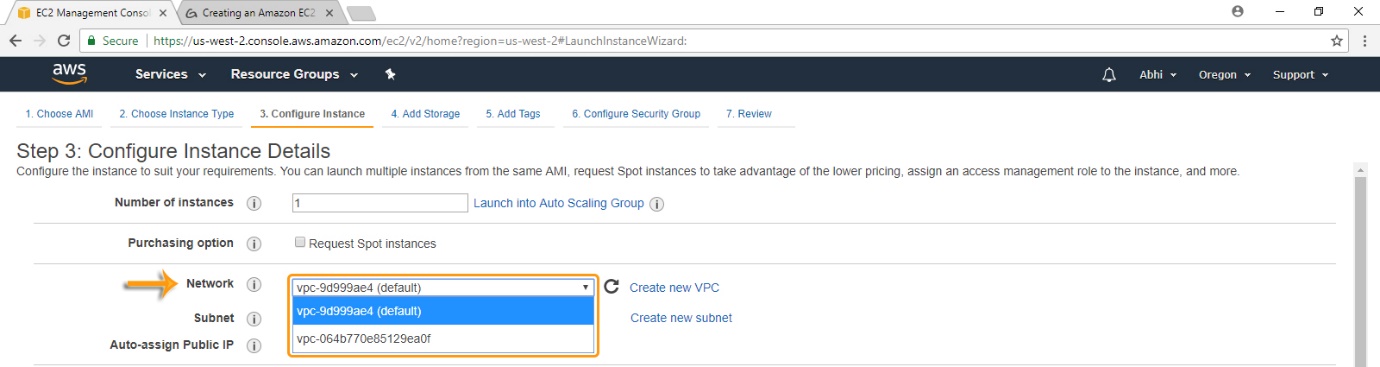
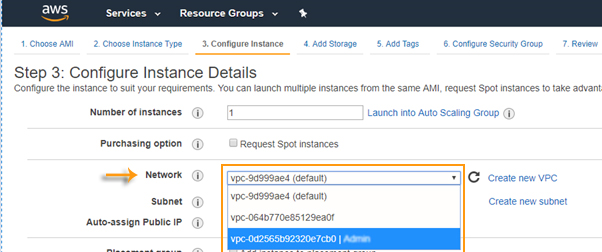
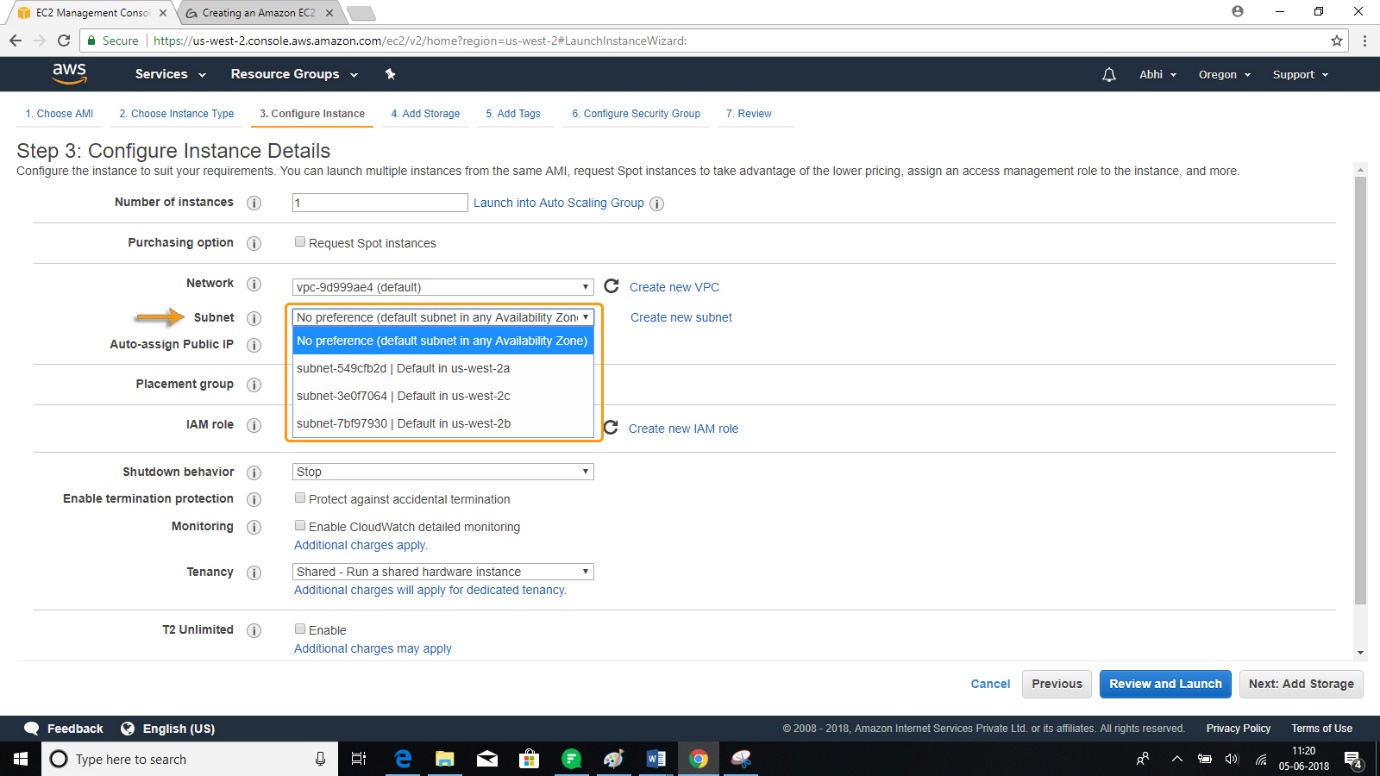
- Now, we have to configure basic networking details for the EC2 server.
- Here we need to decide, in which VPC to launch instance and under which subnets inside the VPC.
- Network section will give a list of VPCs available in our platform.
- We can also create a new VPC
- We can also select existing VPC.
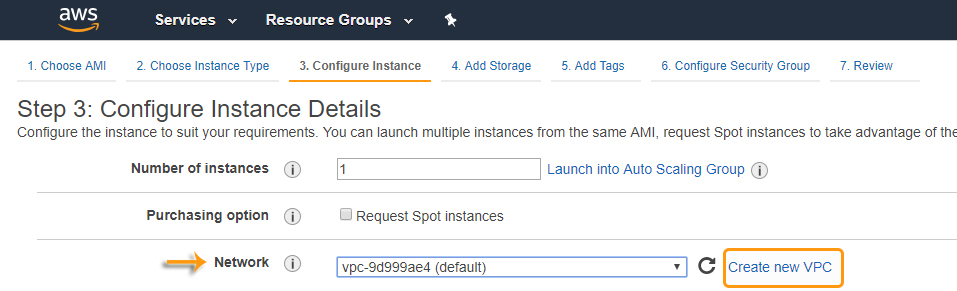
- Now you will see how to create a new VPC.
- Select Create new VPC.
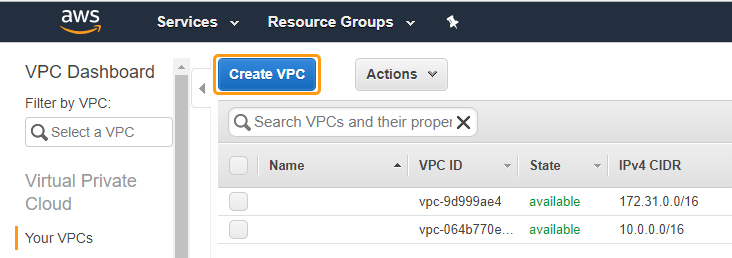
- Click on Create VPC
- Here it proves a pair of IP addresses in the field of IPv4 Class less Inter Domain Routing and then check IPv6 CIDR block.
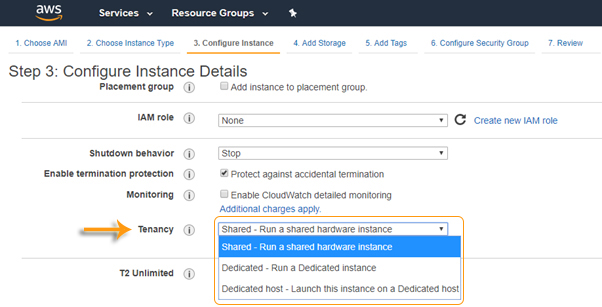
- Tenancy:
Default Tenancy: This is for running an instance on shared hardware and it is free of charge.
Dedicated Tenancy: This is for running our instances on single hardware.
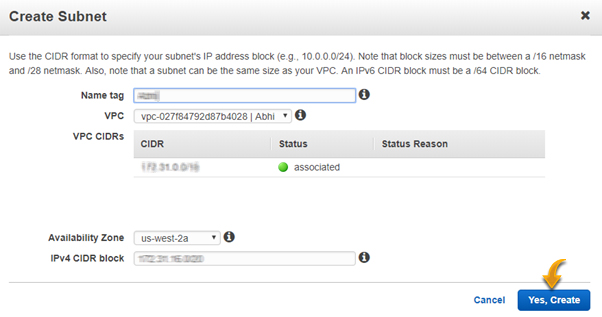
Specify the following VPC details and then click “Yes, Create”.

Note:
Here, we have particular blocks like Ipv6 CIDR block and Ipv4 CIDR block.
If we don’t specify Mandatory blocks, it will show error.
- VPC Created Successfully.
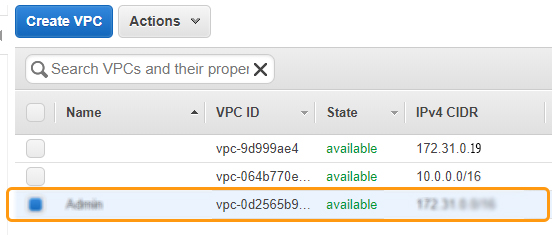
- Here, I have selected a newly created VPC.
- Basically, VPC consists of subnets, which have IP ranges are separated for restricting the access.
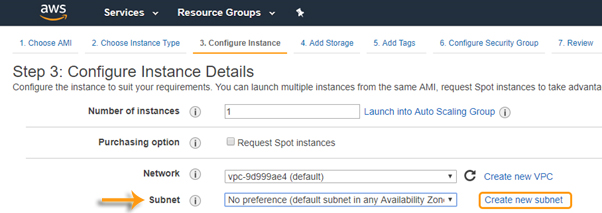
- Under Subnets, you can choose the subnet where you want to place your instance.
- You can also create a new subnet in this step.
- Also, you can choose an already existing public subnet.
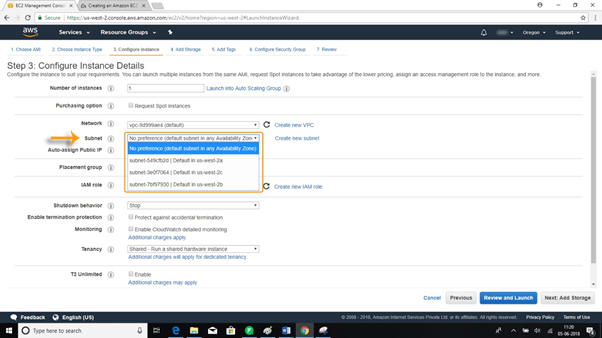
- Here I’m to creating a new Subnet
- Click on Create Subnet.
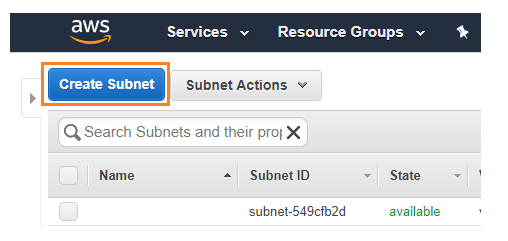
- Click on Yes, Create.
- Subnet created Successfully

- Select the Subnet.
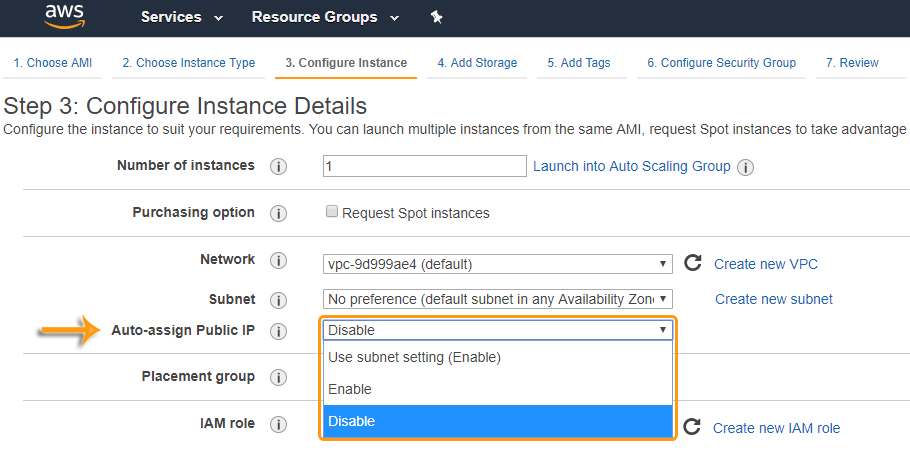
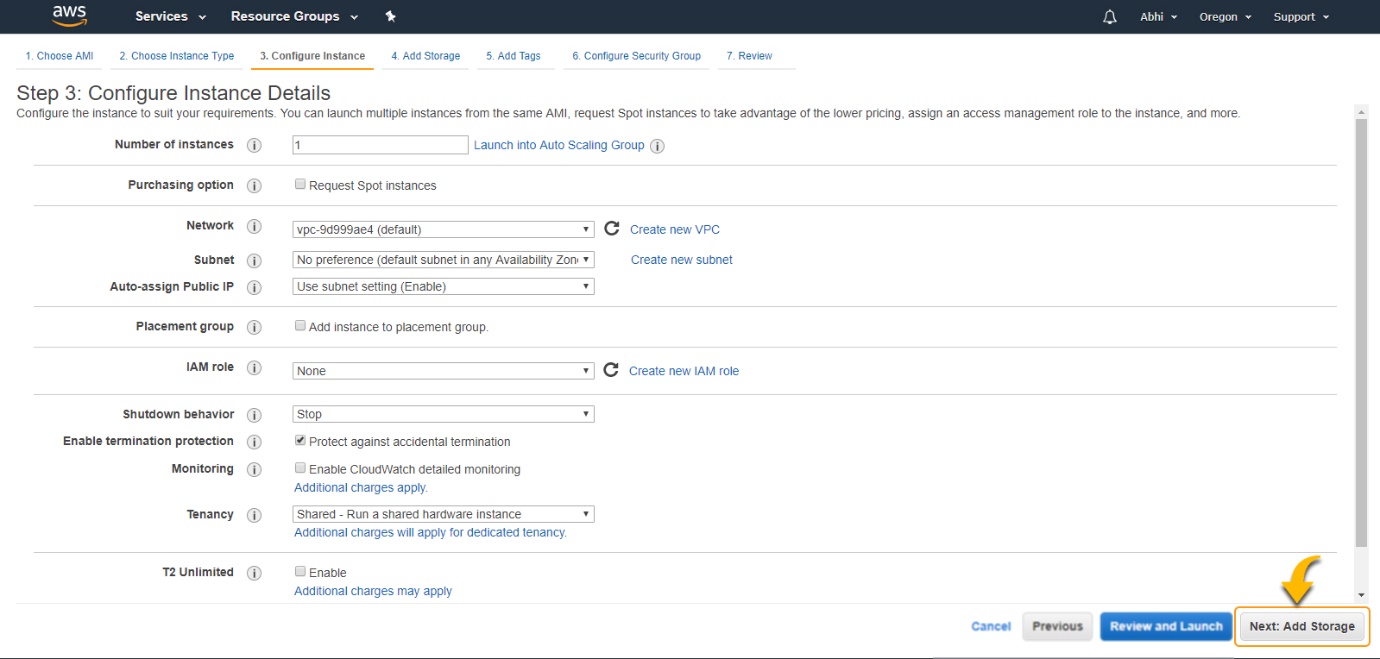
- Now we can choose AWS to assign an IP automatically, or we have to do it manually later.
- We can similarly enable or disable direct assign Public IP’..
- Now keep the option of IAM role as None.
- Shutdown Behaviour – when accidently shut down the instance, but doesn’t want it to be deleted but stopped.
- Here, I’m defining my shutdown behaviour as Stop.

- In case, we have terminated the instance, then AWS has a layer of mechanism.
- It will not be deleted the instance then, have to enable the termination protection.
- We have to check the option for protecting the instance from accidental termination, in the image shown below.

- Under Monitoring- we can enable Monitoring if our instance is a business-critical.
- By default, AWS will always provide basic monitoring on your instance free of cost.
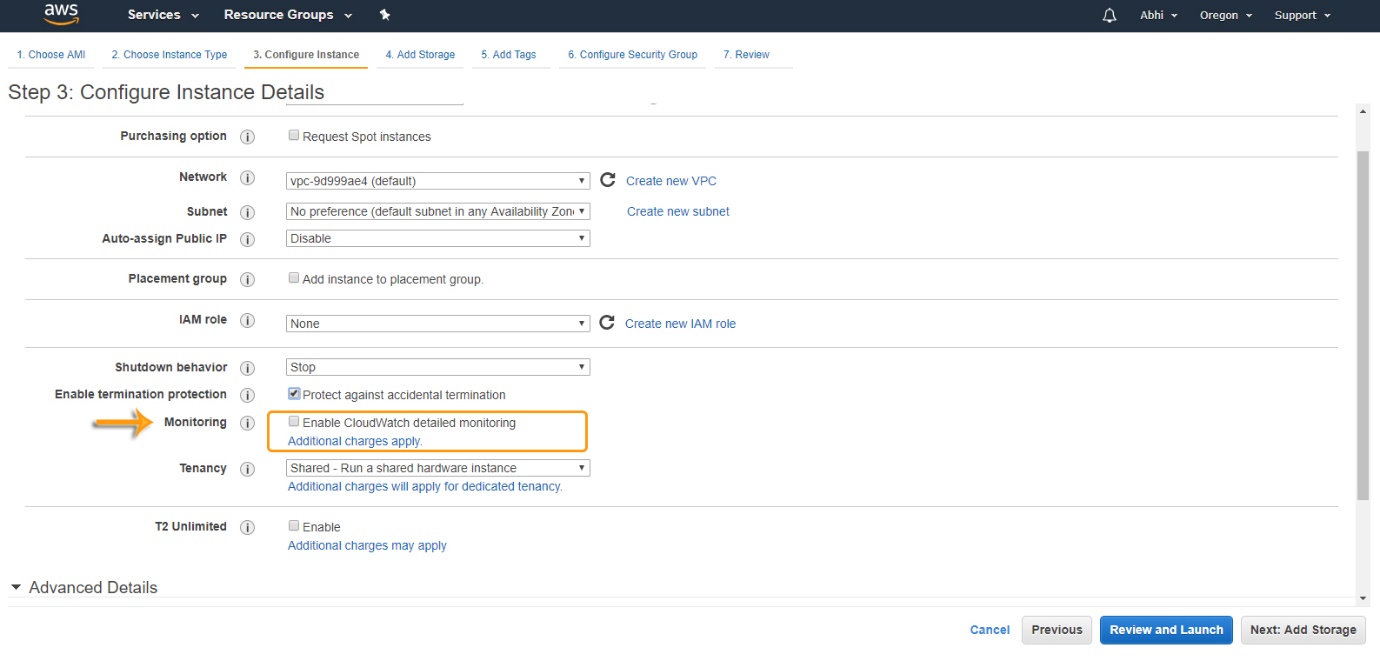
- Under Tenancy- select the option (if shared tenancy). If applications are highly secured, then we have to choose particular capacity. As AWS provides various options.
- Click on ‘Add Storage’ to add data volumes to your instance in next step.
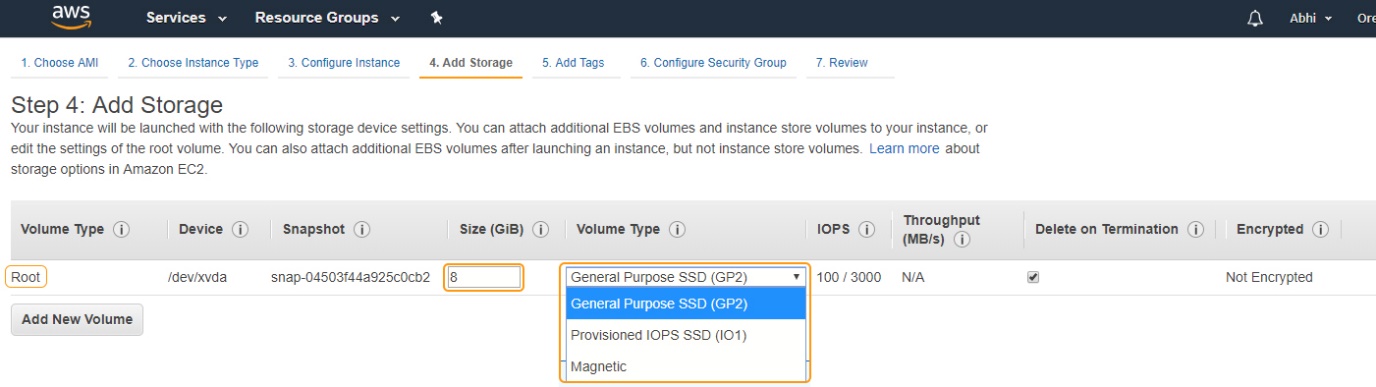
Step:4 Add Storage:
- The instance will be launched from the following device storage settings.
- From there we can add additional EBS volumes and store to the instance or edit the settings of the root.
- We can also attach more EBS volumes after launching the instance, but not instance will store the volumes.
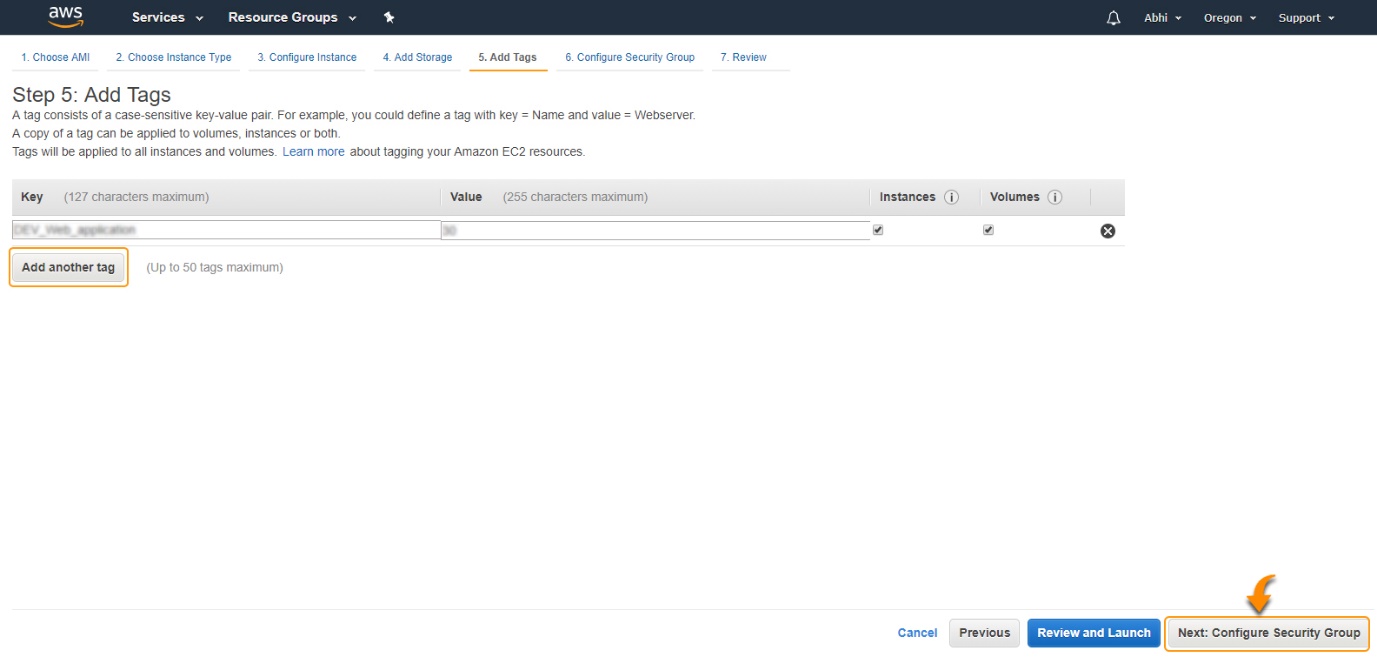
Steps:5 Tags
- A tag will have case-sensitive-value pair.
- A copy of a tag can be applied to volumes, instances or both.
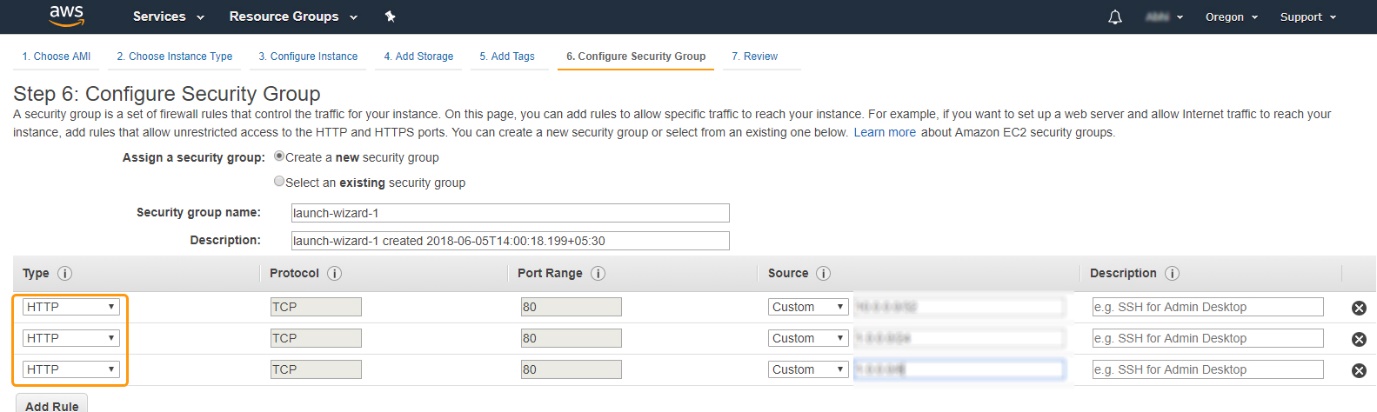
Step:6 Security Group
- A security group is a set of firewall rules that control the traffic for your instance.
- Here, we can add commands to allow specific traffic to reach our instance. For example,
- If we would like to set up a server and to enable Internet traffic, and add rules that allow unlimited access to the HTTPS and HTTP ports.
- We can create a new security group..
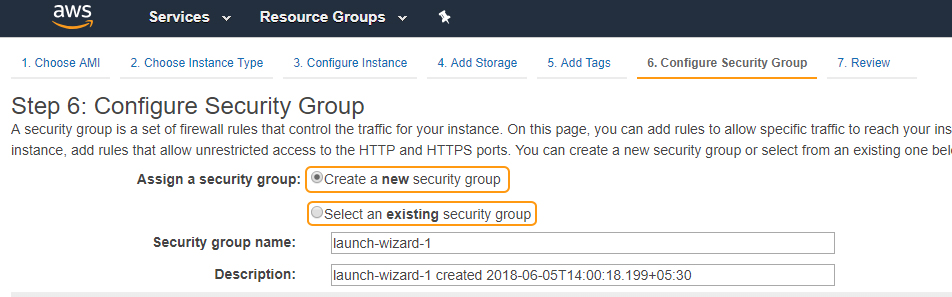
- Now, we are going to create a New Security Group.
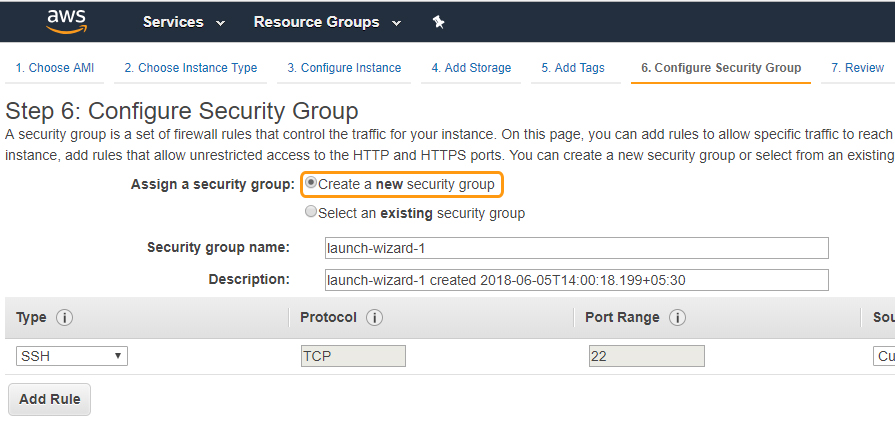
- Click on Add Rule
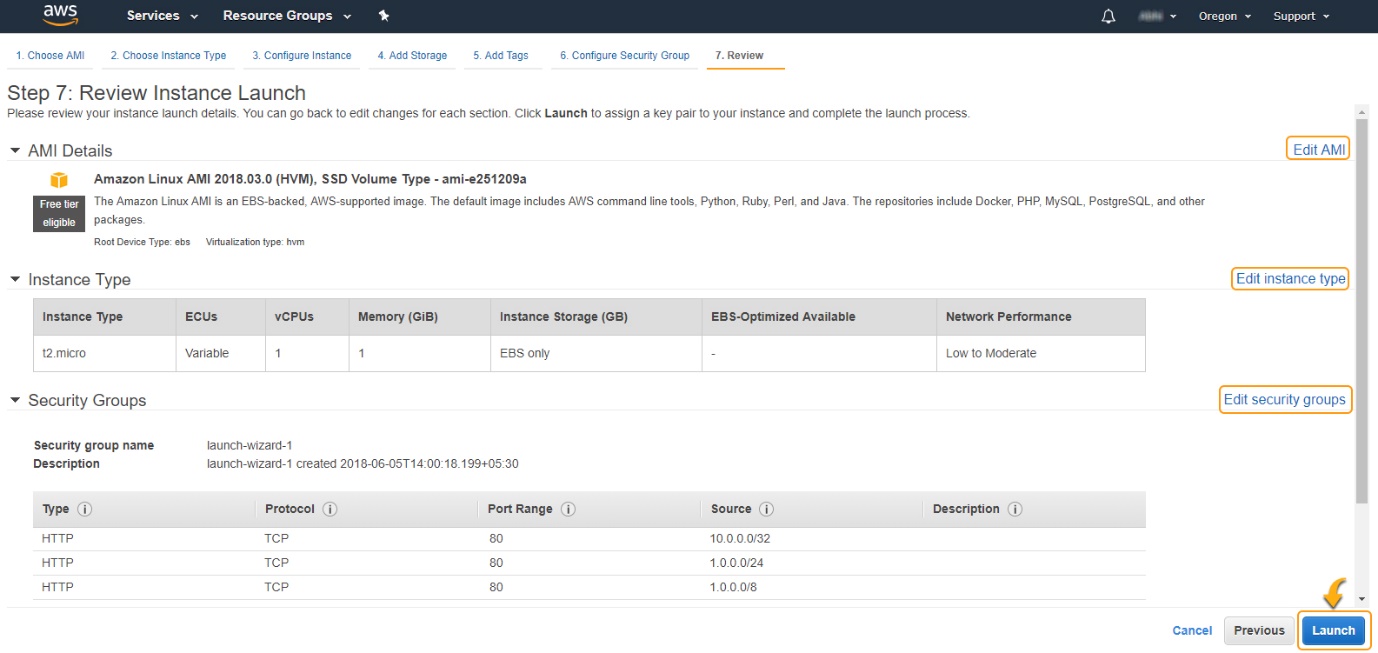
Step:7 Review
- Review the instance details. We can move back to edit for each section.
- Click on Launch to give a pair to the instance and complete the process.
- Select create a new key pair. Enter your key pair name
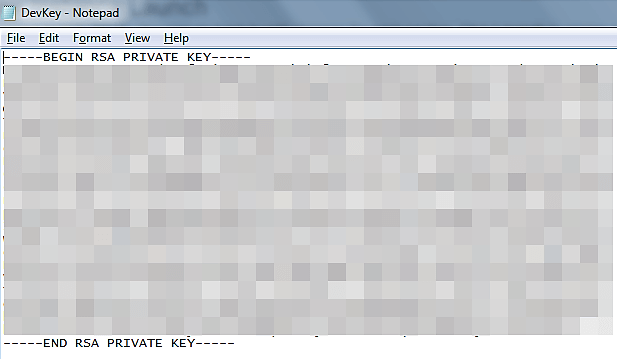
- Click on Download key pair.

- Once you are done downloading and saving your key.
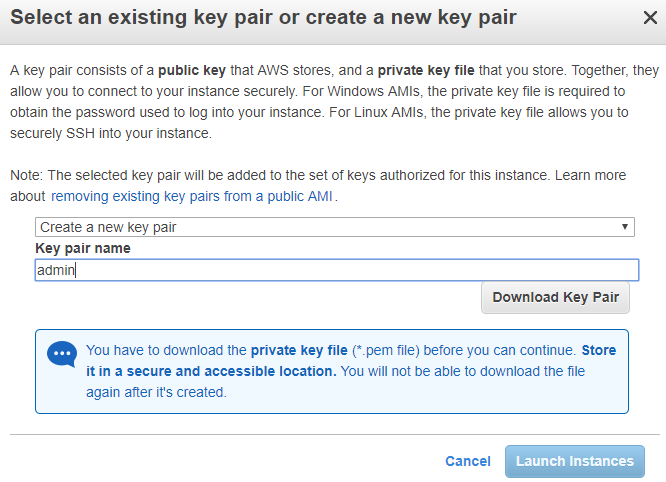
- Now you can launch your instance.
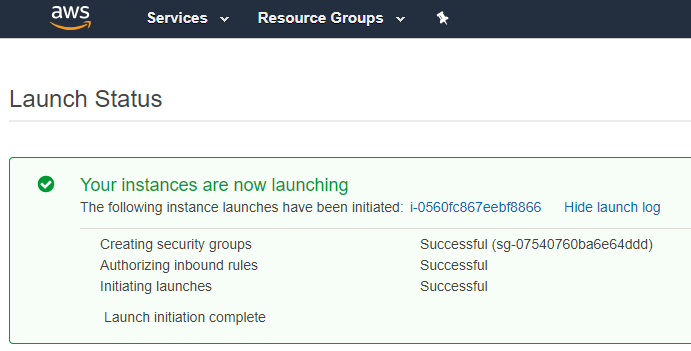
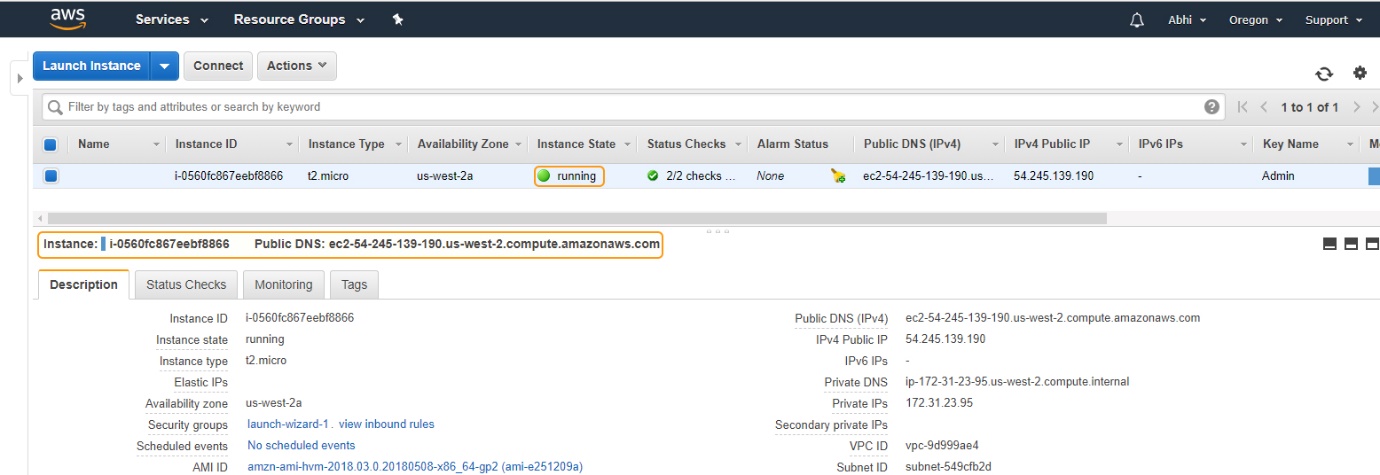
- Click on View Instances

- Now, your instance is up and running, you can see its status as ‘’Running’’.

Rajesh
Author